Set up a blended course with classes
First, find the course and create classes
1. In Curricula,
click Course on the left
navigation pane. From the course card, you can easily distinguish blended
courses and self-paced courses.
• A
blended course has four steps to setup. A blended course with classes in it will
have a class icon displayed on the course card.
• A
self-paced courses have three steps to setup.
2. Locates the
course.
3. Click the
Configure button and starts from step 1 – Configure classes.
4. Click Create
class and complete the required fields. You can create multiple classes.
*Note: When creating a class, you can choose to
create a team for the class in Microsoft Teams. The team will be created upon
the class creation. You need to make sure that your organisation has already
integrated Curricula with Microsoft Teams. For detailed instructions on
integrating Curricula with Microsoft Teams, refer to How to enable integration
with Microsoft Teams?. If you have no permissions to integrate Curricula
with Microsoft Teams, contact the tenant owner or service admin for
assistance.
5. Select a class
and click Enrol learners > Enrol learners.
6. In the learner
list, click Enrol learners. Click Add learner and add learners to
the course first. Then select the learners need to be enrolled to this class and
click Save.
*Note: If you don’t find the learners who need to be
enrolled to the course, navigate to MaivenPoint Online Services > Account
management to add users first. For detailed instructions on adding users to
MaivenPoint Online Services, refer to Add users to manage or use your MaivenPoint
services. If you have no permissions to add users in MaivenPoint
Online Services, contact the tenant owner or service admin for assistance.
*Note: If you want to assign a group collaboration
task for learners, refer to How to manage groups for
enrolled learners? to manage groups for them.
7. When finishing
the learner enrolment, click Next to create sessions.
Next, create sessions

1. Click Create
session and fill in the session information. You can create multiple
sessions for the course.
2. Click Next
to configure the sessions for the created classes.
3. Assign the
trainer and configure the session time for each session.
*Note: According to a session’s training mode, a
venue may be required. If a session requires a venue, you can click Assign
venue and select a venue for the session.
4. When finishing
the session configurations, click Next.
Then, generate learning paths and add learning
objects

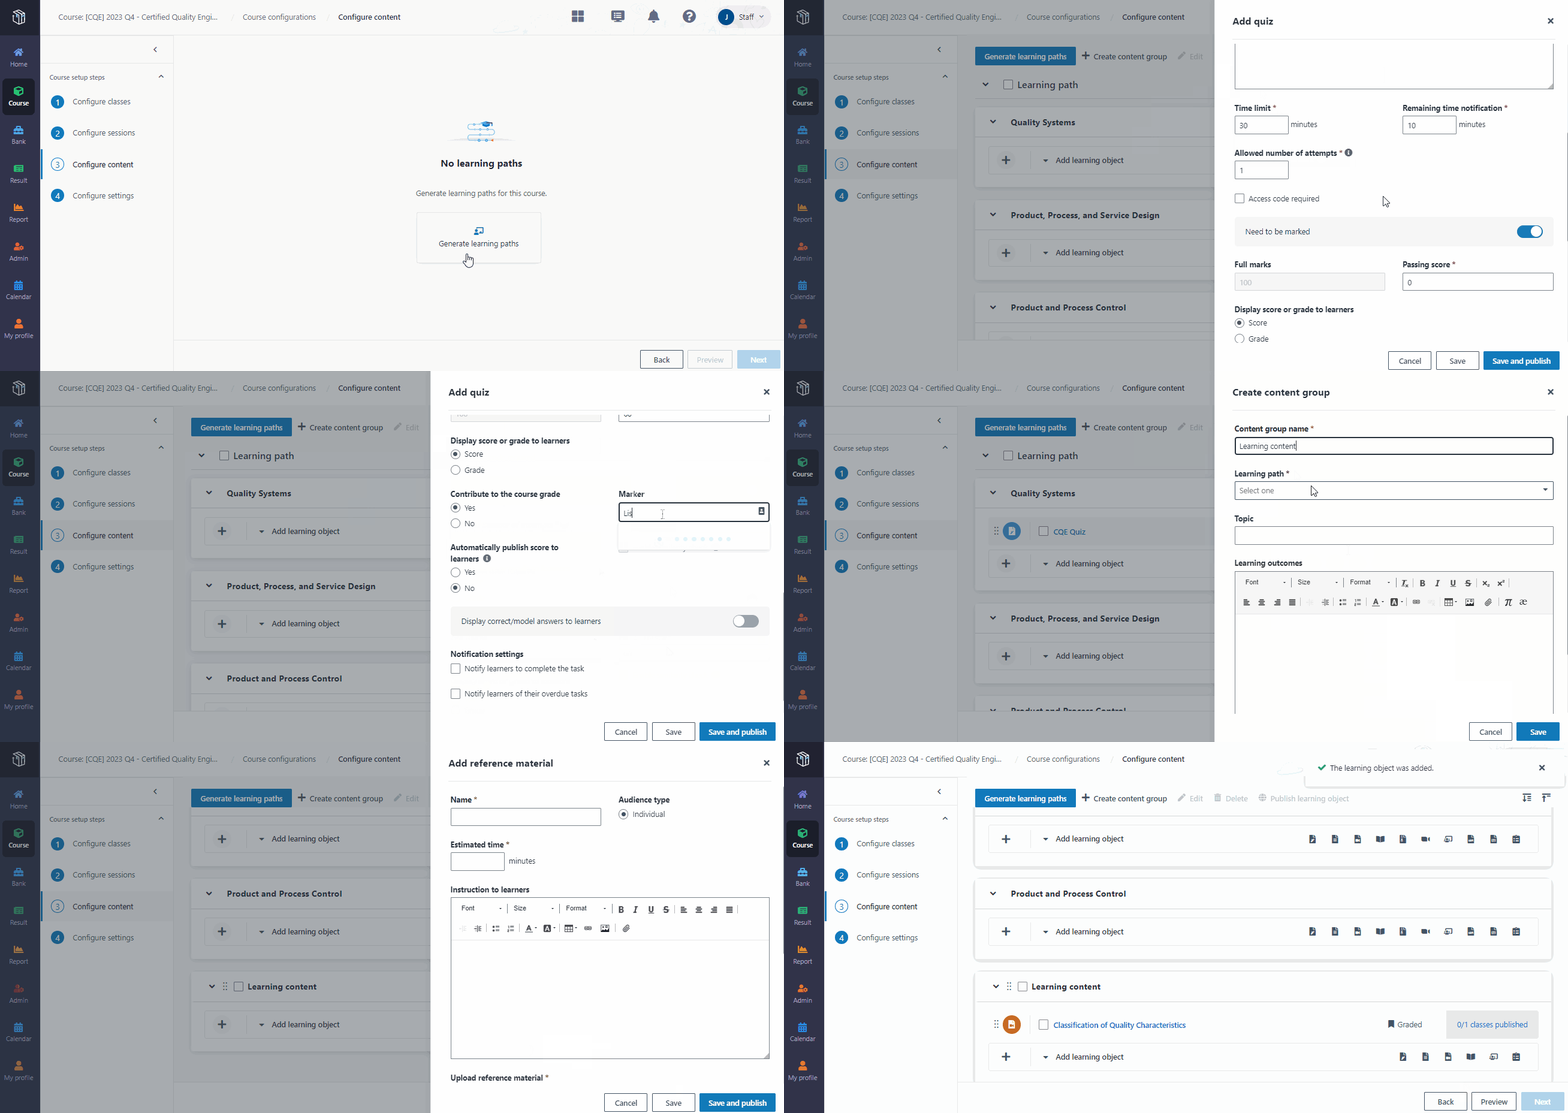
1. Click Generate
learning paths. The learning paths are generated based on the sessions he
created.
2. In a learning
path, you want to add a quiz for a session.
3. Locate the
session, click the learning object type Quiz, and then fill in the quiz
information. You can select a prepared quiz from the quiz bank or create a new
quiz.
4. You have a few
reference materials that are not related to specific sessions. The reference
materials can be placed to a content group.
a. Click Create content group and
fill in the content group information.
b. In the content group, click the
learning object type Reference material, fill in the required
information, and then click Save.
Now, publish the learning content
Now the course content is ready, and the course manager wants
to publish the content, so that the content will be visible to learners.

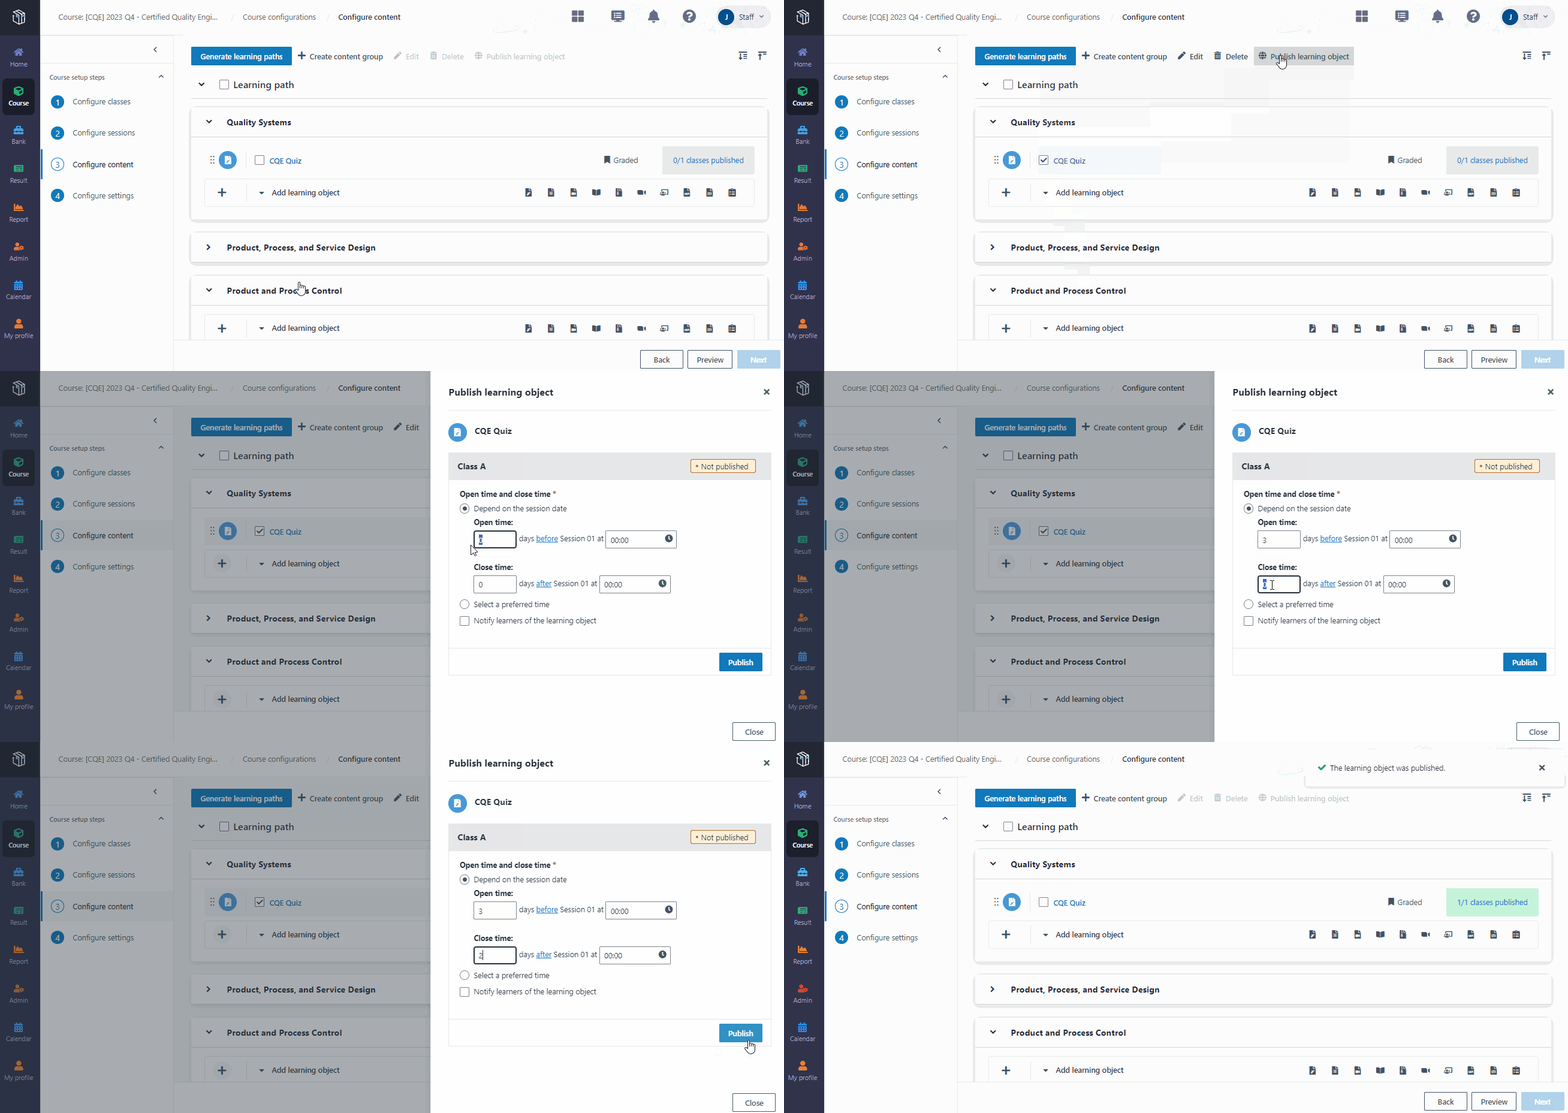
1. Locate a learning
path, select a learning object, and then click Publish learning
object.
2. In the section
for “Class A”, select the open time and close time, and then click
Publish.
3. When finishing
configuring the publish settings for each class, publish the learning object
separately.
4. Now the learning
content is published to learners and the learners will be able to view the
content.
*Note: The trainer and class owner can also publish
the learning content.


