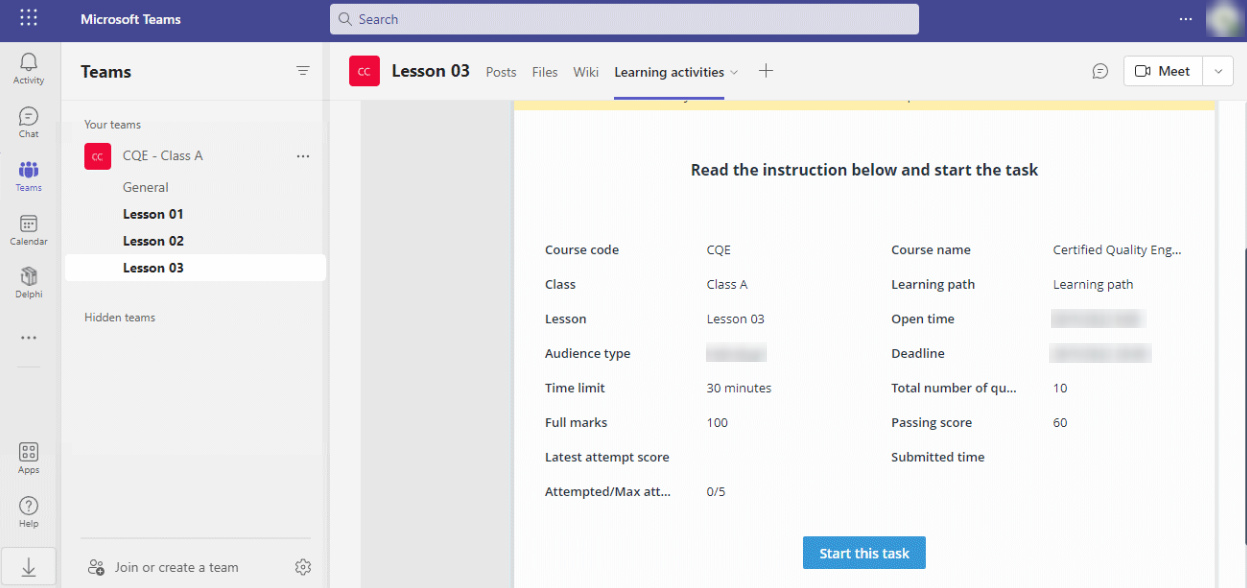
Curricula can integrate with Microsoft Teams to leverage teams and channels. Course-based teams will have channels for course content. Learners and staff can chat in channels, join meetings for online sessions, as well as view and complete learning activities.

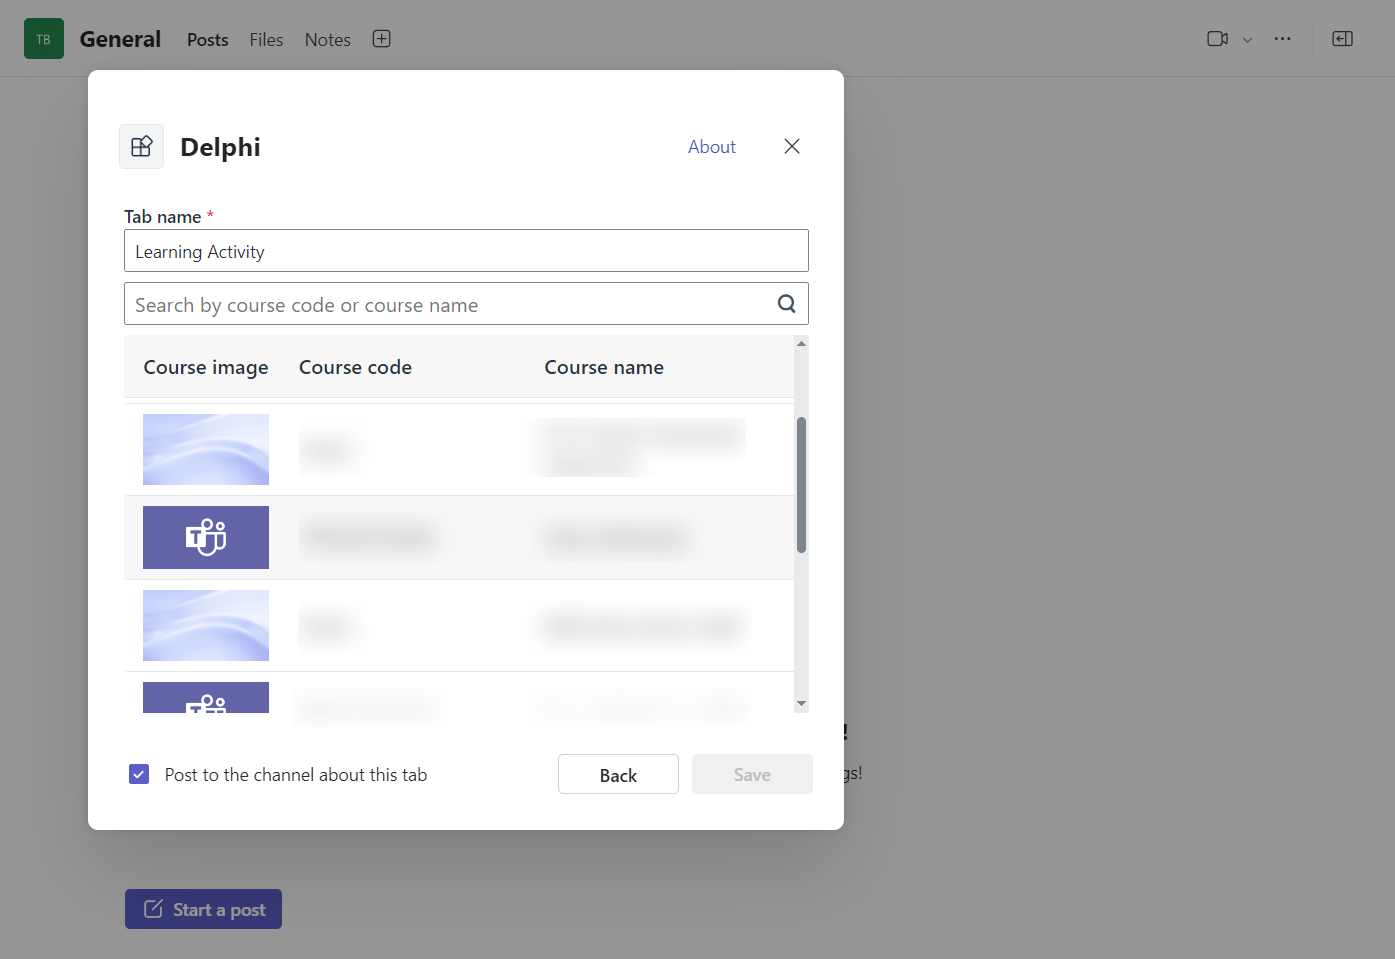
In addition to creating a new team, users can add sessions to an existing channel, so that they can access the learning activities directly within the tab. Add Delphine to the channel as a new tab, update the tab name if required, select a course, and then select a session within the course.
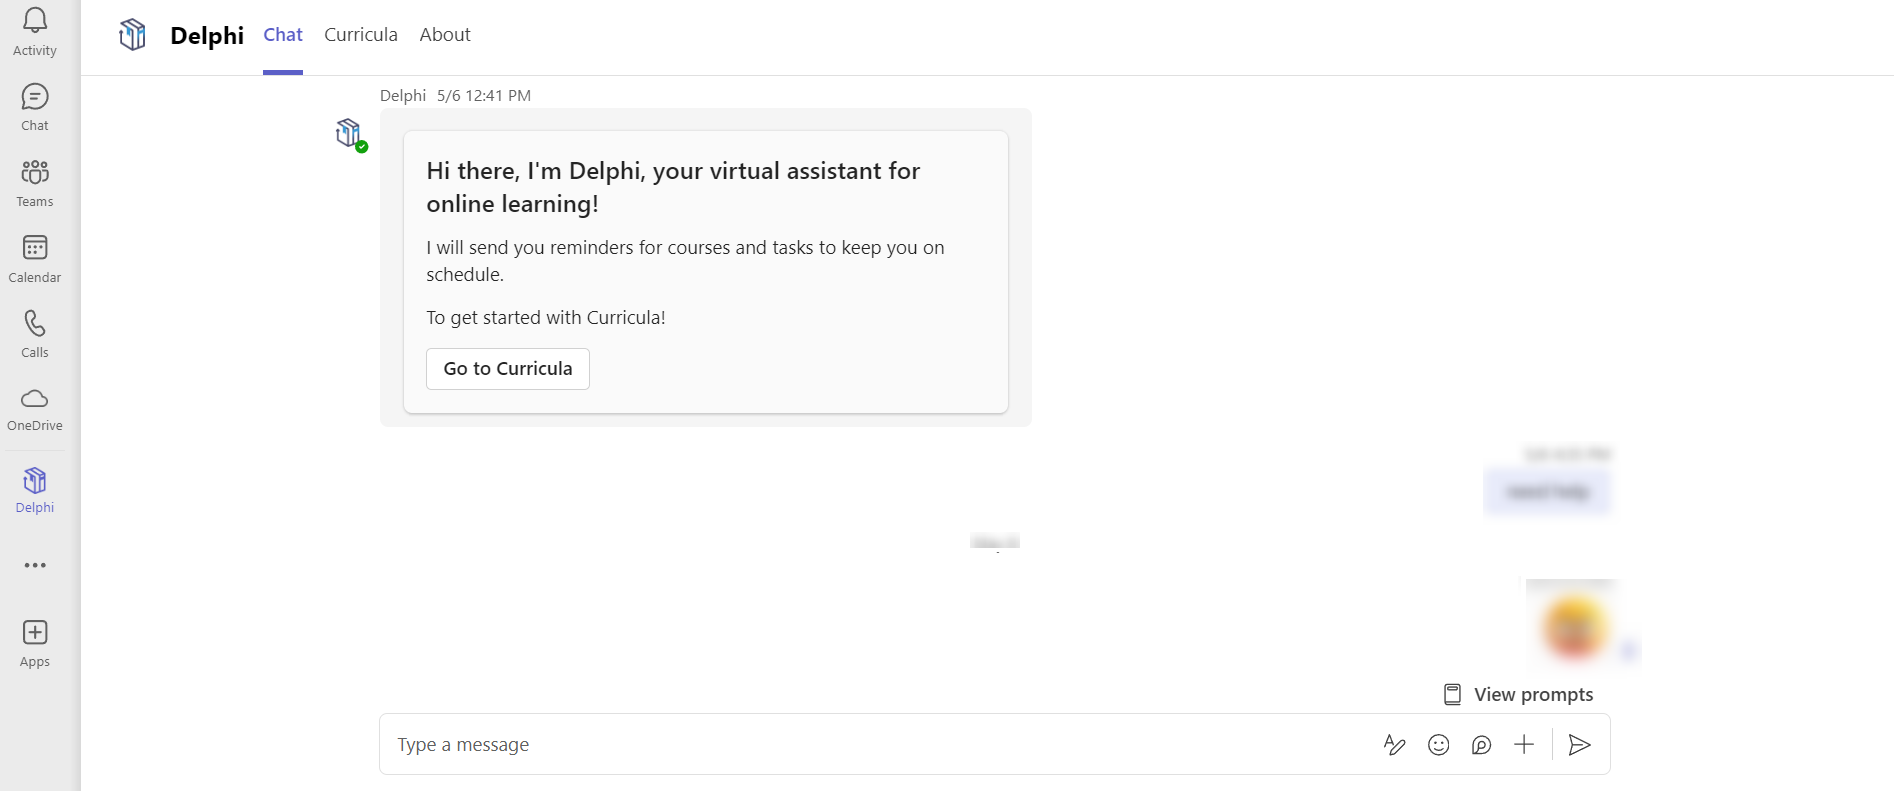
The Teams app Delphi also has the capability to send courses and tasks notifications.
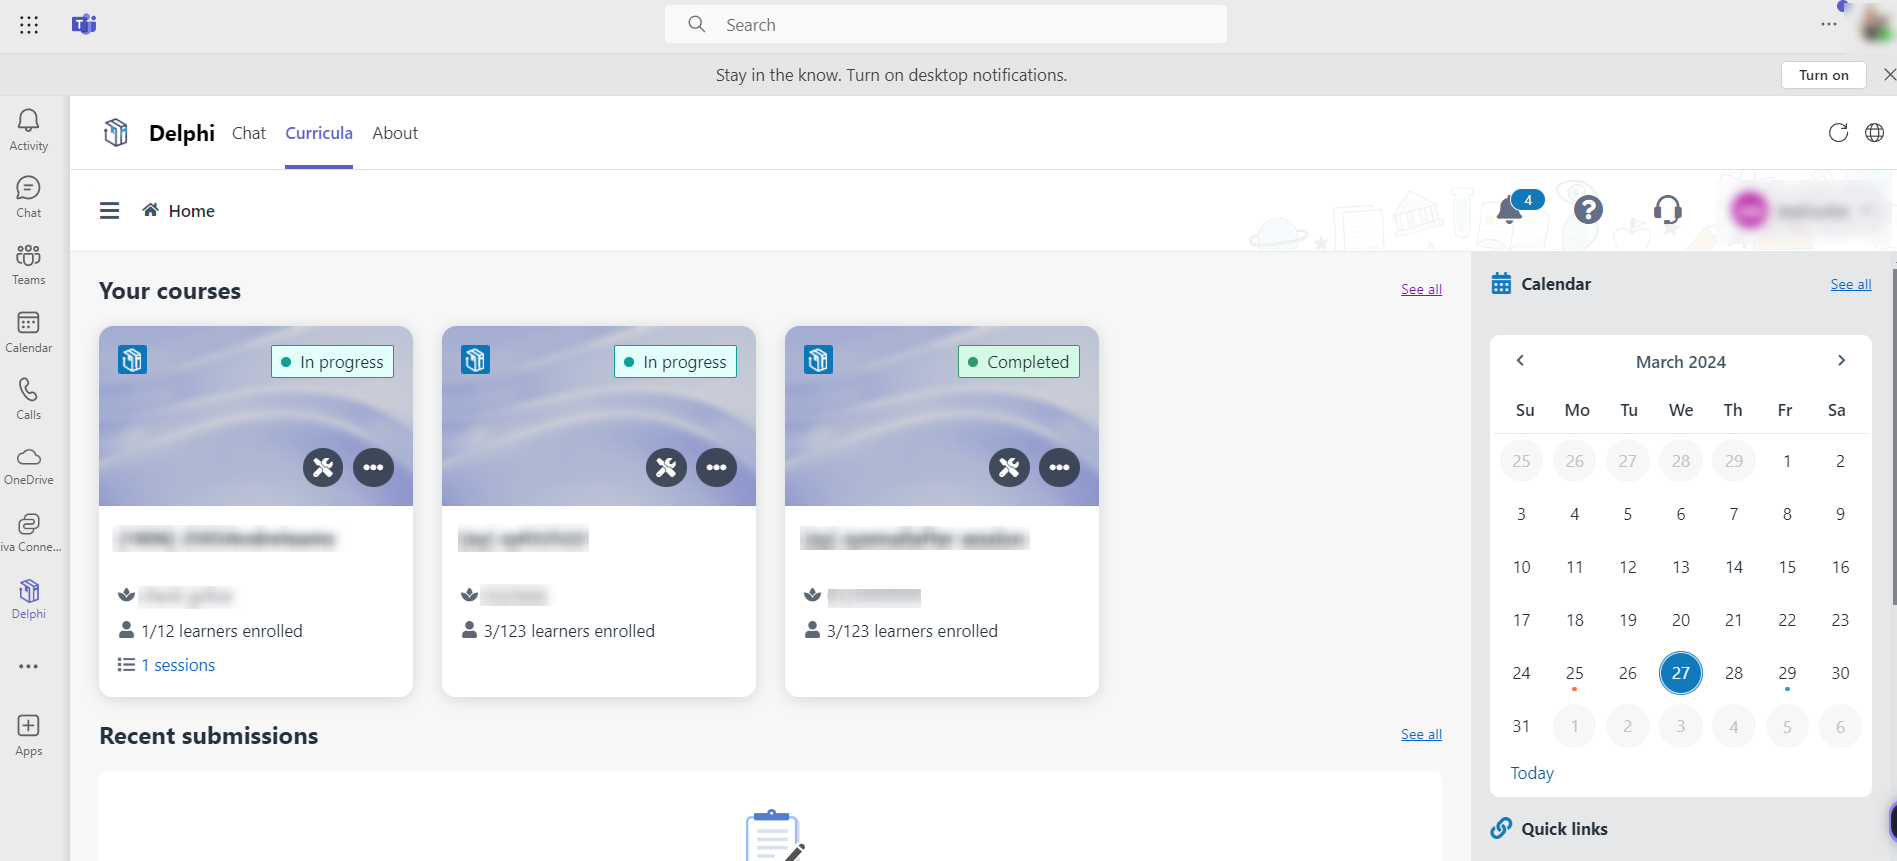
What’s more, the Curricula tab has been integrated into Delphi, enabling users to experience Curricula in Microsoft Teams.
To enable the integration with Teams, complete the following configurations in order.
The connection can be built by completing the Microsoft Entra ID authorisation in MaivenPoint Online Services. The tenant owner or service admin of MaivenPoint Online Services has the permission to perform the authorisation. If you have no permissions for the authorisation, contact the tenant owner or service admin for assistance.
Refer to the instructions below:
1. Navigate to MaivenPoint Online Services > Settings > Microsoft Entra ID authorisation > Tenant management, click Connect.
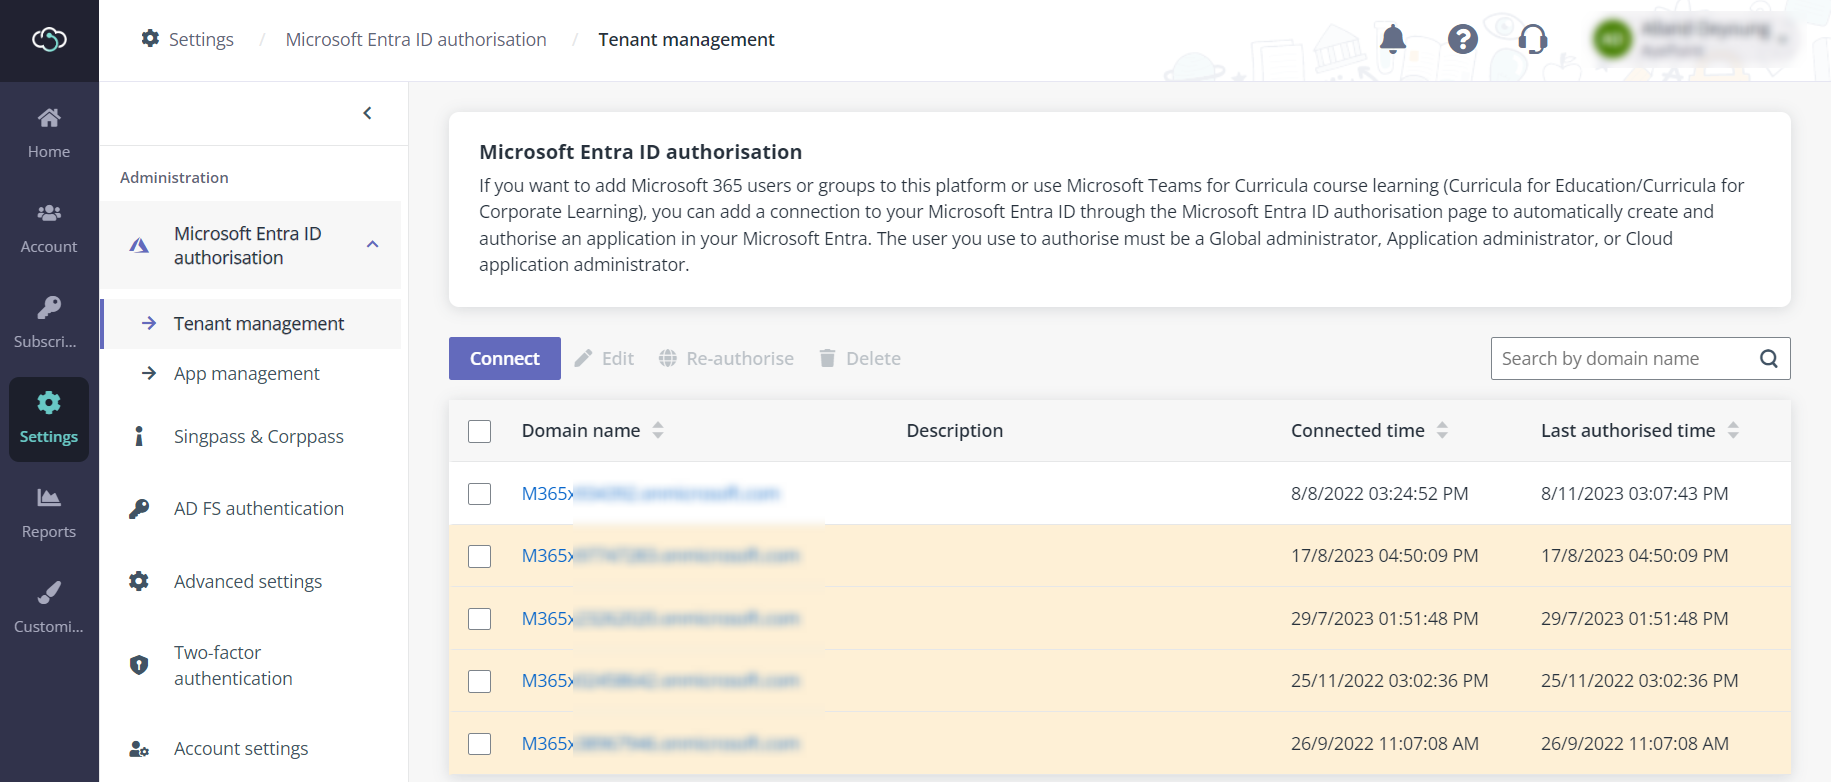
2. On the Microsoft 365 sign-in page, sign in with a Microsoft 365 global administrator account, application admin account, or cloud application admin account.
3. On the Permission requested page, review the required permissions and click Accept to continue.
4. After the tenant has been connected, click Back to go back to the Microsoft Entra ID authorisation page.
Creating teams and channels in Microsoft Teams for online sessions requires a Curricula for Corporate Learning app added to your Microsoft Entra tenant with sufficient API permissions consented. You must create an app profile for the tenant that will use Curricula for Corporate Learning to add that app.
To create an app profile for Curricula, refer to the instructions below:
1. Navigate to MaivenPoint Online Services > Settings > Microsoft Entra ID authorisation > App management, and click Create.
2. On the Create app profile page, select the tenant that has been connected, and then select the Curricula for Corporate learning checkbox to set the corresponding app.
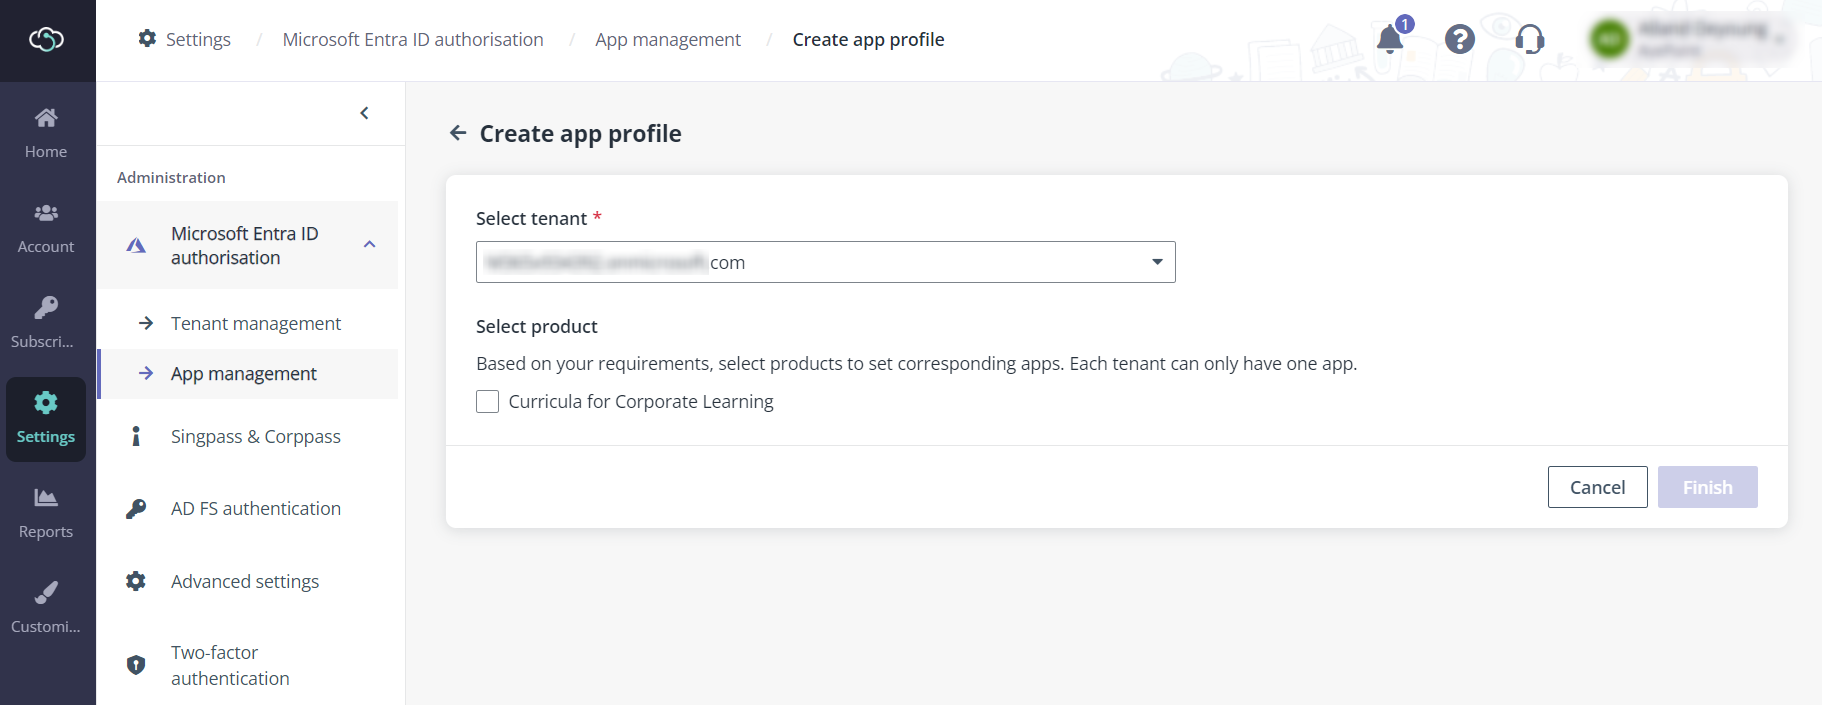
3. After the Curricula for Corporate Learning checkbox is selected, click Consent.
4. On the Microsoft 365 sign-in page, sign in with a Microsoft 365 global administrator account, Application admin account, or cloud Application admin account.
5. On the Permission requested page, review the required permissions, and click Accept to continue.
6. After the app profile for Curricula was authorised, click Close.
7. Click Finish to go back to the Microsoft Entra ID authorisation > App management page.
To enable the bot functionality from Delphi, follow the steps below to enable the Delphi bot in Curricula.
1. Navigate to Admin > Global settings > Microsoft Teams configurations.
2. Select the connected tenant and click Edit.
3. Select the Enable bot functionality for Delphi checkbox as required and then click Next.
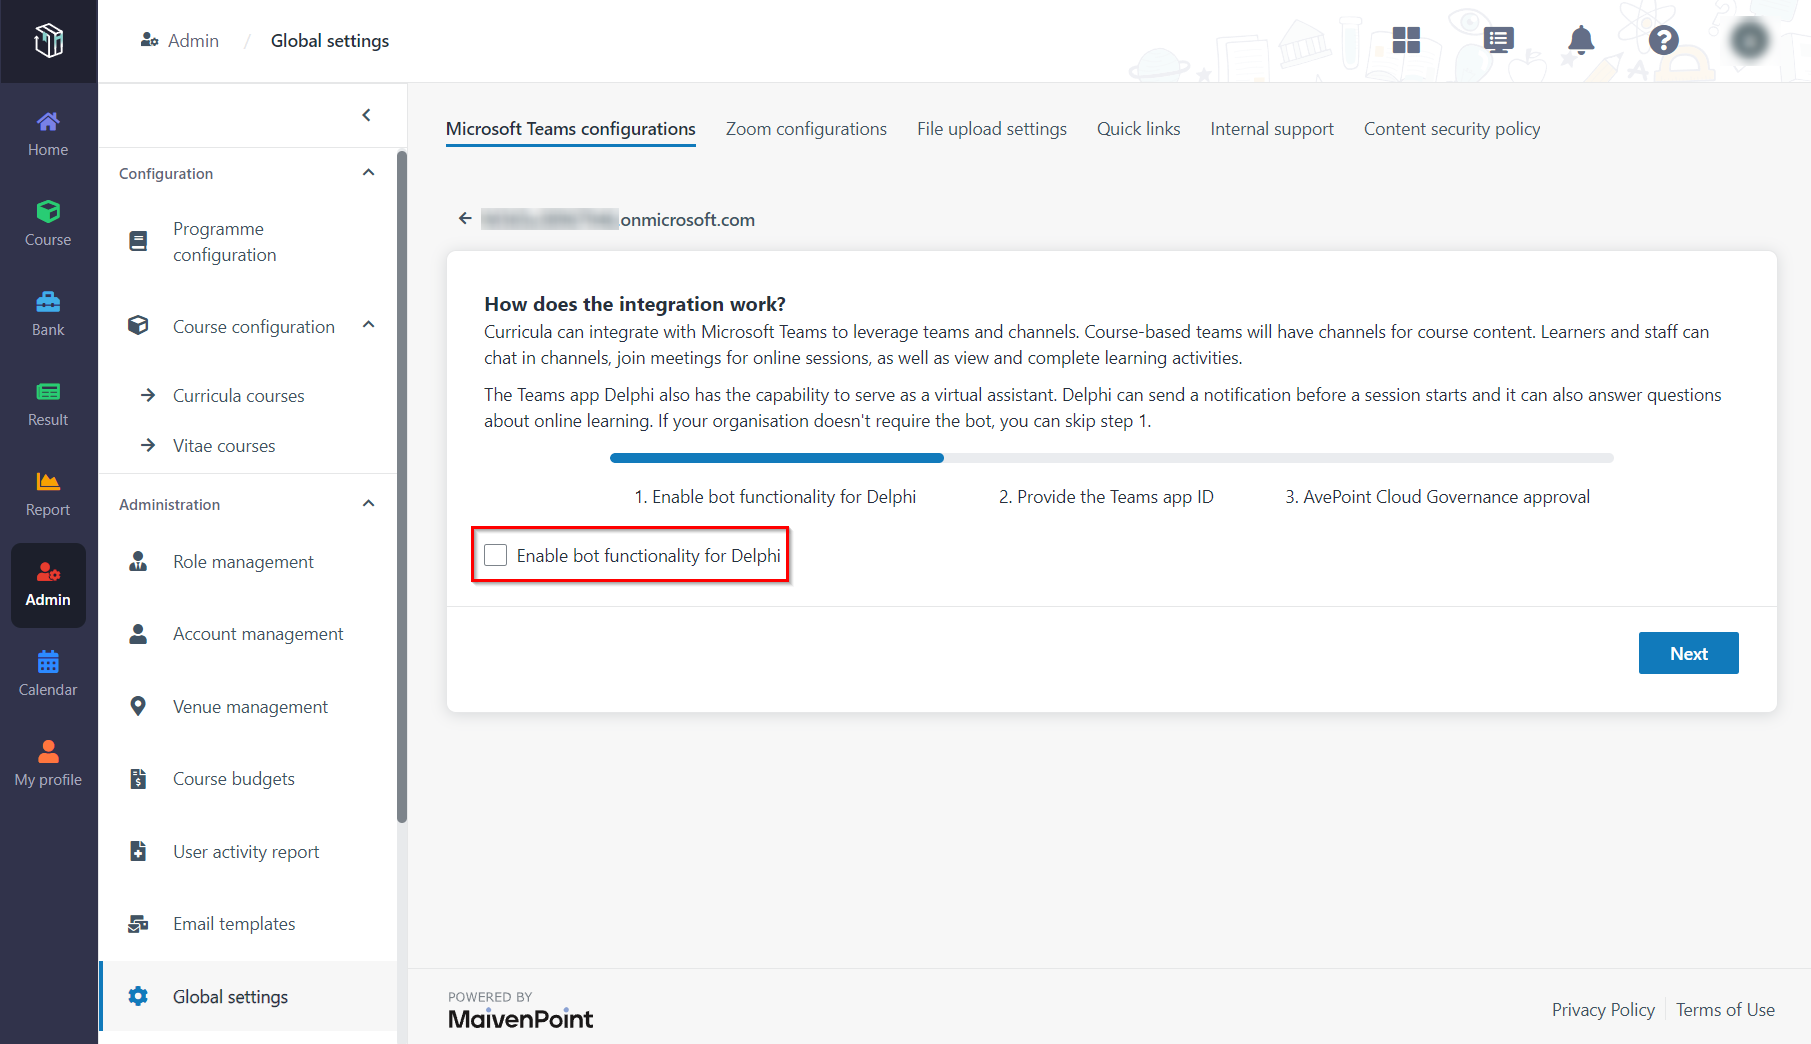
1. On the Microsoft Teams configurations page of the connected tenant, click Download Teams app – Delphi, and select a location to save the app package.
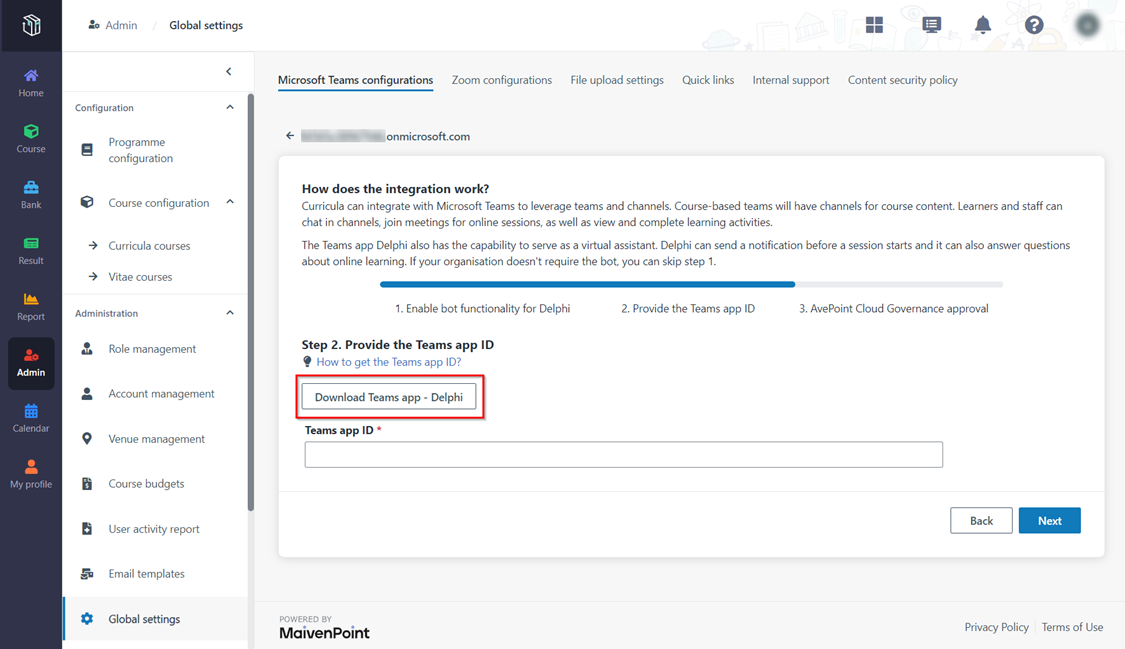
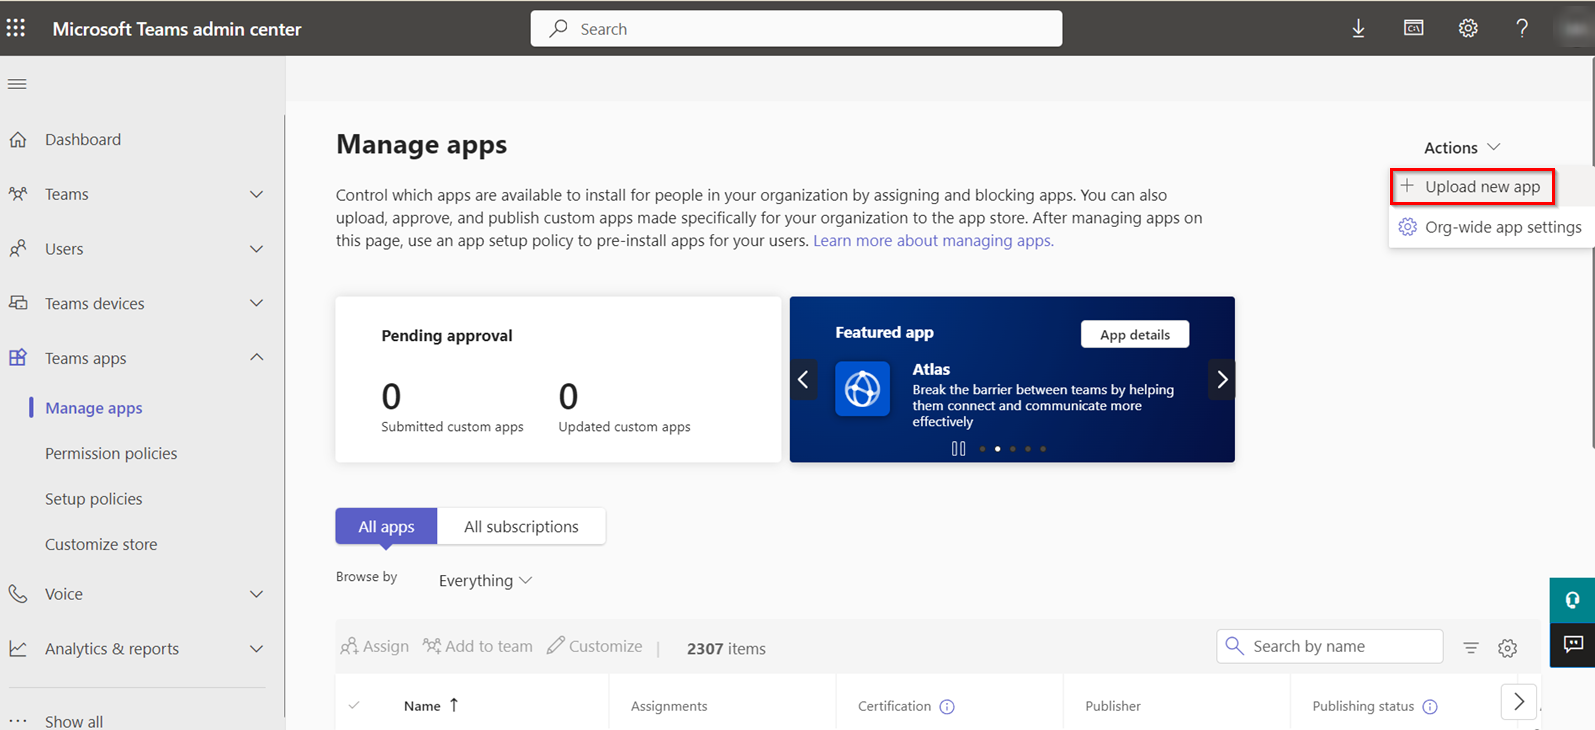
2. Sign in to Microsoft Teams admin center with a Teams service admin or global admin account. Navigate to Teams app > Manage apps >Actions, and click Upload new app.
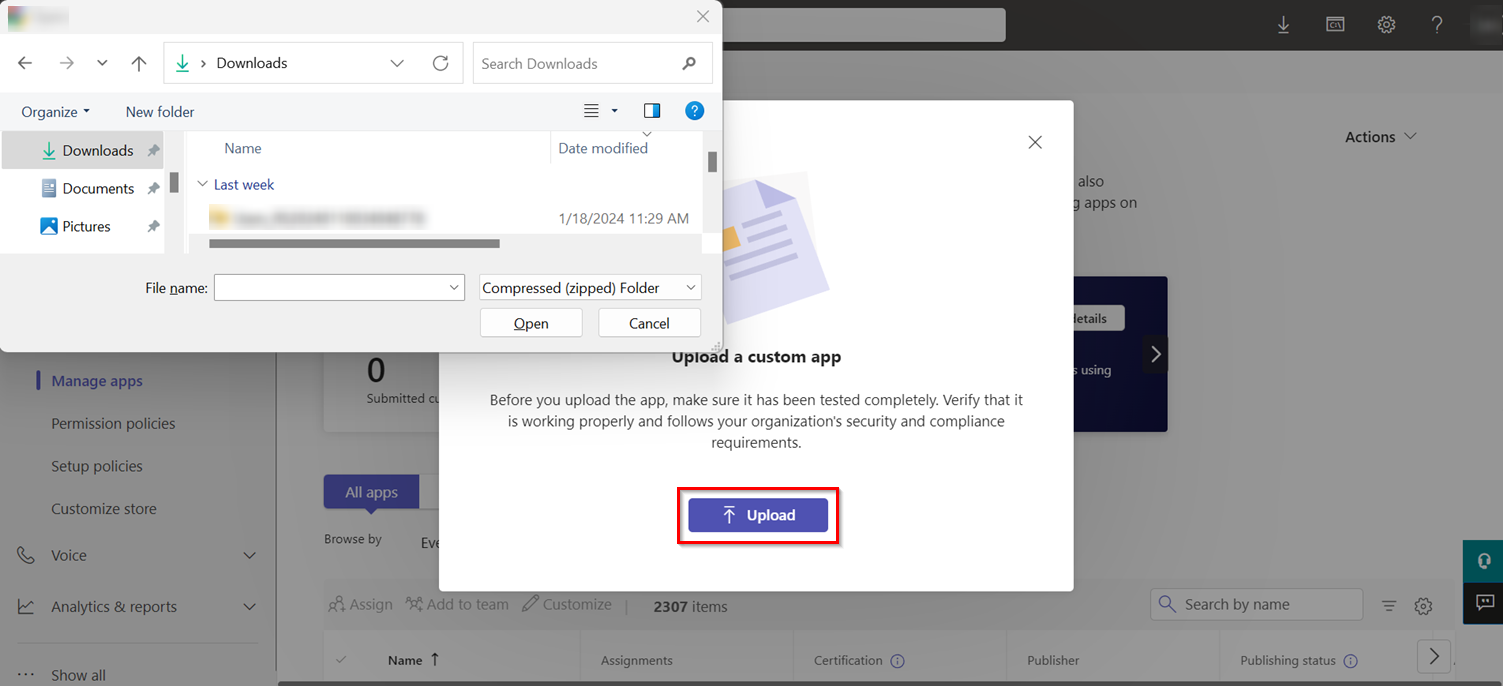
3. Click Upload and select the app package you downloaded from Curricula.
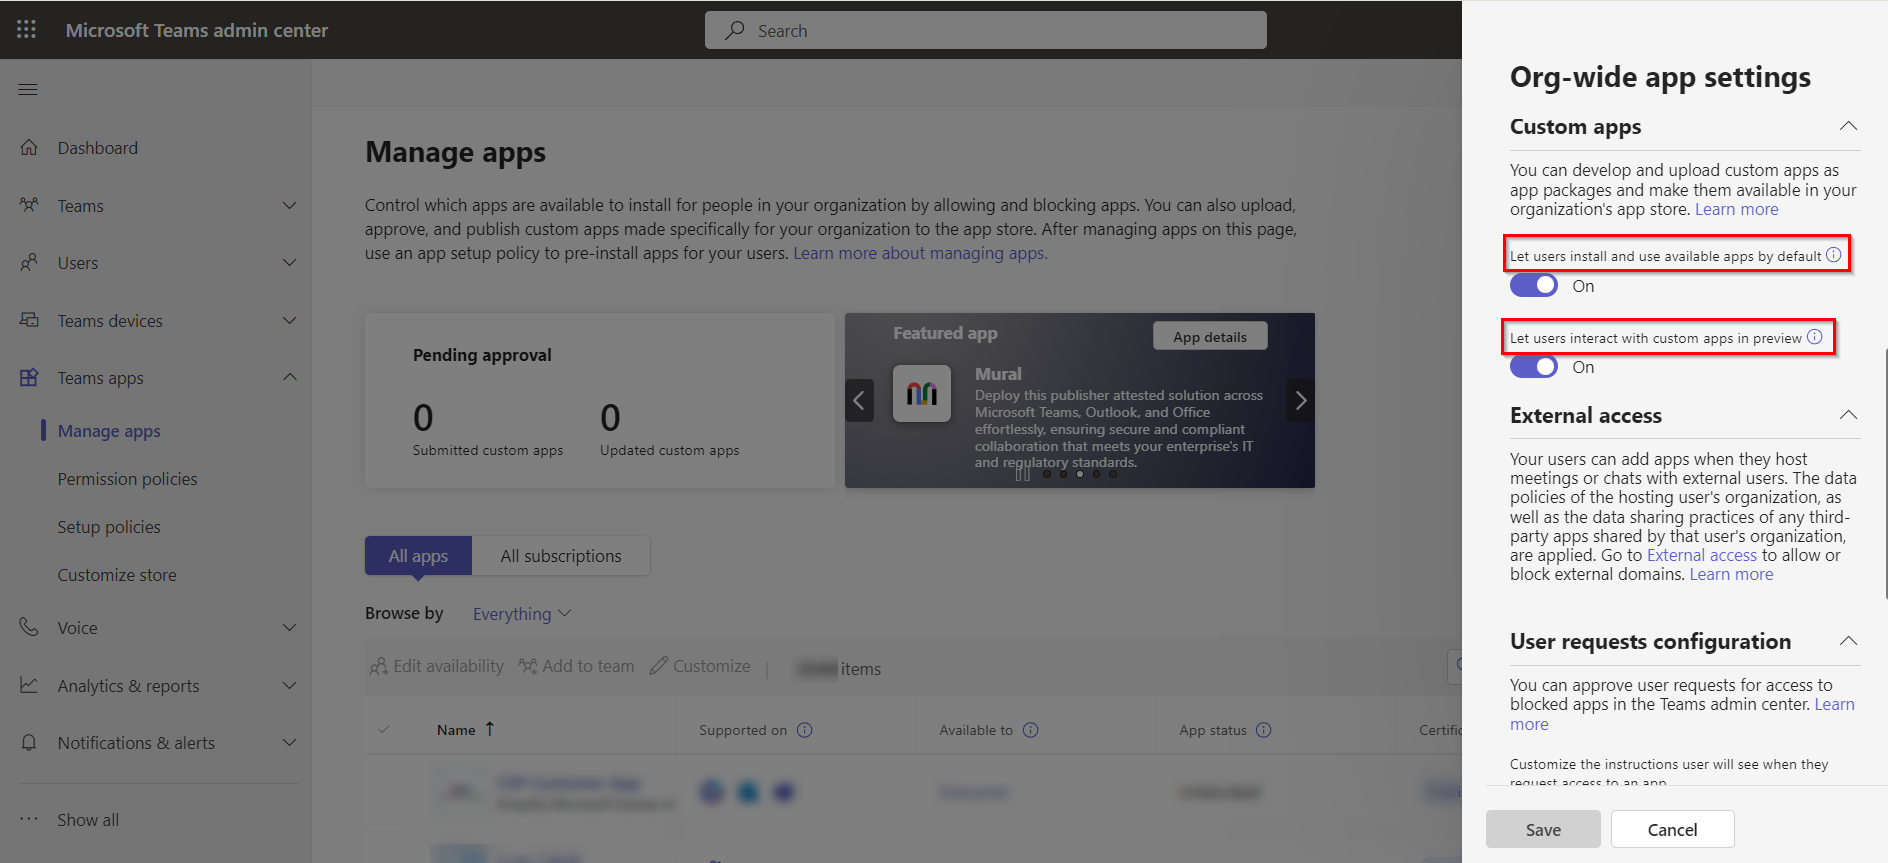
4. Navigate to Teams app > Manage apps >Actions and click Org-wide app settings. In the Org-wide app settings panel, turn on the Let users install and use available apps by default toggle and the Let users interact with custom apps in preview toggle in the Custom apps section.
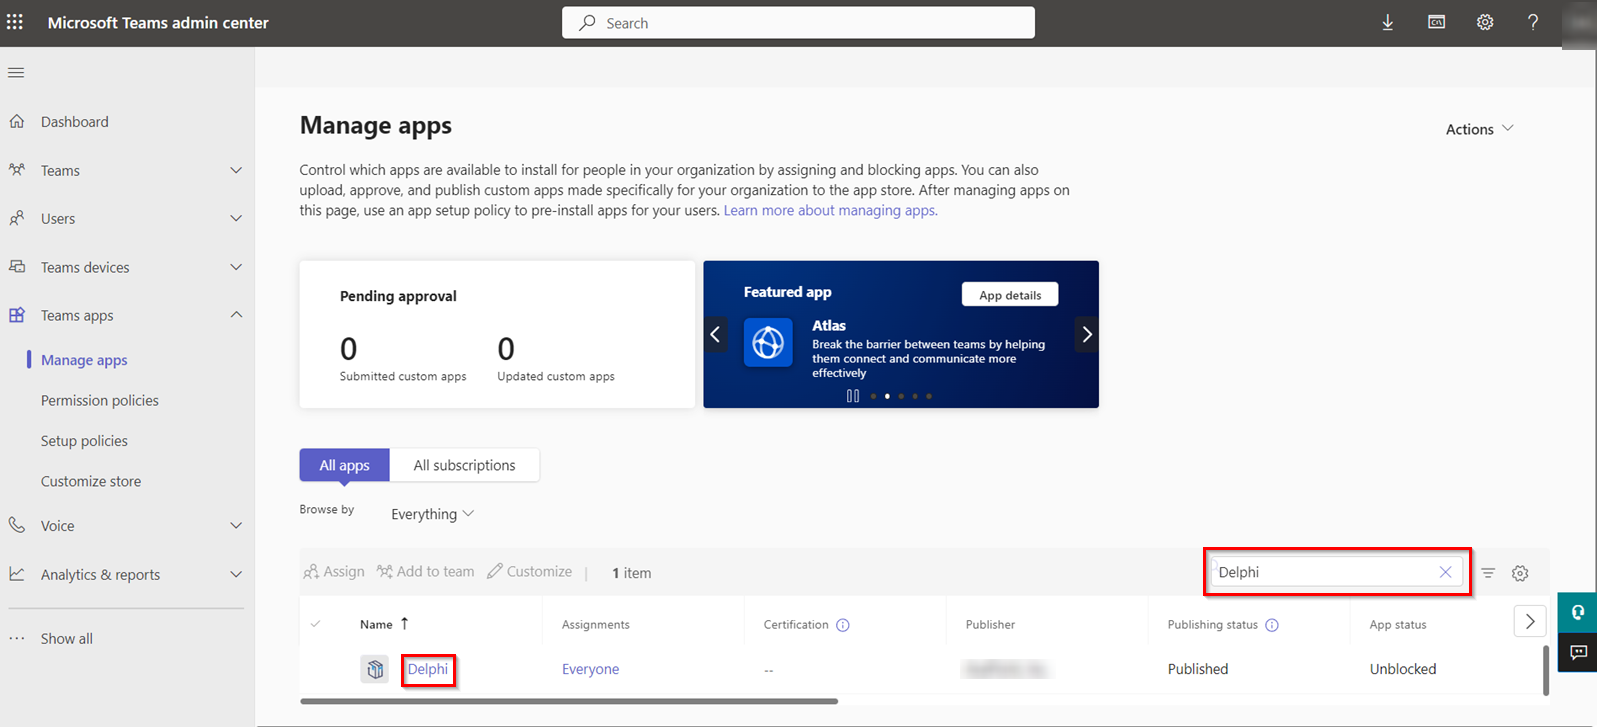
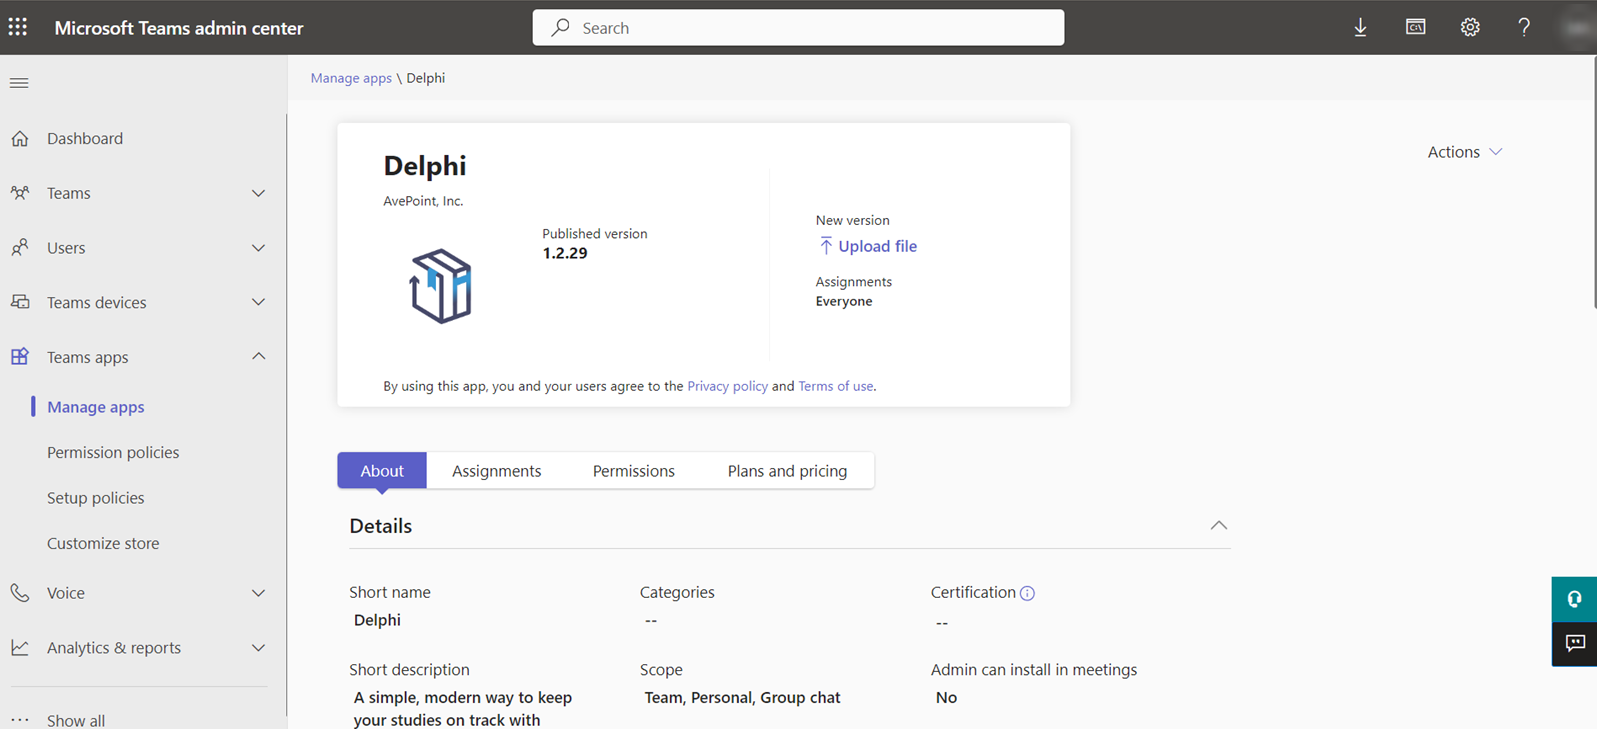
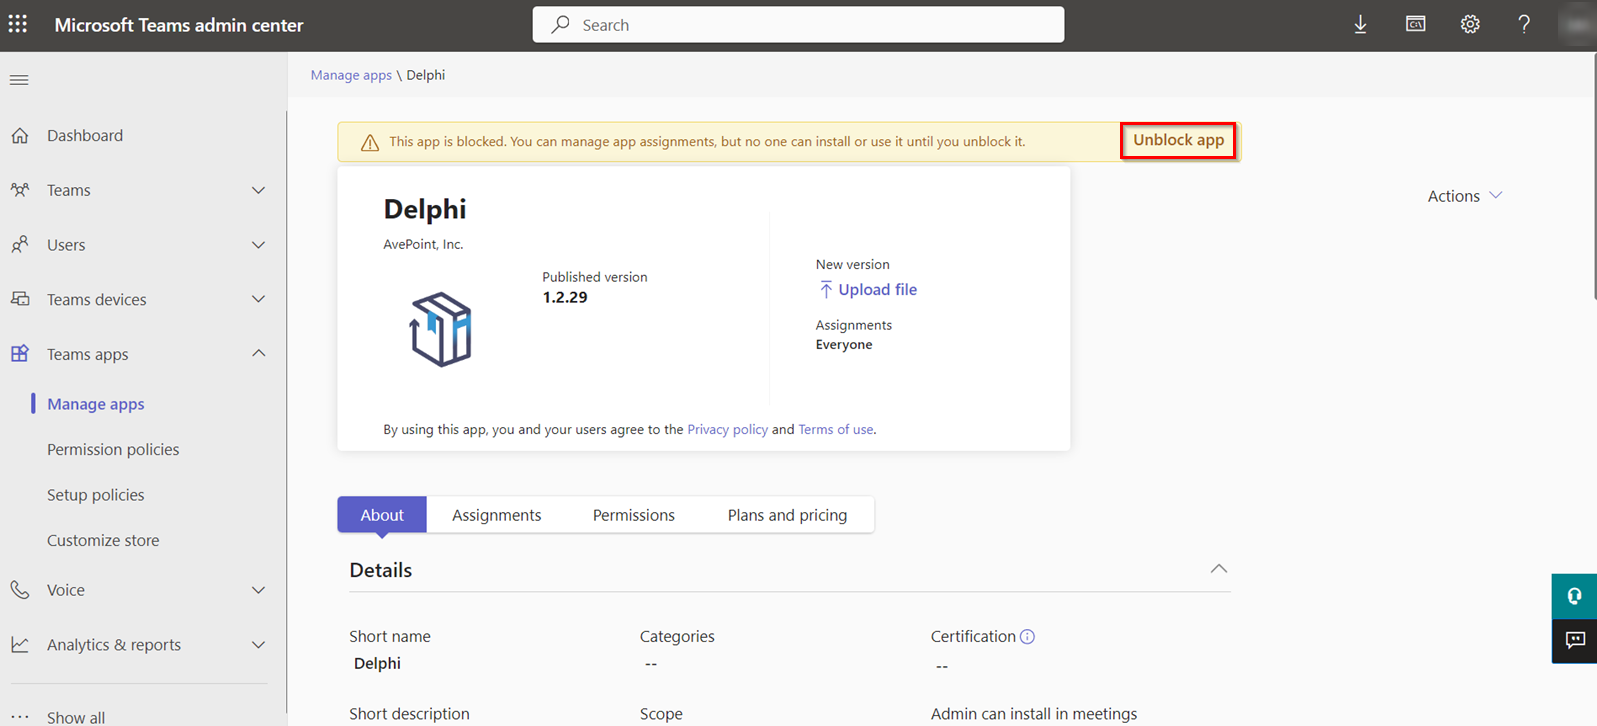
5. Go back to the Manage apps page, search for Delphi and click its name to go to the details page and check your organisation’s permission policy for Delphi.
•If Delphi is allowed, you can proceed to the next step.
•If Delphi is blocked, click Unblock app to unblock it.
6. If you have selected the Enable bot functionality for Delphi checkbox in Curricula, you can proceed to the next step. If you didn’t select the Enable bot functionality for Delphi checkbox in Curricula, copy the app ID of Delphi to the clipboard and then refer to step 13.
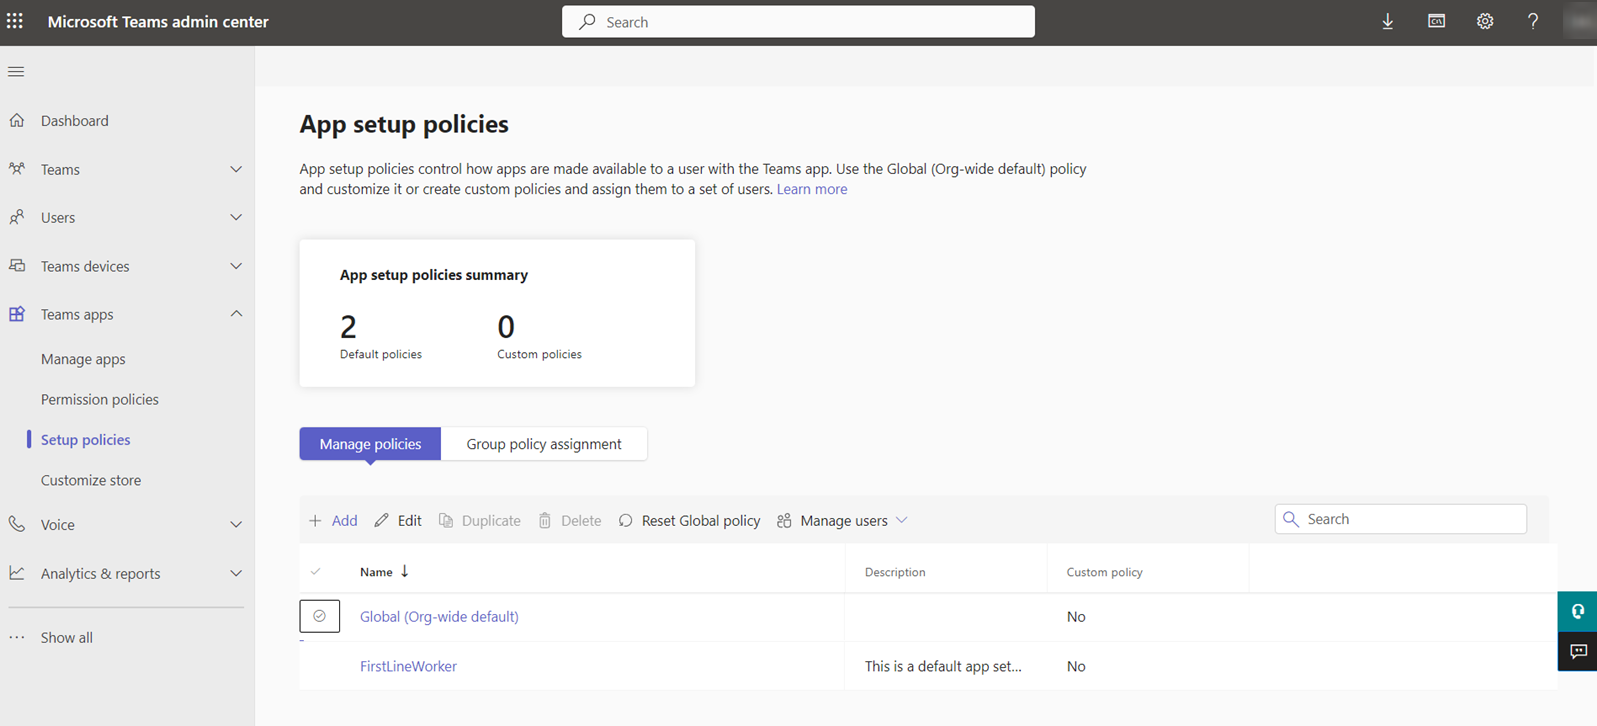
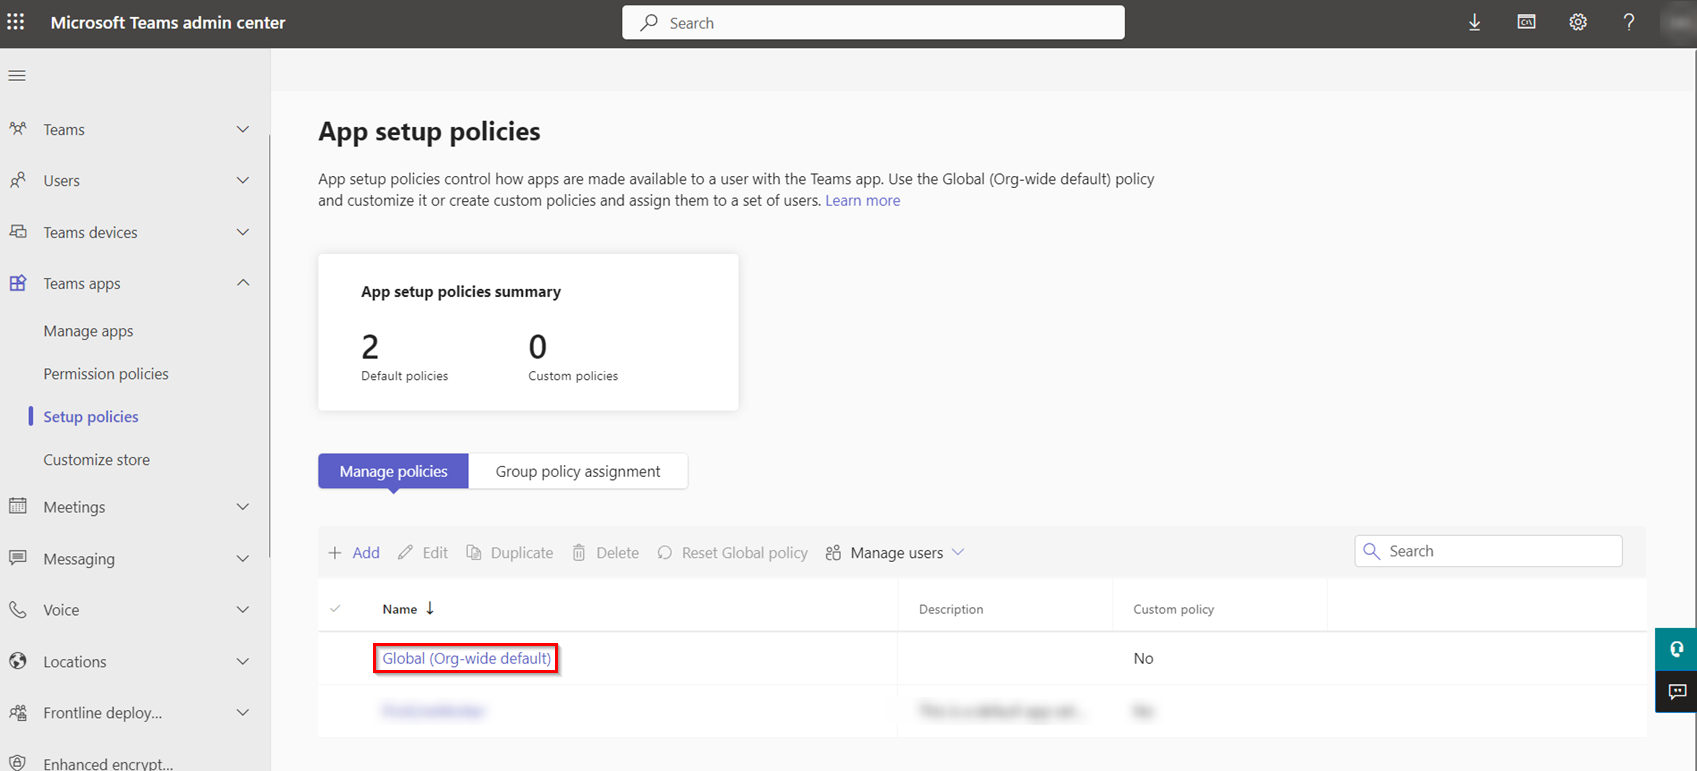
7. Navigate to Setup policies. Edit the Global (Org-wide default) policy or create a custom policy.
8. If you want to add Delphi for all users in your tenant, you can proceed to the next step. If you want tenant users to add Delphi for themselves later, refer to step12.
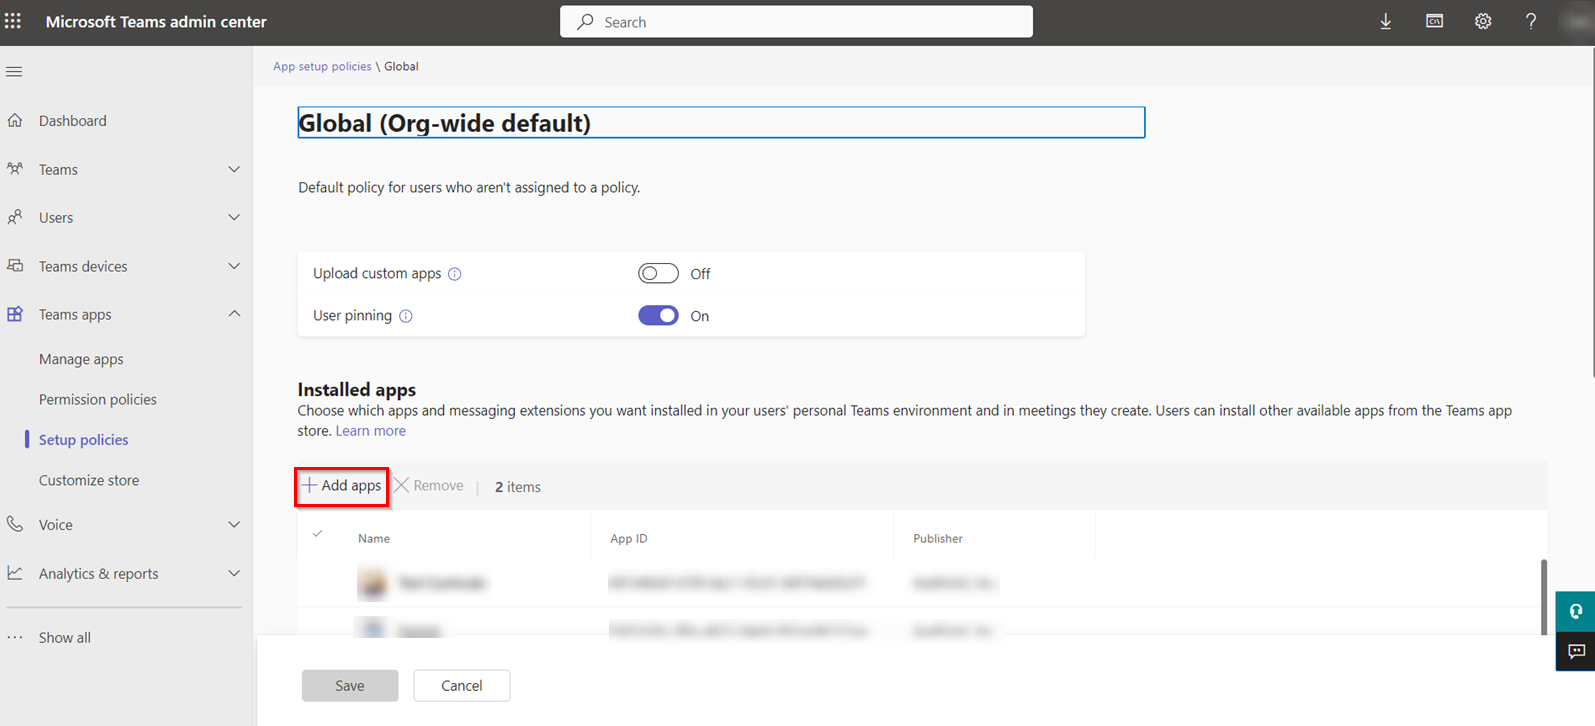
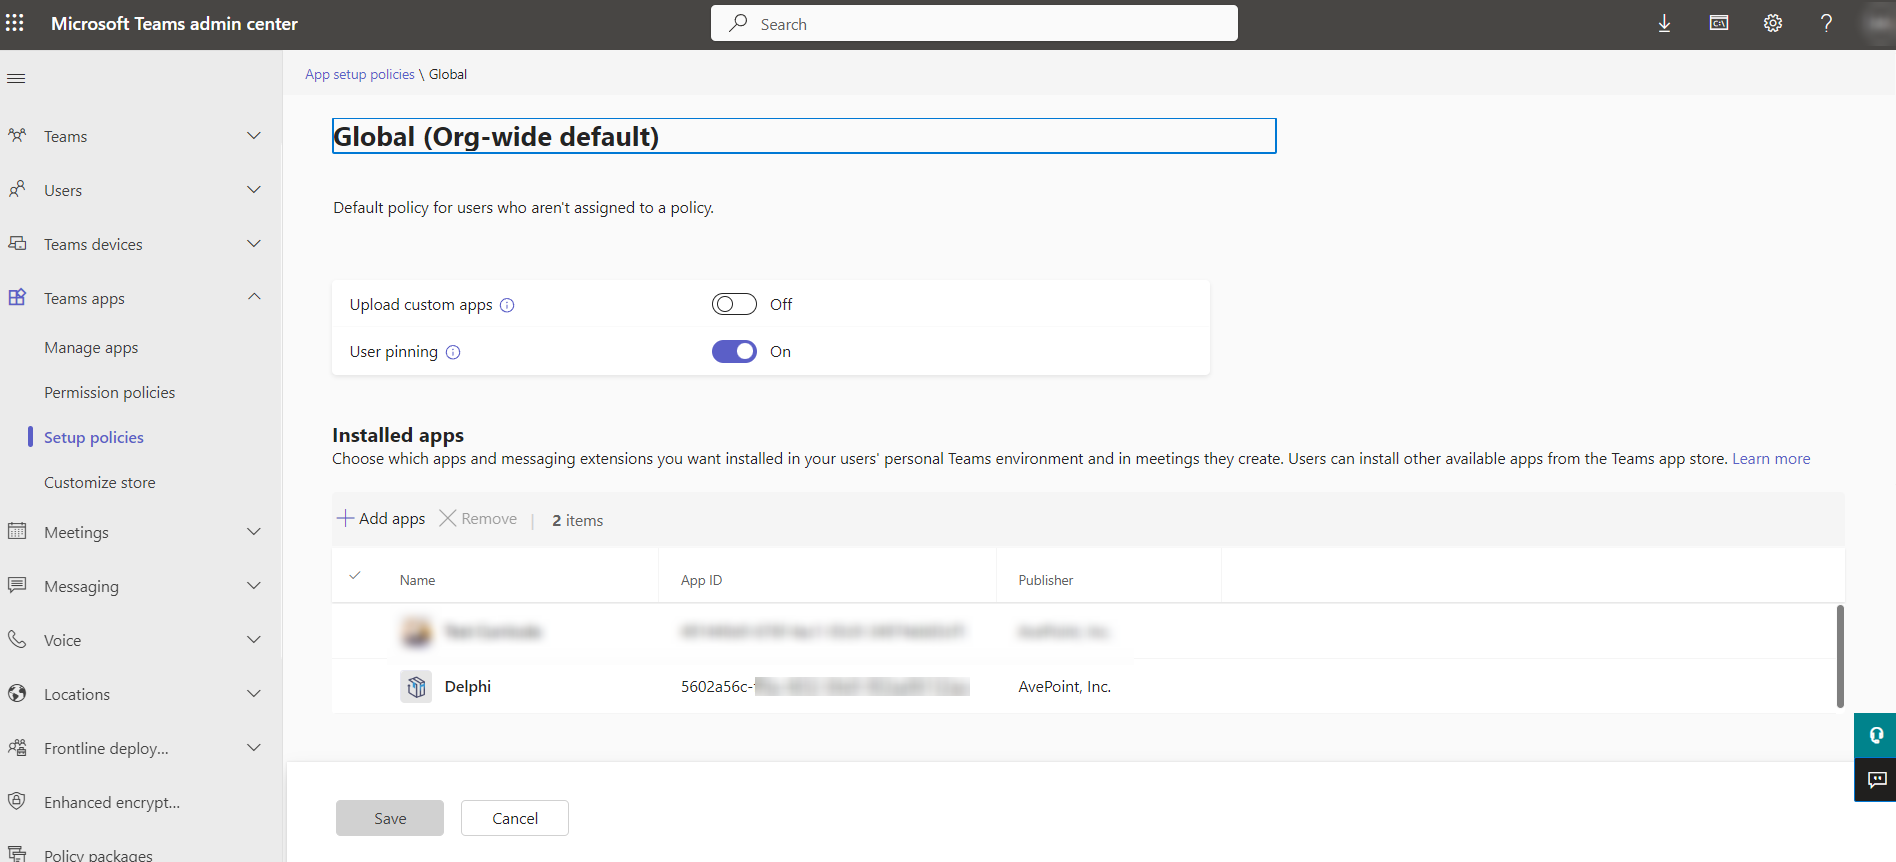
9. In the Installed apps section, add Delphi.
10. In the Pinned apps section, add Delphi. You can click Move up or Move down to set the order that Delphi appears in the Teams app bar.
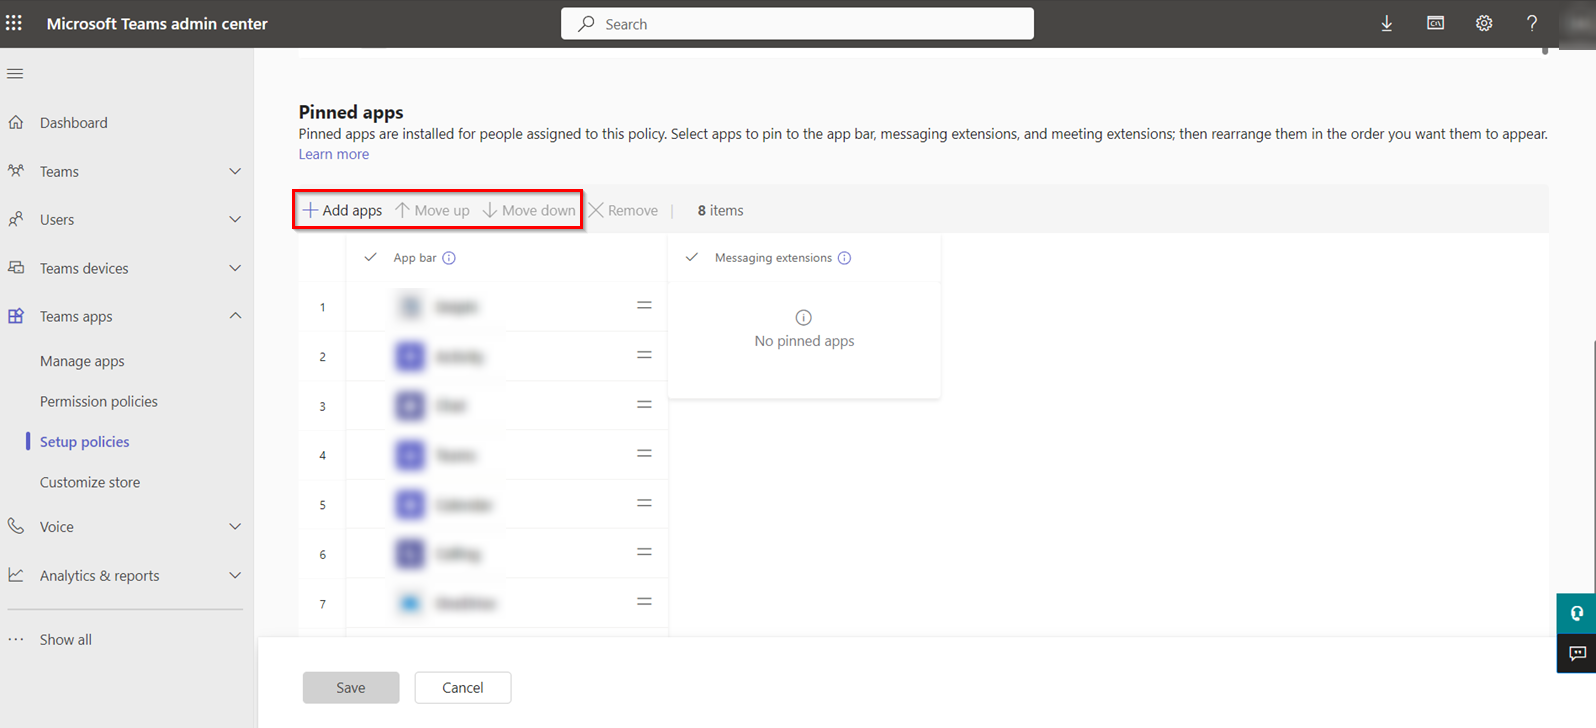
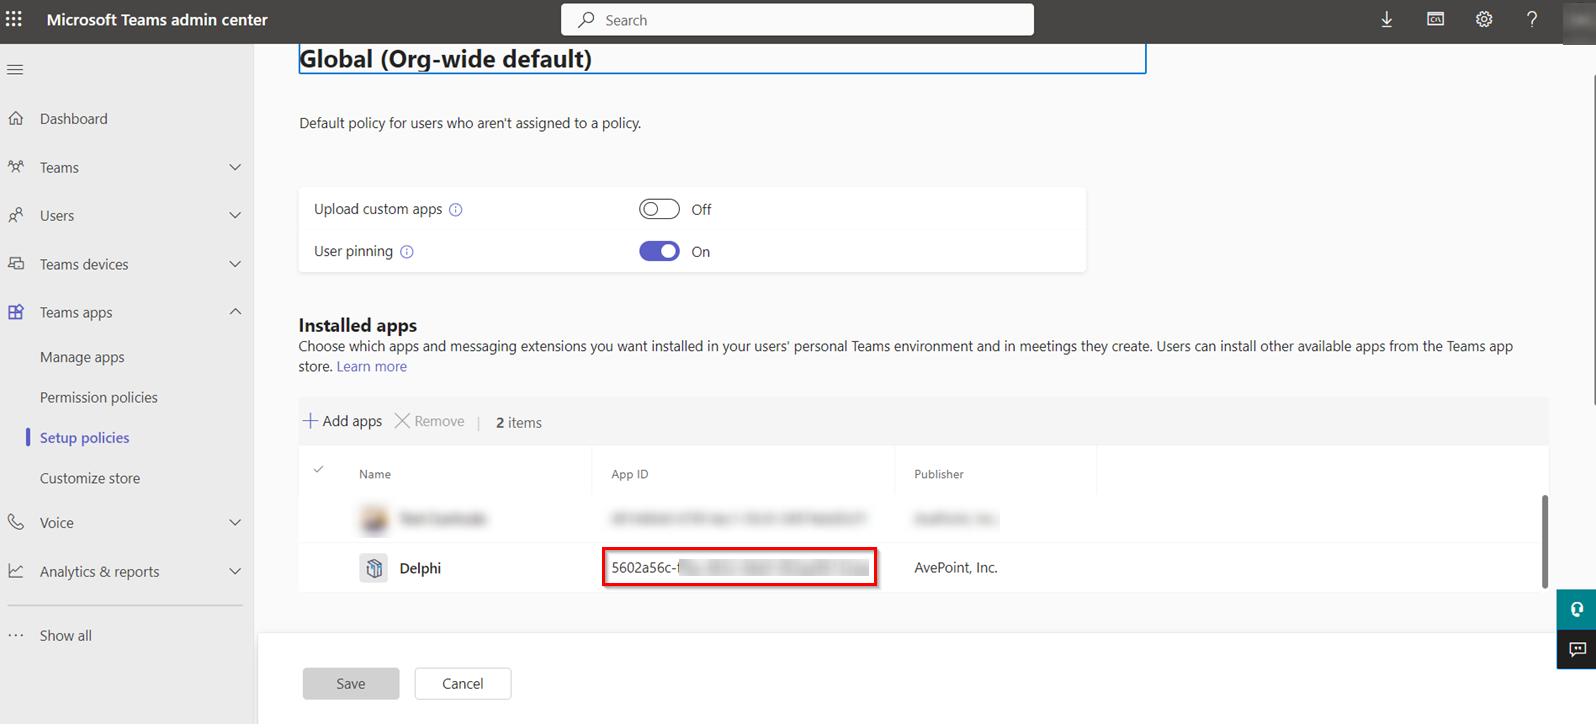
11. After saving the setup policy, click the policy name, go to the Installed apps section, and then copy the app ID of Delphi to the clipboard.
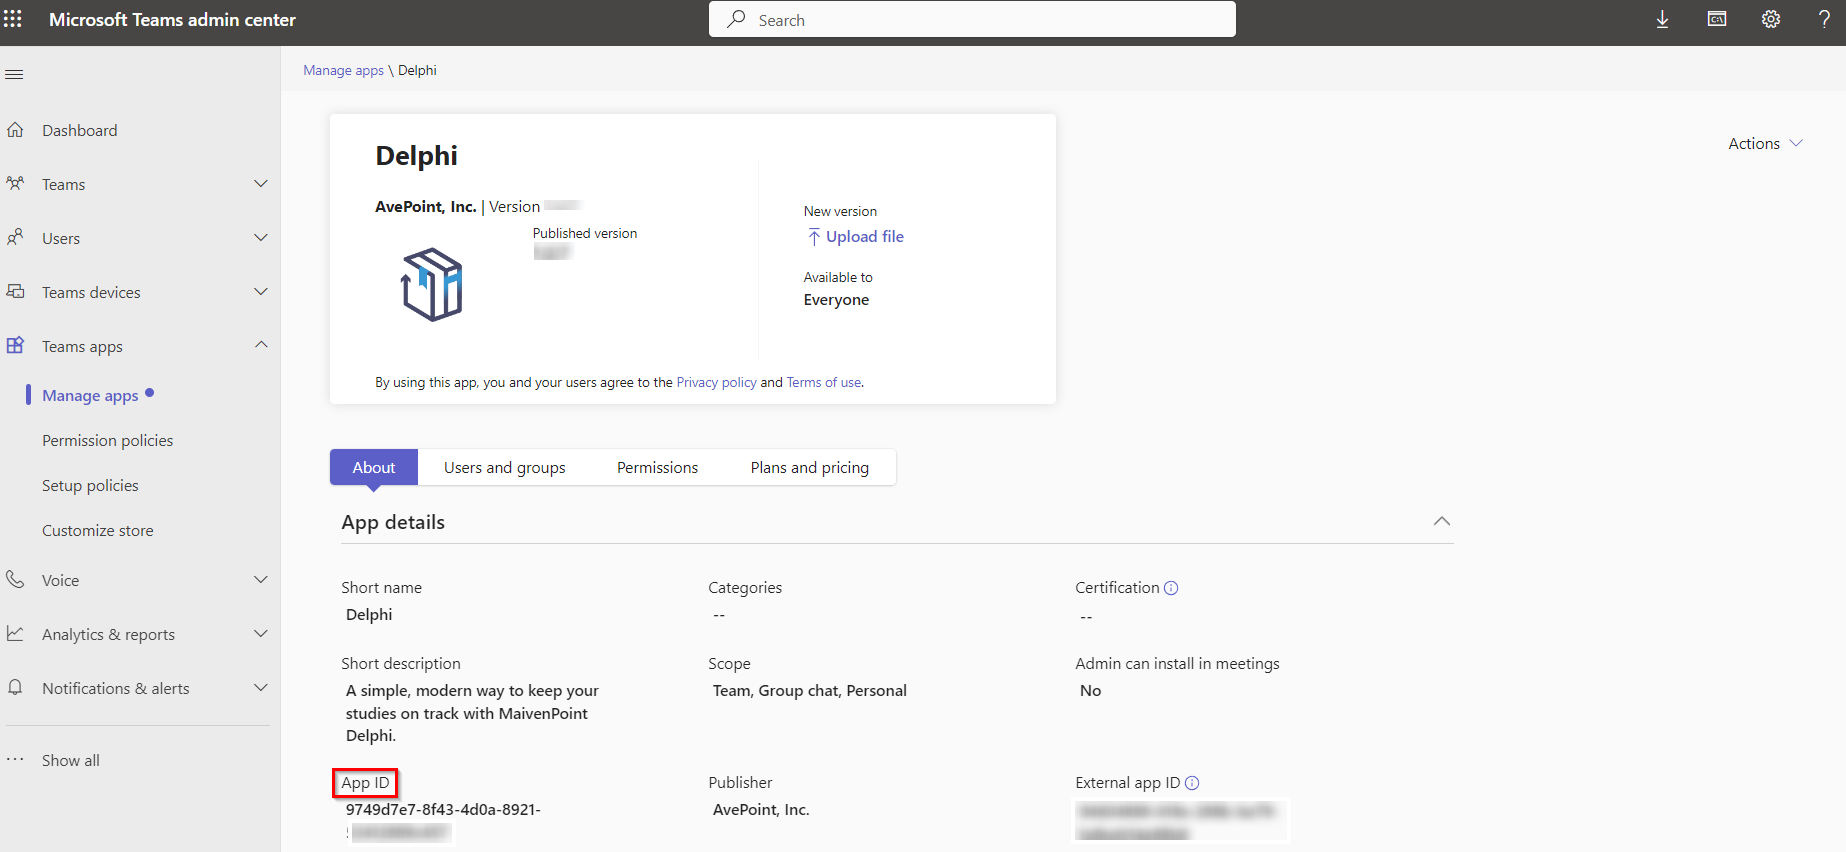
12. Go to the Manage apps page, search for Delphi and click its name to go to the details page and copy the app ID of Delphi to the clipboard.
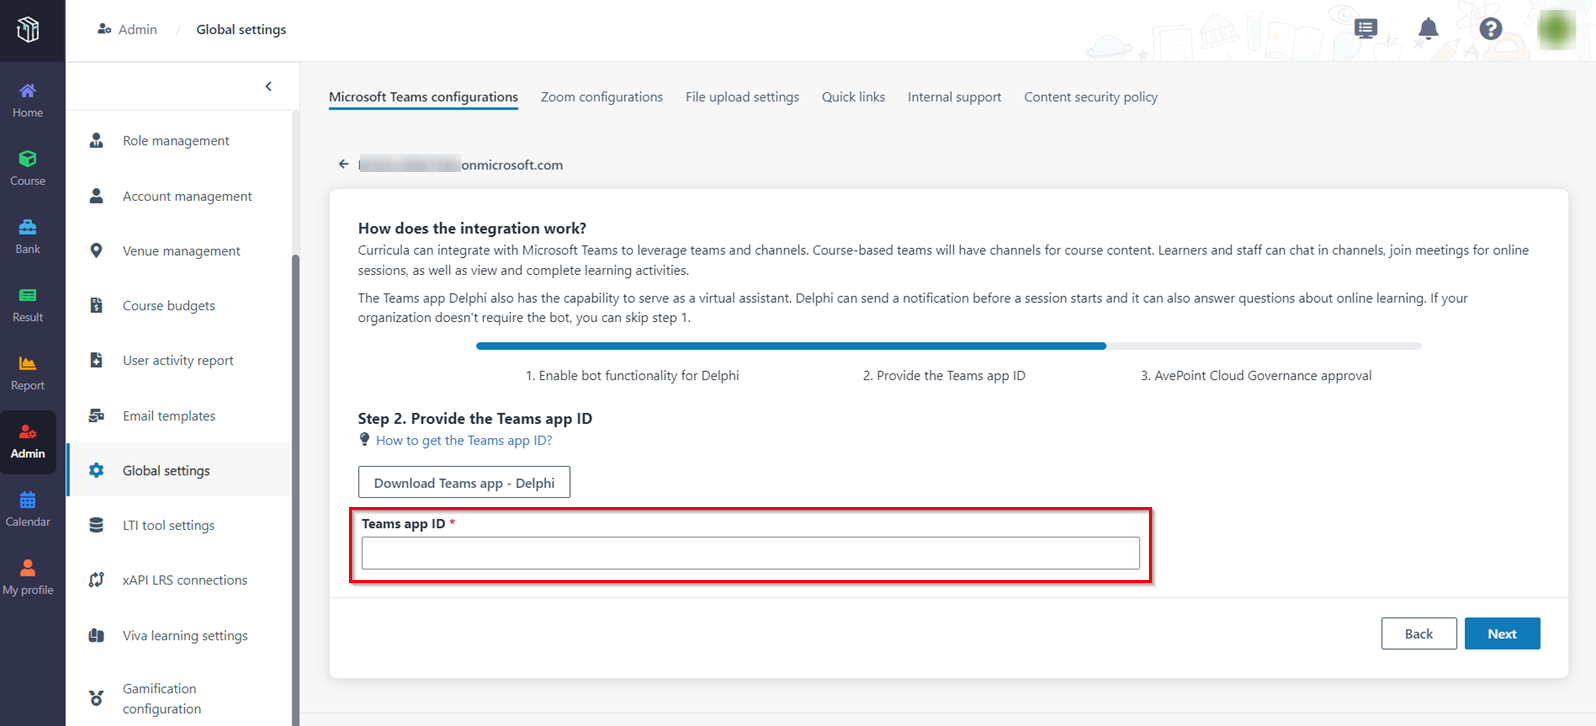
14. When the teams app ID is ready, click Next.
Application admins can define whether to enable Cloud Governance approval for creating a team in Microsoft Teams. Once enabled, application admins need to raise a request in Cloud Governance and wait for approval to create the team.
1. Turn on the Cloud Governance approval toggle.
2. Sign in to Cloud Governance admin centre.
3. Navigate to Settings > System > Webhook Management, click Create and create a webhook with the webhook URL, secret token header, and secret token value provided by Curricula.
4. Navigate to Settings > System settings > Workspaces & services > API authentication profiles and create an API authentication profile to generate a client ID and a client secret.
5. Go back to the Microsoft Teams configurations page in Curricula and paste the client ID and client secret to the Client ID field and Client secret field.
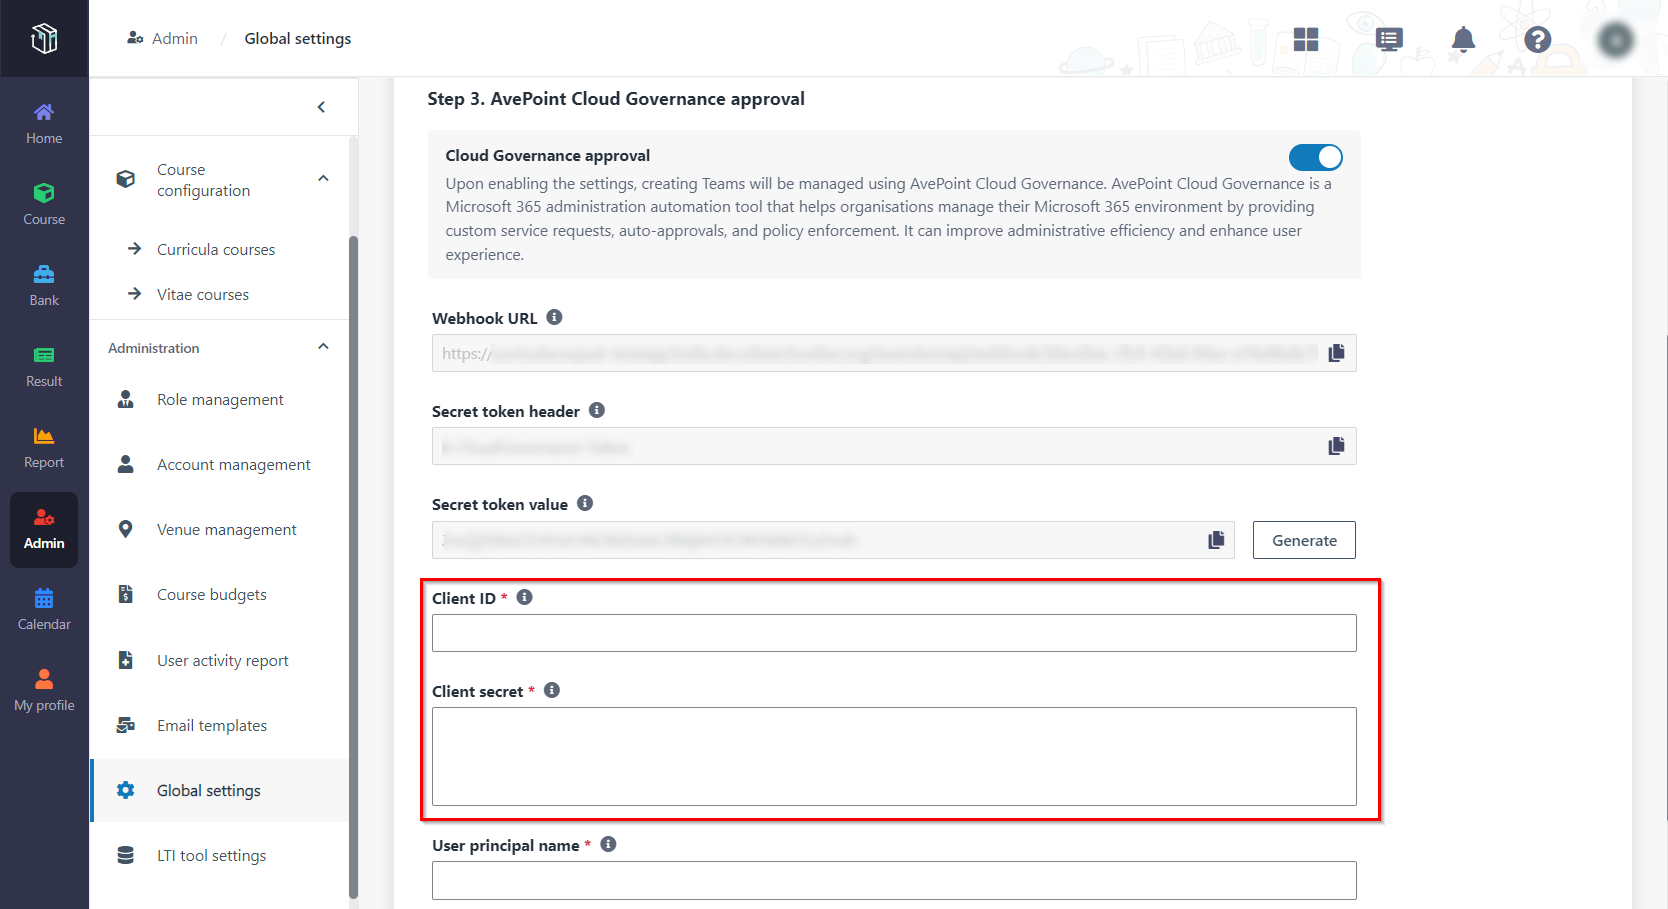
6. Enter the user principal name and service name, and then click Finish. Now the Microsoft Teams configurations are finished.
As a tab in Delphi app, Curricula is now available for experiencing in Microsoft Teams. If you have enabled integration with Microsoft Teams before and now want to try the Curricula tab in Microsoft Teams, you need to update the app package of the Teams app – Delphi.
Let’s see how to update the app package to experience the Curricula tab.
1. In Curricula, navigate to Admin>Global settings > Microsoft Teams configurations. On the Microsoft Teams configurations page of the connected tenant, click Download Teams app – Delphi and select a location to save the new app package.

2. Sign in to Microsoft Teams admin center with a Teams service admin or global admin account. Navigate to Teams app > Manage apps.
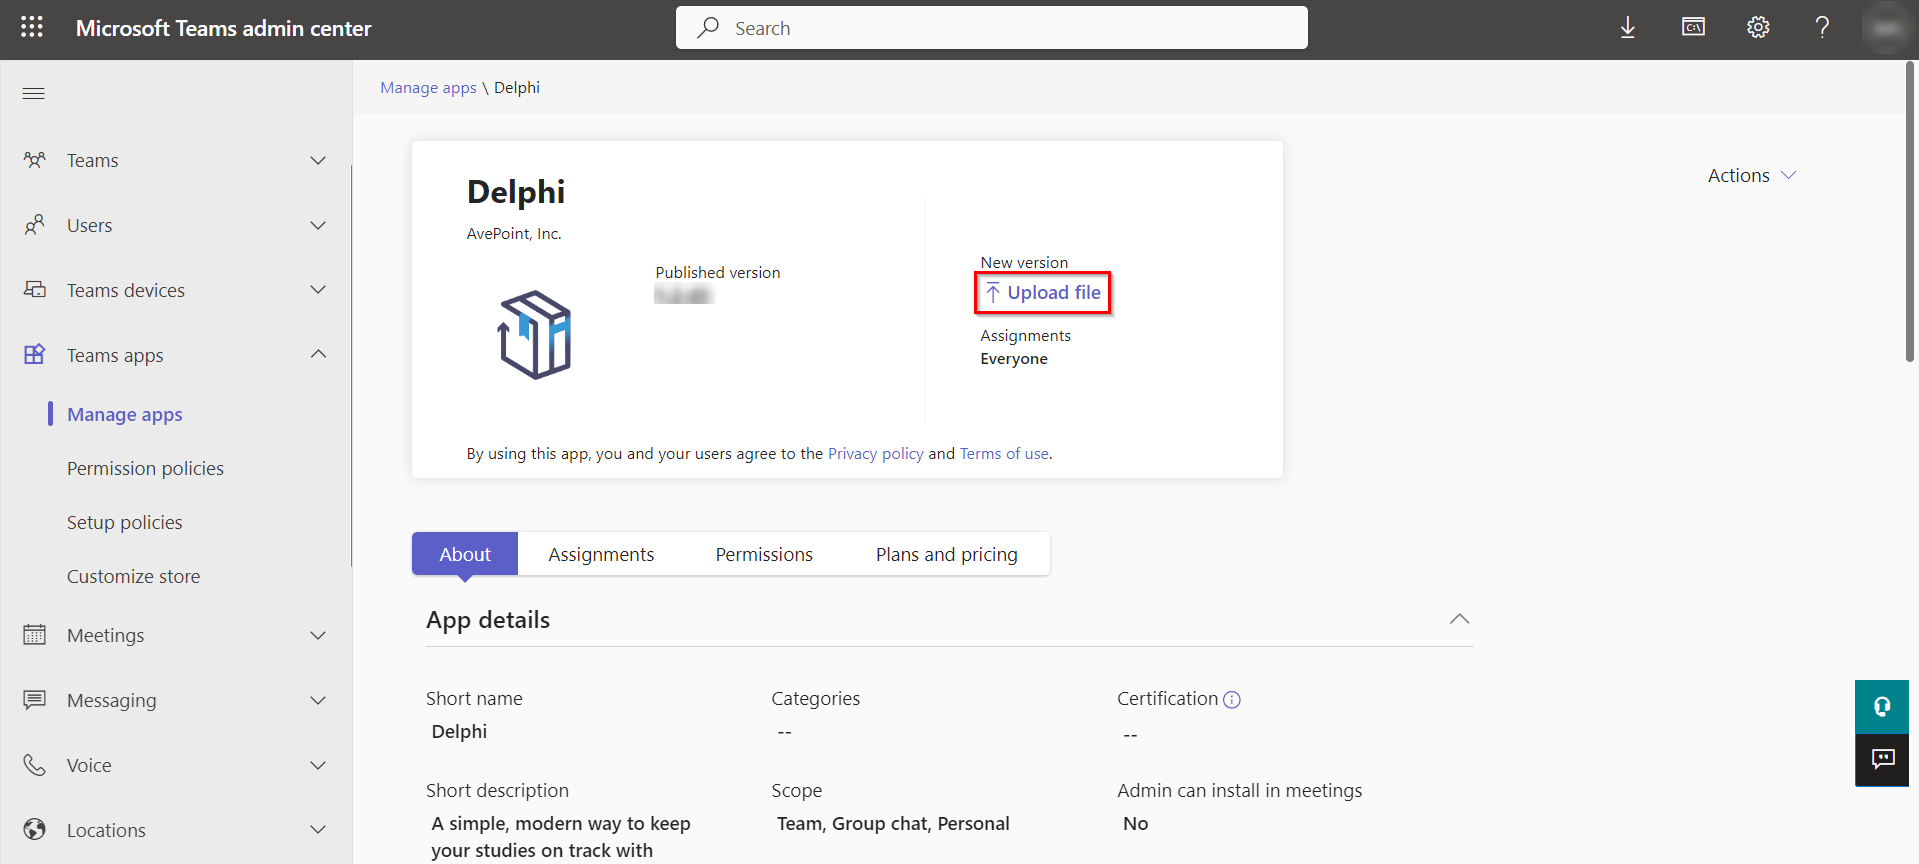
3. On the Manage apps page, search for Delphi and click its name to go to the details page.

4. Click Upload file and select the new app package you downloaded from Curricula.
5. After uploading, navigate to Setup policies. Click the Global (Org-wide default).
6. On the Global (Org-wide default) page, if Delphi has been added in the Pinned apps section, proceed to the next step; if Delphi hasn’t been added, click Add apps to add it.
In Microsoft Teams, navigate to Delphi > Curricula to experience the Curricula tab.