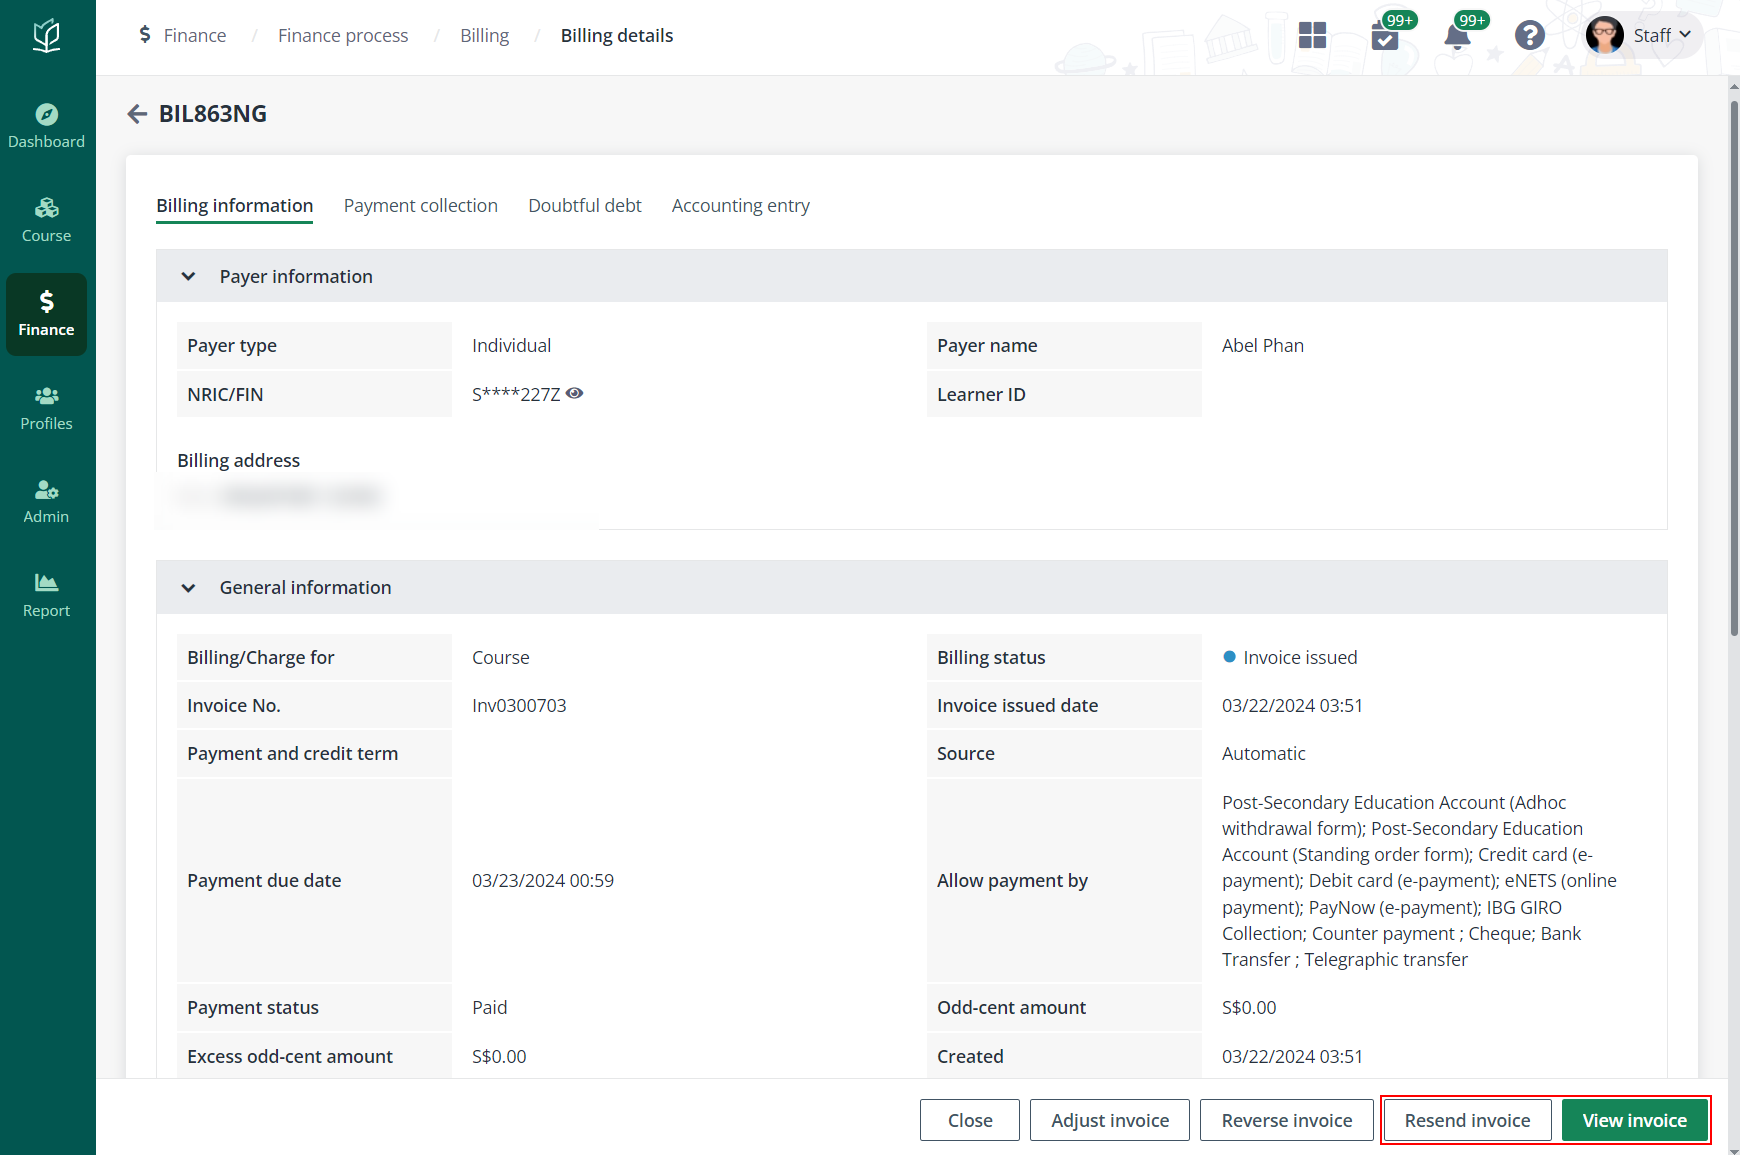
To view the details of an existing billing item, click the reference No. of an existing billing item on the Billing page.

On the Billing details page, relevant information is displayed in the following tabs:
•Billing information – Displays the general information of the billing items, course application, and payer.
•Payment collection – Displays the payment collections of this billing. New payment collections can also be created here.
•Doubtful debt – If the payment has not been completed after the payment due date, when there is a doubtful debt rule applied, doubtful debt record will be automatically generated for the billing. Or when the billing is manually added to the doubtful debt list. The doubtful debt records can be viewed in this tab.
•Accounting entry – Accounting entries can be created for the billing in this tab, including the basic accounting entry settings and worktag settings.
•Instalment – If the billing has instalment enabled, relevant information can be checked in this tab. This requires the Enterprise Pro subscription. With this subscription, your organisation can contact MaivenPoint support to request to enable the functionality.
Refer to the following table for details of the billing statuses in the system.
|
Billing status |
Description |
|
Cancelled |
A billing in confirmed status was cancelled and is no longer valid. |
|
Confirmed |
A billing was created to notify payer of the services charged but an official invoice has not been issued. |
|
Discarded |
A billing in draft status was discarded. |
|
Draft |
A billing was manually created and saved as draft. |
|
Expired |
A billing was unpaid as of payment due date and has expired. An expired billing is no longer valid. |
|
Invoice issued |
A billing with the official invoice has been issued. |
|
Reversed |
The billing remains valid but is fully offset by a credit note. |
To confirm the payment status and details of the billing, go to the Payment collection tab where the confirm payment records are listed.
To view the details of a payment collection record, click the ID of a payment collection. In the Payment collection details panel, admin can check the amount of payment, the payment mode leveraged by the payer, and other payment details. Admin can also click View receipt to view and download the PDF file of the receipt.
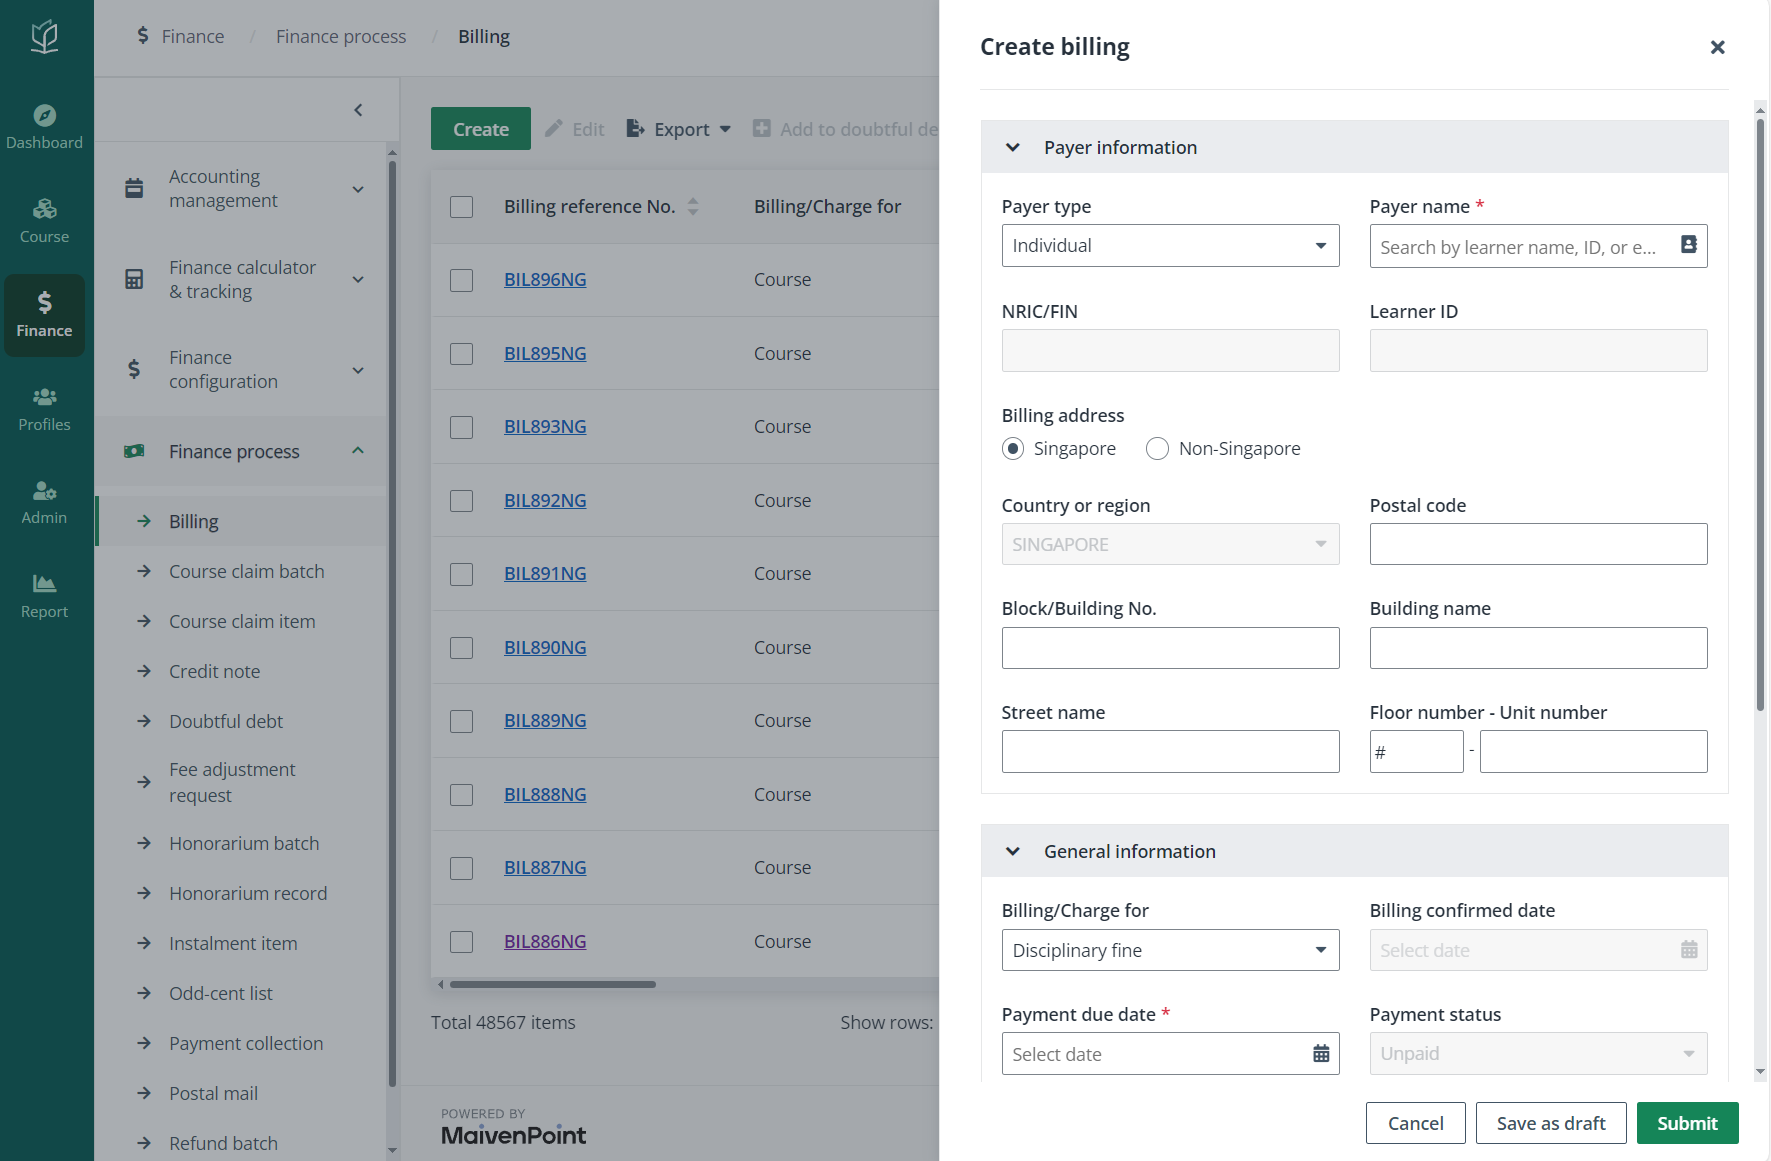
When admin confirms that a payment has been made for the billing by offline payment methods and has the details of the payment, admin needs to create a payment collection to record the payment information by following the steps below:
1. Click Create.
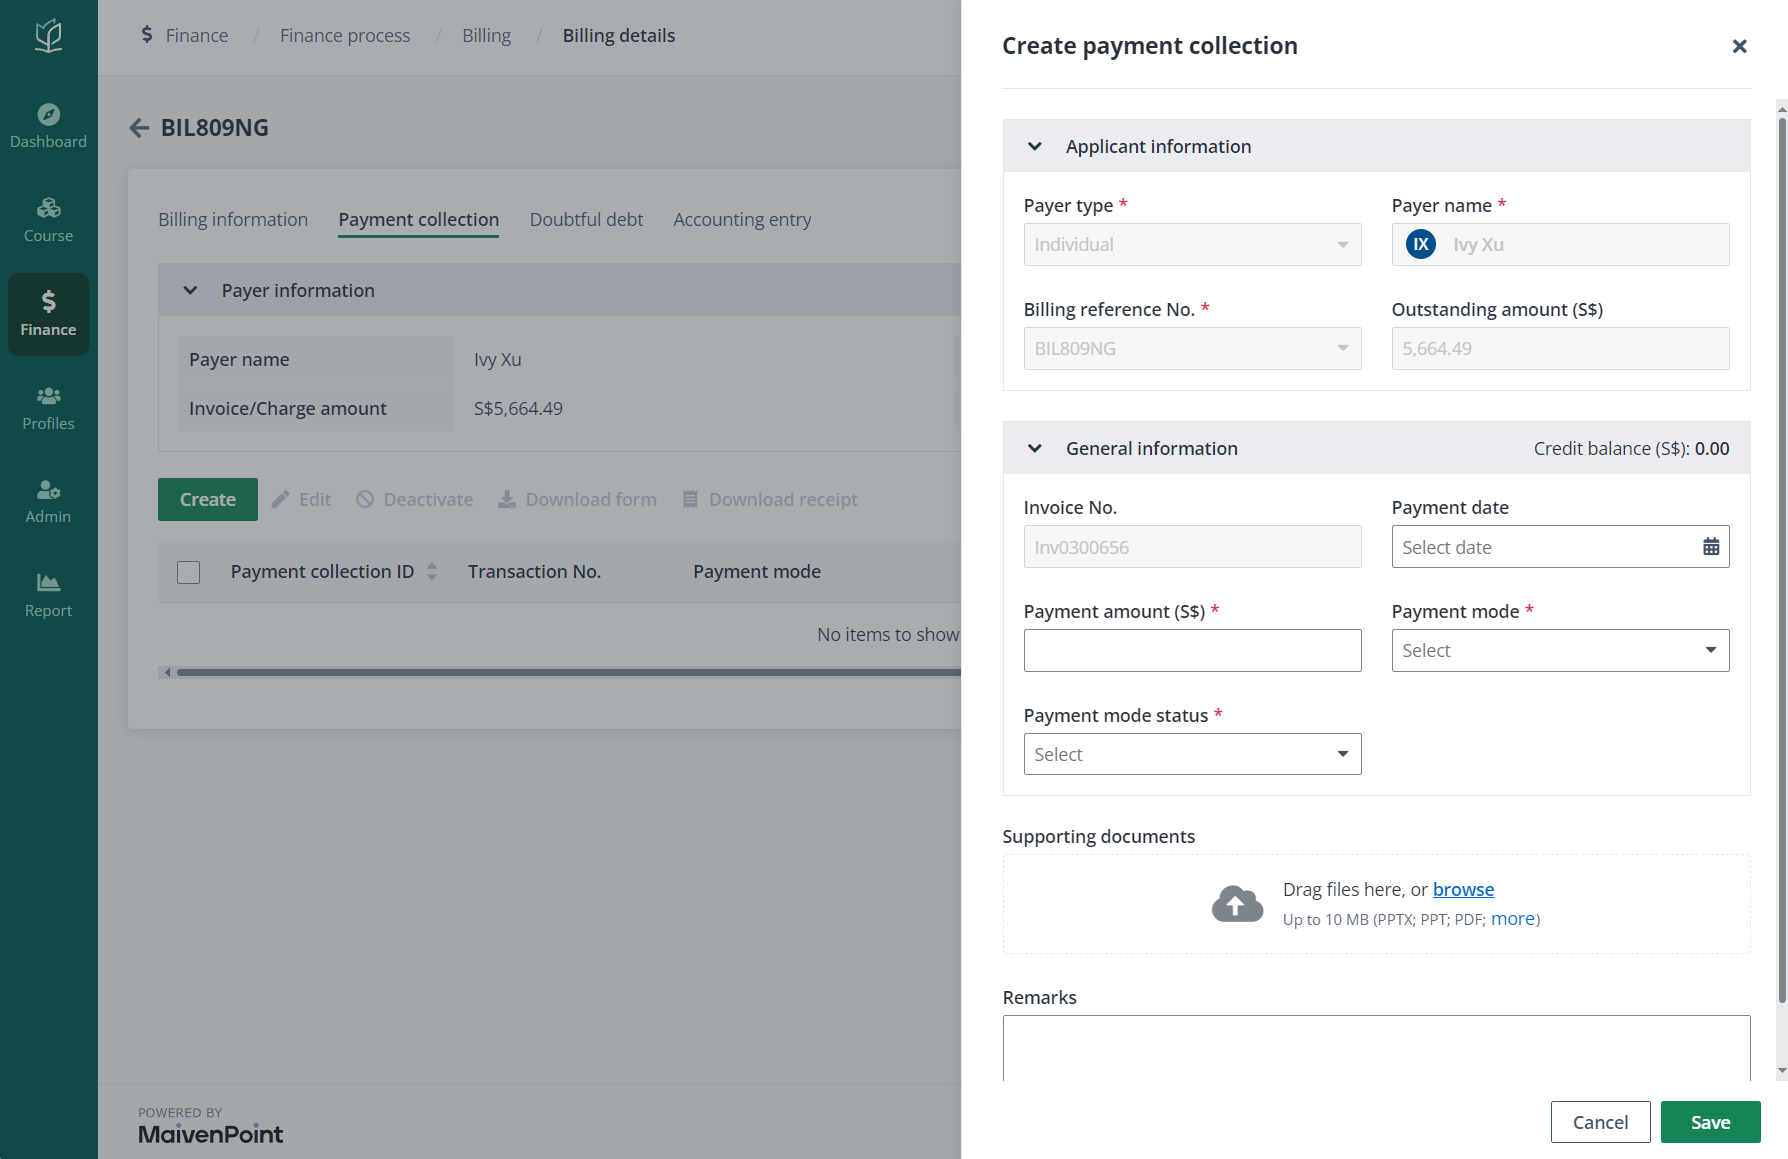
2. In the Create payment collection panel, fill in the required information of the payment collection.
3. Click Save. The payment collection is created and the status of the payment collection complies with the configured status.
When the payment status of a billing is Paid, an invoice will be generated for the billing. Admin can use the Payment status filter above the table to find the paid billings and check the invoices generated.
To view an invoice, admin can click View invoice in the lower-right corner of the Billing details page.
To reverse an invoice, click Reverse invoice in the lower-right corner. In the Reverse invoice window, select an official reason for the reversal and provide a supporting document. Then, specify the approver. If needed, you can also enter the internal reason which will not be displayed to the payer but only for internal reference.
In occasions where admin need to resend the generated invoice, for example, the invoice previously sent out has been told to be deleted accidentally, click Resend invoice in the lower right corner of the Billing details page and the invoice will be sent again.
To encrypt the invoice sent via the notification email, admin can enable the encryption setting when configuring relevant notification template. For more details, refer to Notification template.
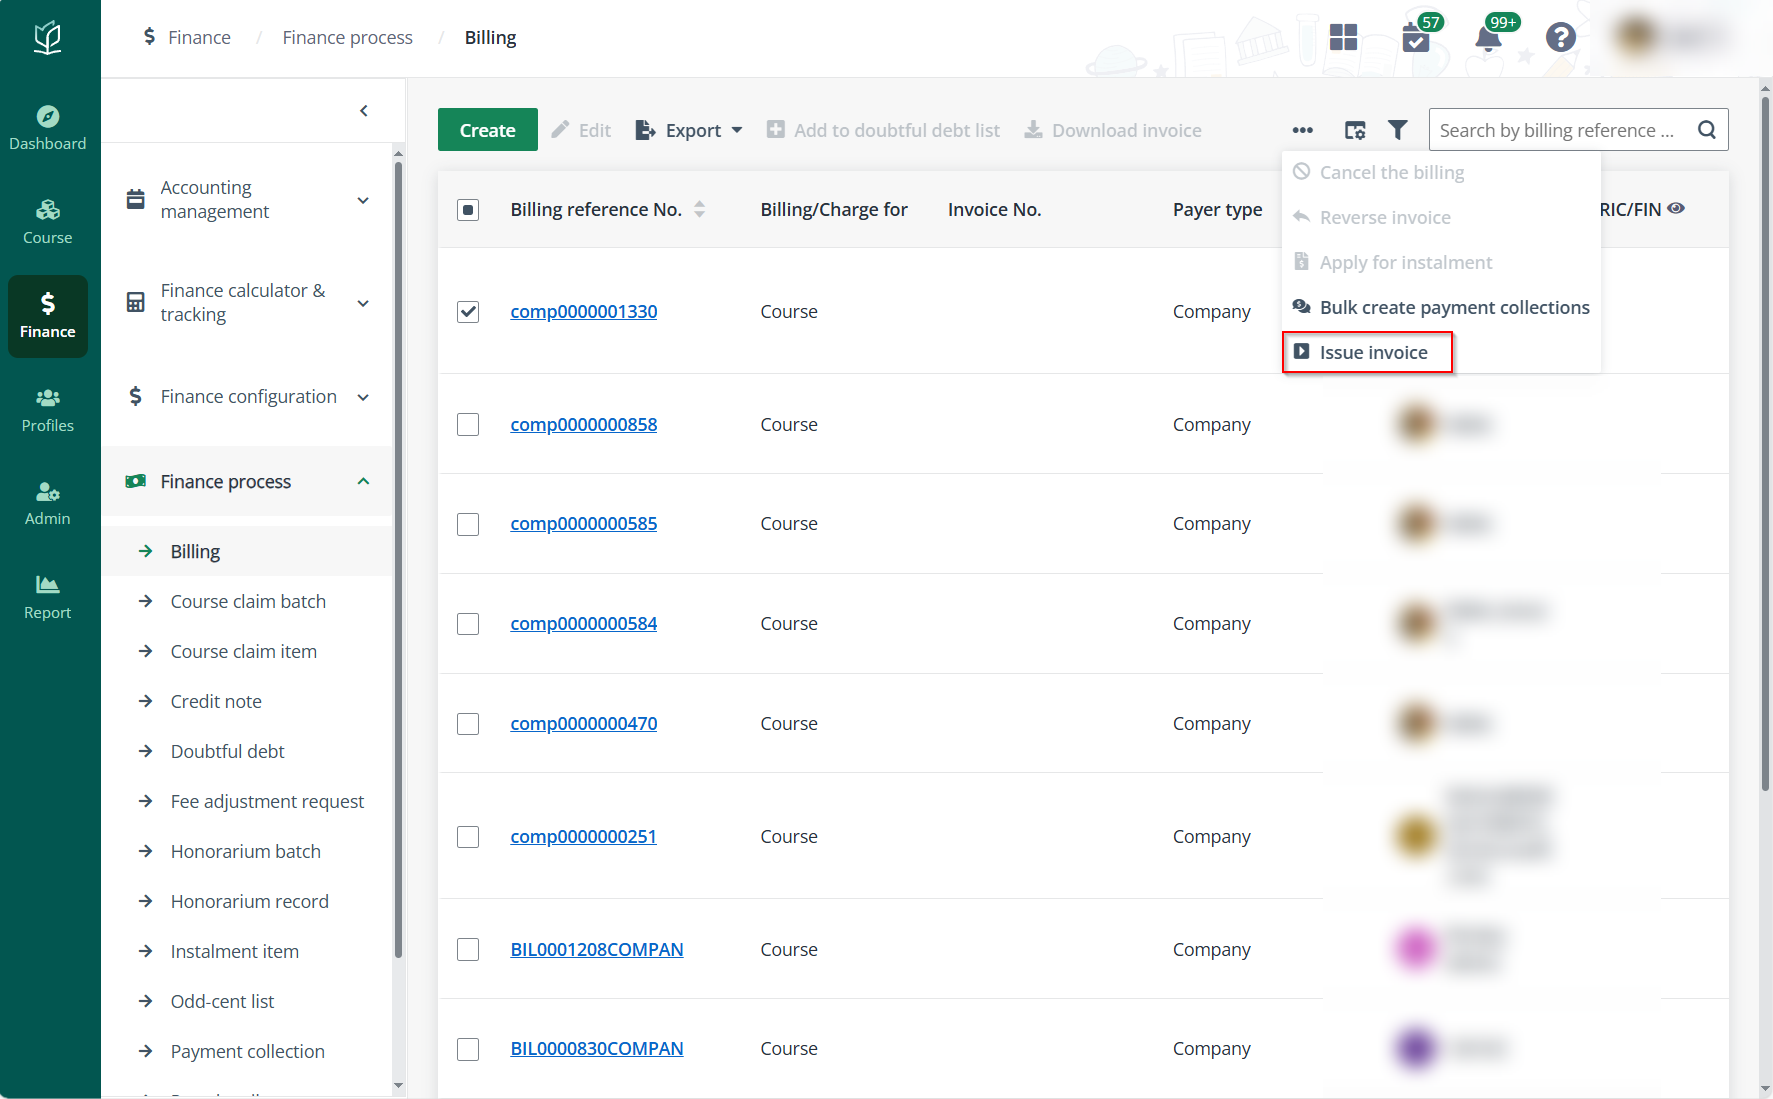
Invoice for a confirmed course billing can be manually issued to companies. To issue the invoice, complete the following steps:
1. On the Billing page, select a company’s course billing in Confirmed status. The billings can be found by using the Billing status, Billing/Charge for, and Payer type filters.
2. Click “…” above the table to expand the action list, and then click Issue invoice.
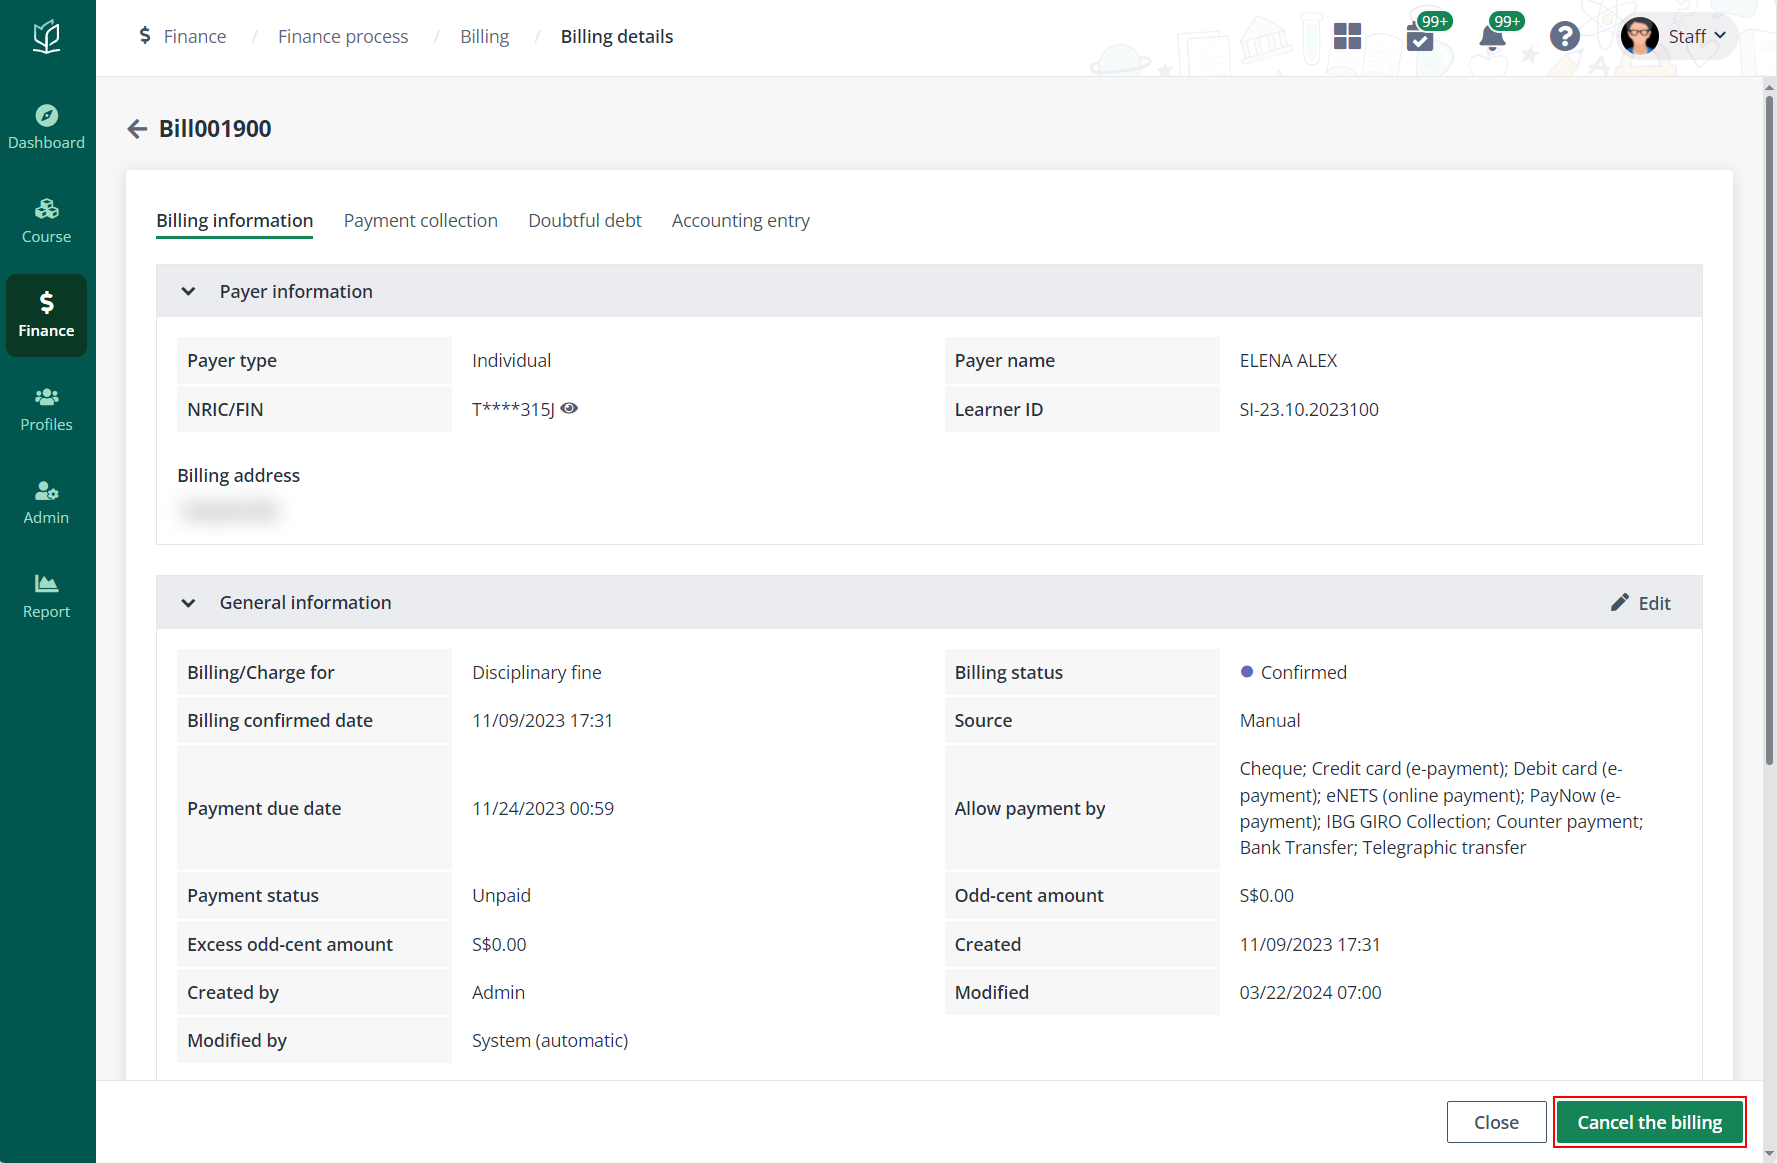
3. After the job finishes, an invoice will be generated and the billing status will change to Invoice issued. The company’s contact can then check and download the issued invoice in admin portal. If notification was configured for the invoice issuance, the notification sending status can be checked in Admin > Notification management.
After an invoice of a billing for the course is issued, there may be occasions in which the fee of the billing requires to be adjusted, admin can complete the fee adjustment by adjusting the issued invoice following the steps below:
1. On the Billing details page, click Adjust invoice in the lower-right corner. Invoice-issued billings for courses can be found by the Billing status and Billing/Charge for filters.
2. In the Fee adjustment panel, configure the adjustments for the billing by setting a new payment credit term and filling up the adjusted fees.
Fees can be adjusted with the following setups:
•Manual computation indicator – On the top right of the Adjustment details section, turn on or off the toggle to enable or disable the manual fee adjustment configurations. If disabled, the system will adjust the fee according to available fee adjustment conditions.
•Fee adjustment details – If Manual computation indicator is enabled, manually adjust the fees of the existing billing items by updating values in the Revised amount column.
o Click Create to add existing disciplinary fines or apply discounts to the billing.
o Click Split amount, and then update the values in Revised split 1 and Revised split 2 columns to split the amount of existing billing items.
3. Click Confirm and provide reasons or supporting document of the fee adjustment. The credit note and adjusted invoice will be issued after approval.
Sometimes, a confirmed billing can be in the Unpaid status for a long period. Instead of keeping the long-time unpaid billings in the system, admin can cancel the billings for the following fees in Vitae after checking with other finance officers:
•Disciplinary fine
•Discrepancy claim
•Supplementary fee
*Note: Only billings manually created for disciplinary fines and supplementary fees can be cancelled.
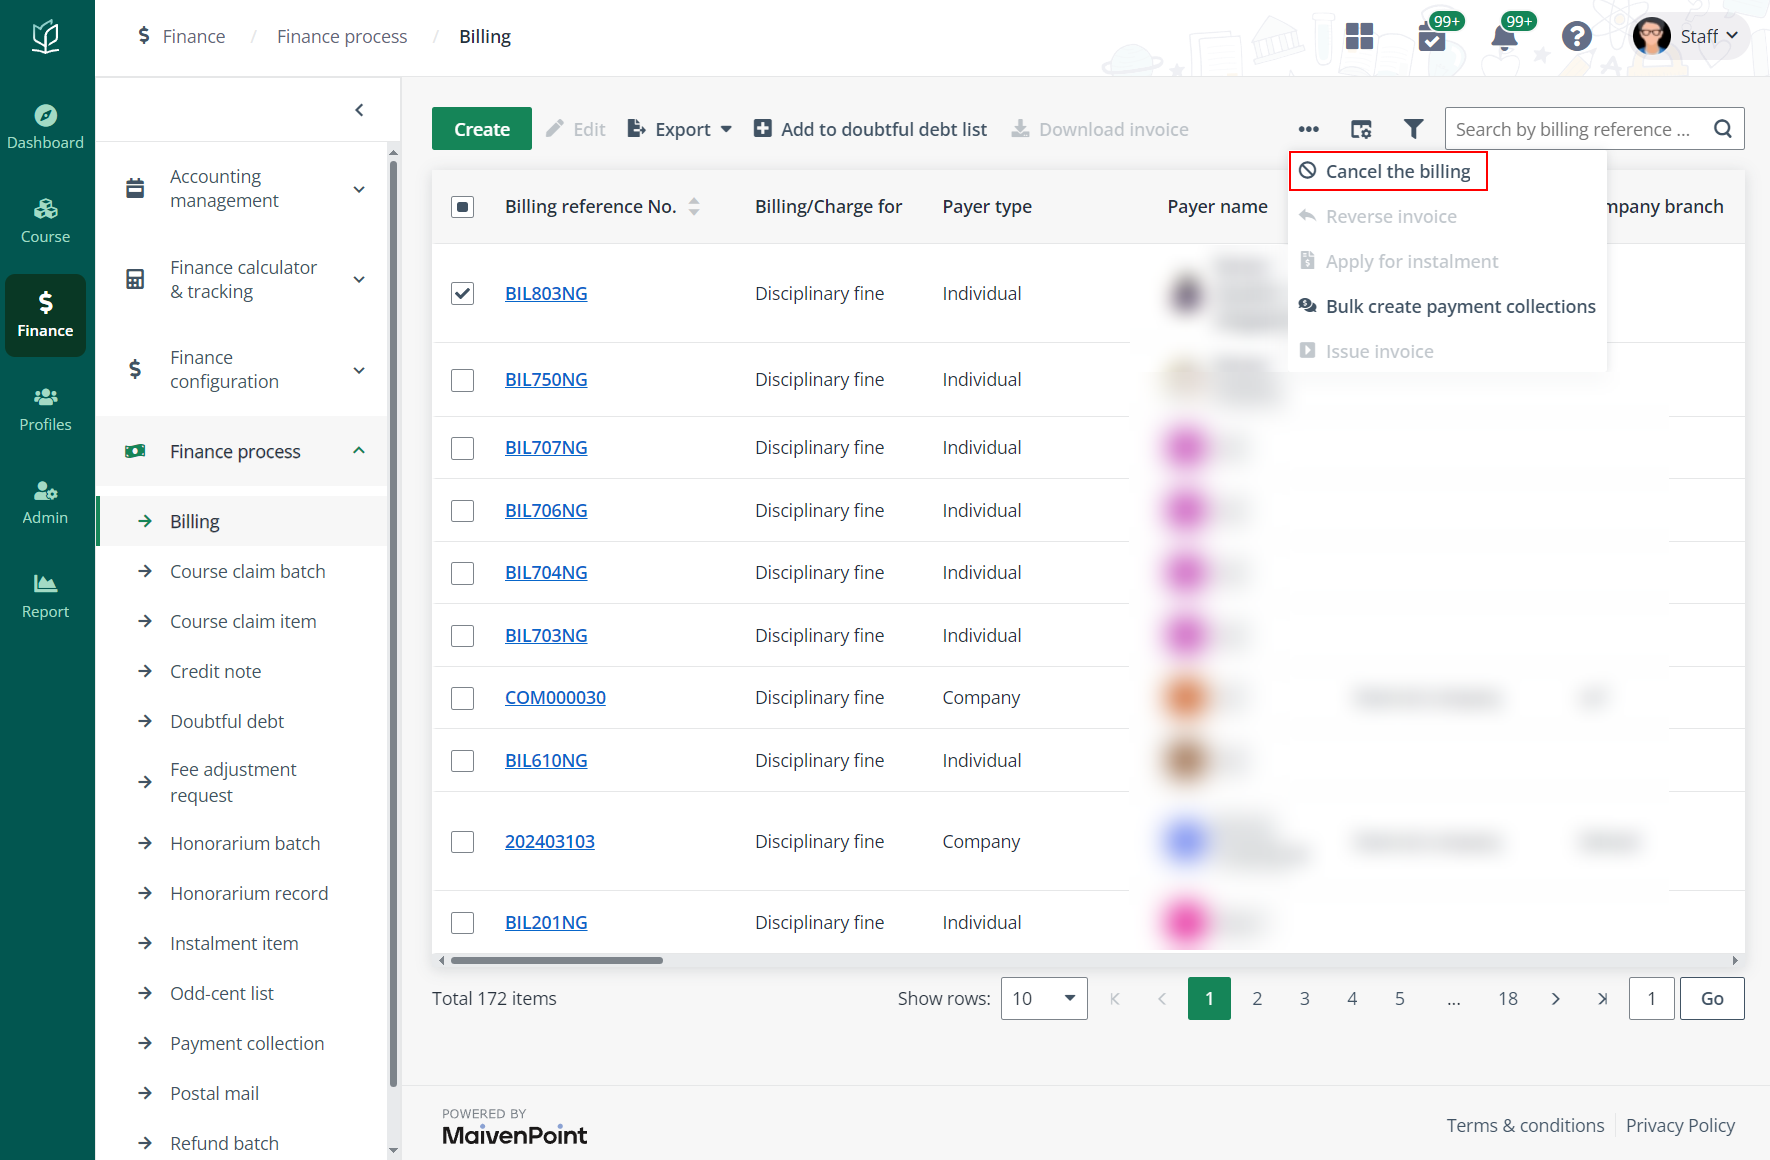
To cancel a billing, complete the following steps:
1. On the Billing page, find the billing to cancel. The confirmed billing can be found with the Billing status, Billing/Charge for, and Payment status filters while the manually created billings can be identified by creator names in the Created by column.
2. Select the billing and click Cancel the billing on the ribbon.
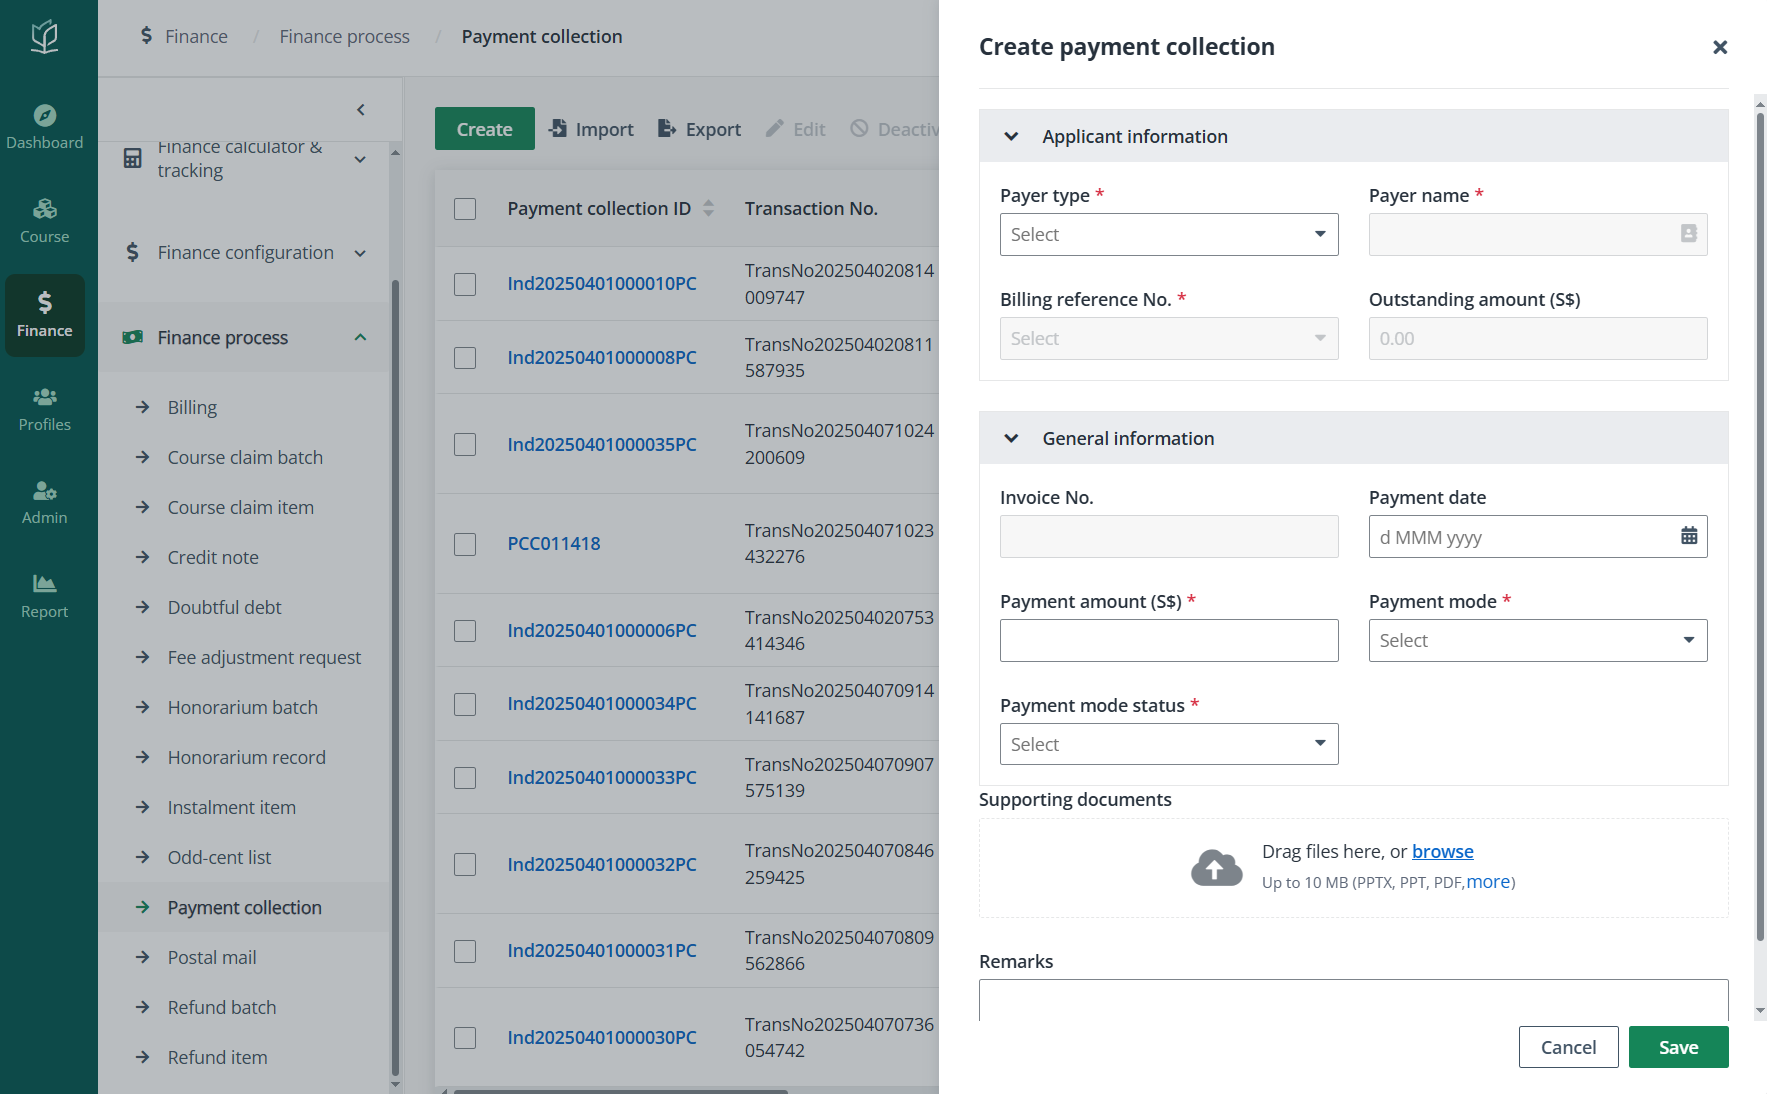
Or click the billing reference number to go to the Billing details page. The Cancel the billing button can be found in the lower right on the page.
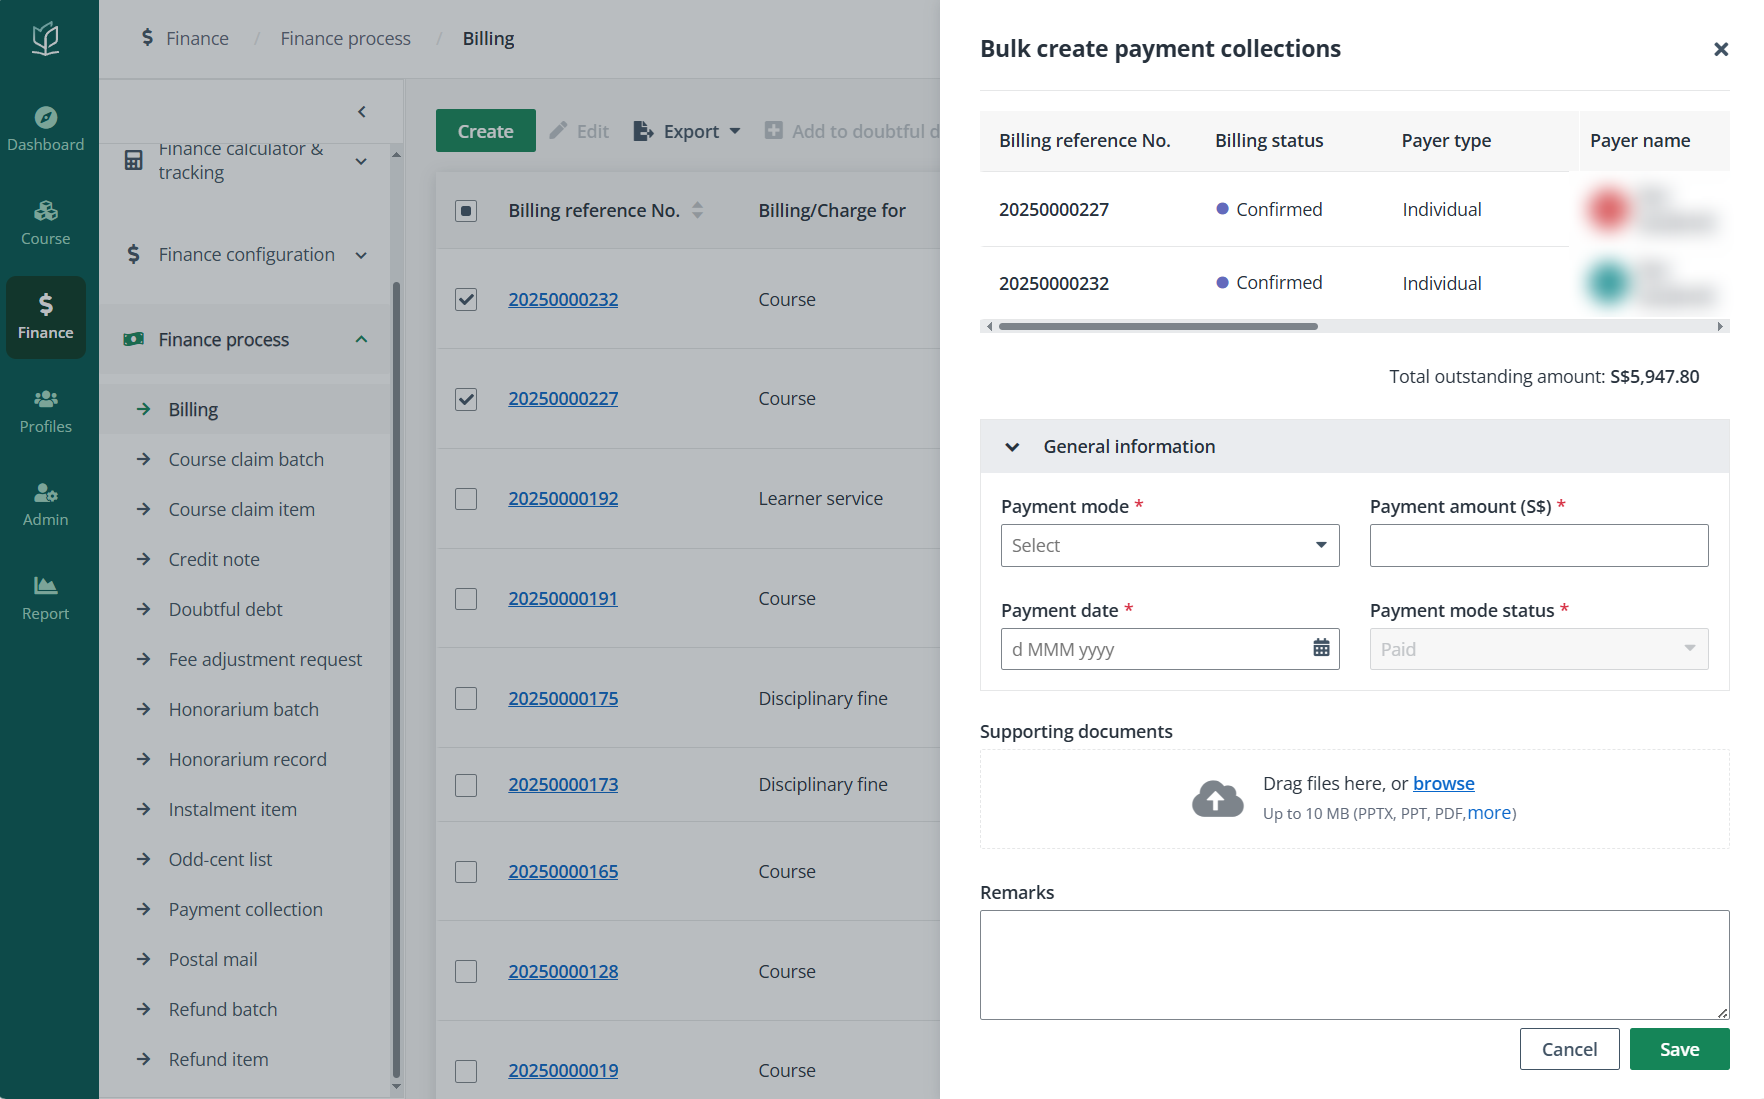
3. After clicking Confirm in the Cancel the billing window, the billing status will be Cancelled.