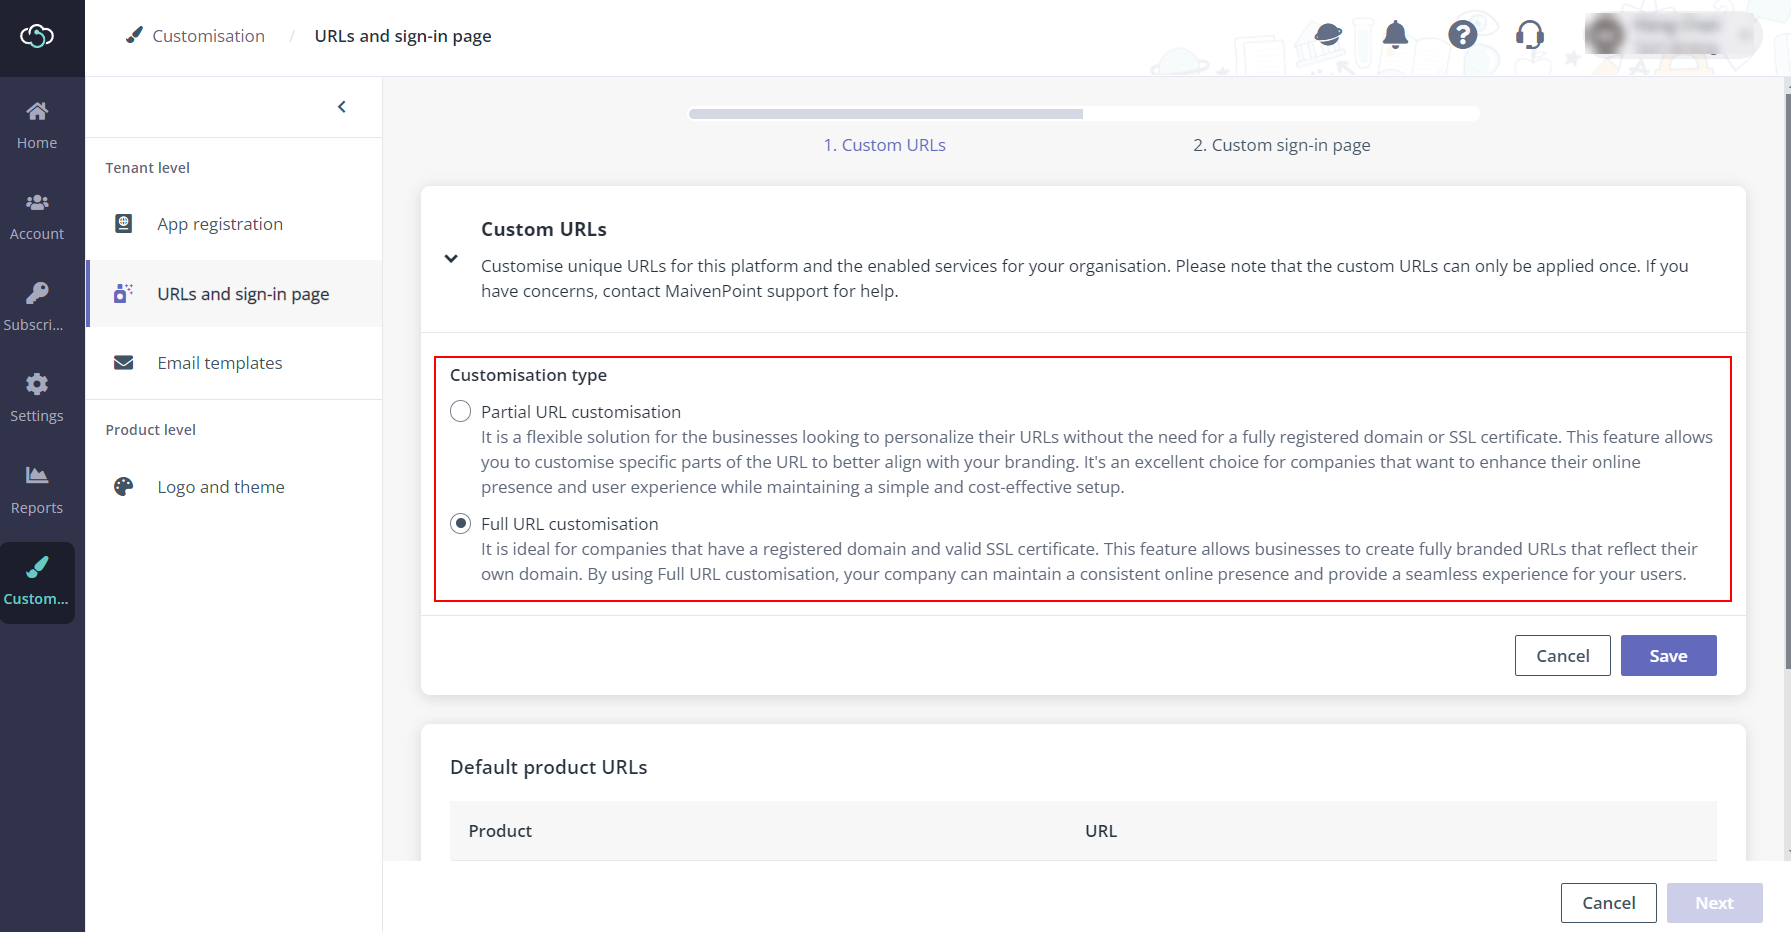
MaivenPoint provides two types of URL customisation, offering businesses a flexible solution to personalize the access URLs to MaivenPoint services. Whether you’re looking to enhance your branding without a fully registered domain or SSL certificate, or you have these in place and seek full URL customisation, this feature caters to your needs. It enables companies to align URLs with branding goals, thereby improving online presence and user experience in a cost-effective manner.
For businesses with a registered domain and valid SSL certificate, full URL customization ensures a seamless and consistent online presence.
*Note: After applying the full URL customisation, if you are using your own Azure storage, it’s essential to update the allowed origins in the CORS settings of your storage account. For details, refer to allow MaivenPoint to access your storage account. This ensures the required permissions are in place for seamless integration and functionality; if you are using MaivenPoint default storage, contact MaivenPoint support for assistance.
Follow the steps below to configure custom access URLs for this platform and the enabled products and redesign the Sign-in page for your own brand:
1. Navigate to Customisation > URLs and sign-in page.
2. In the Custom URLs step, select the Customisation type. Note that the URLs cannot be changed again once you have applied.

•Partial URL customisation – It is a flexible solution for the businesses looking to personalize their URLs without the need for a fully registered domain or SSL certificate. This feature allows you to customise specific parts of the URL to better align with your branding. It's an excellent choice for companies that want to enhance their online presence and user experience while maintaining a simple and cost-effective setup.
•Full URL customisation – It is ideal for companies that have a registered domain and valid SSL certificate. This feature allows businesses to create fully branded URLs that reflect their own domain. By using Full URL customisation, your company can maintain a consistent online presence and provide a seamless experience for your users.
3. Click Save to proceed.
4. If you choose Partial URL customisation, enter your domain name to the text box and click Verify to validate the URLs. Note that the domain name can only contain digits (0-9), letters (A-Z and a-z), and hyphen (-), and cannot exceed 20 characters. The URLs of the enabled products will also be populated and verified.
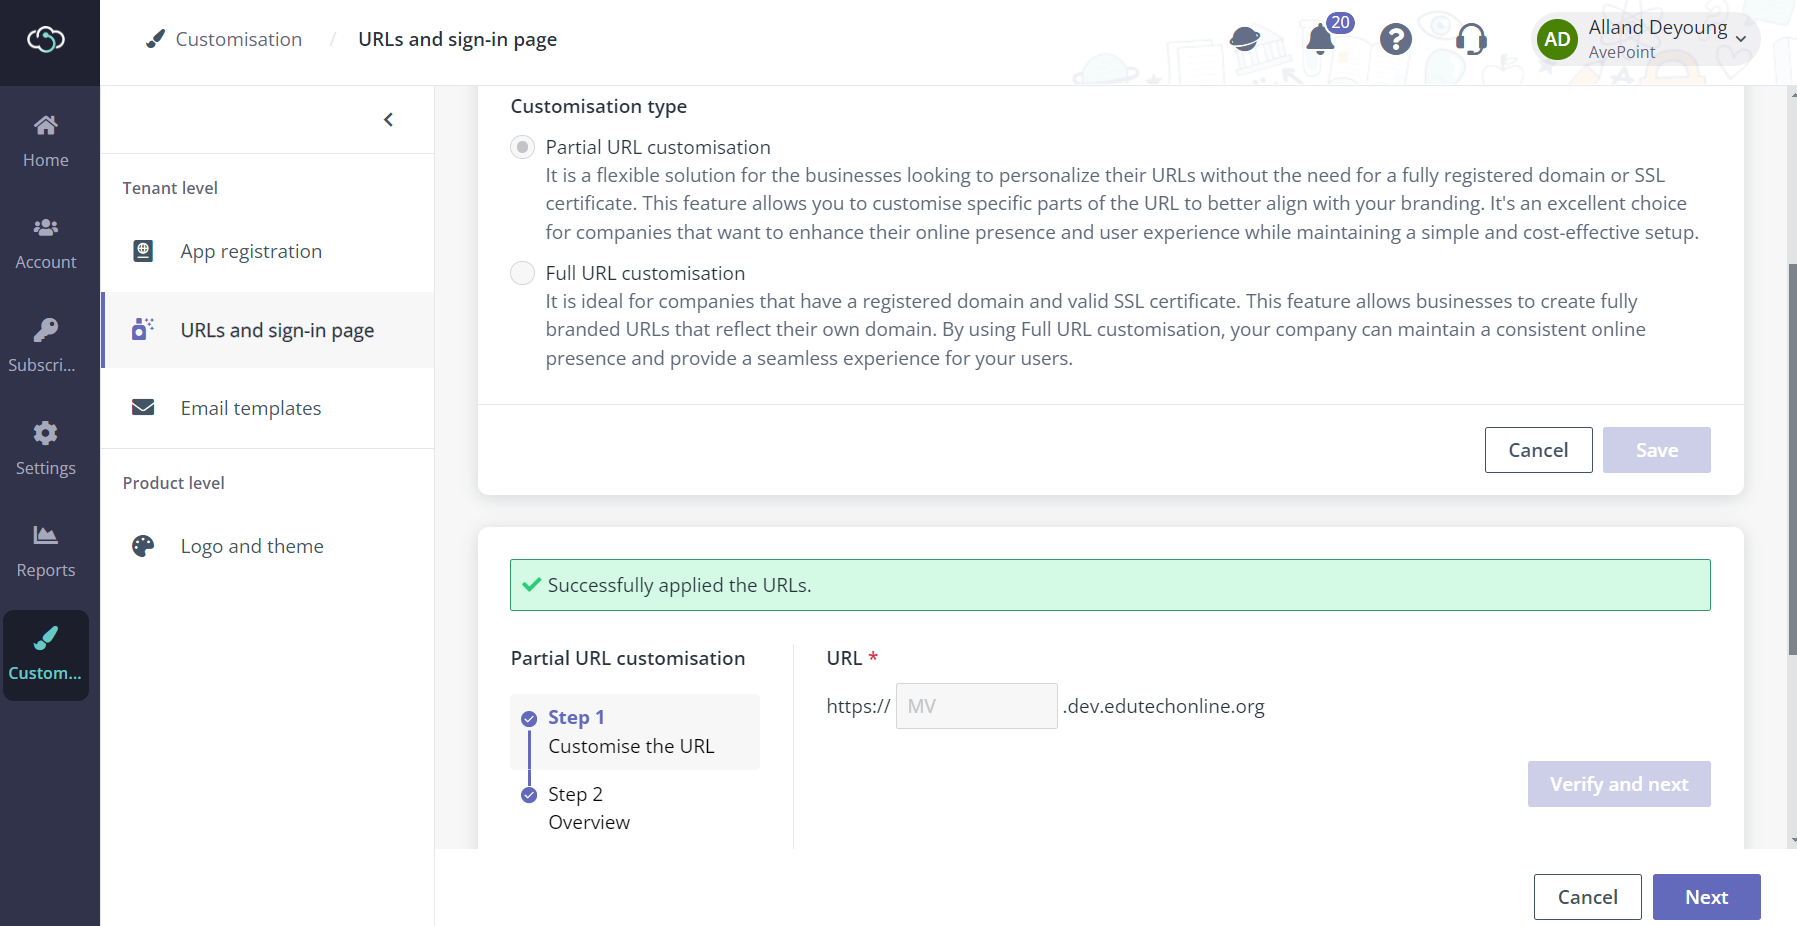
5. If you choose Full URL customisation, follow the steps below:
c. Enter the domain name and click Next. Ensure you have a valid certificate for this domain name.
d. In the step 2, the endpoint URLs are listed. You must go to the DNS provider and add CNAME records for the endpoint URLs provided.
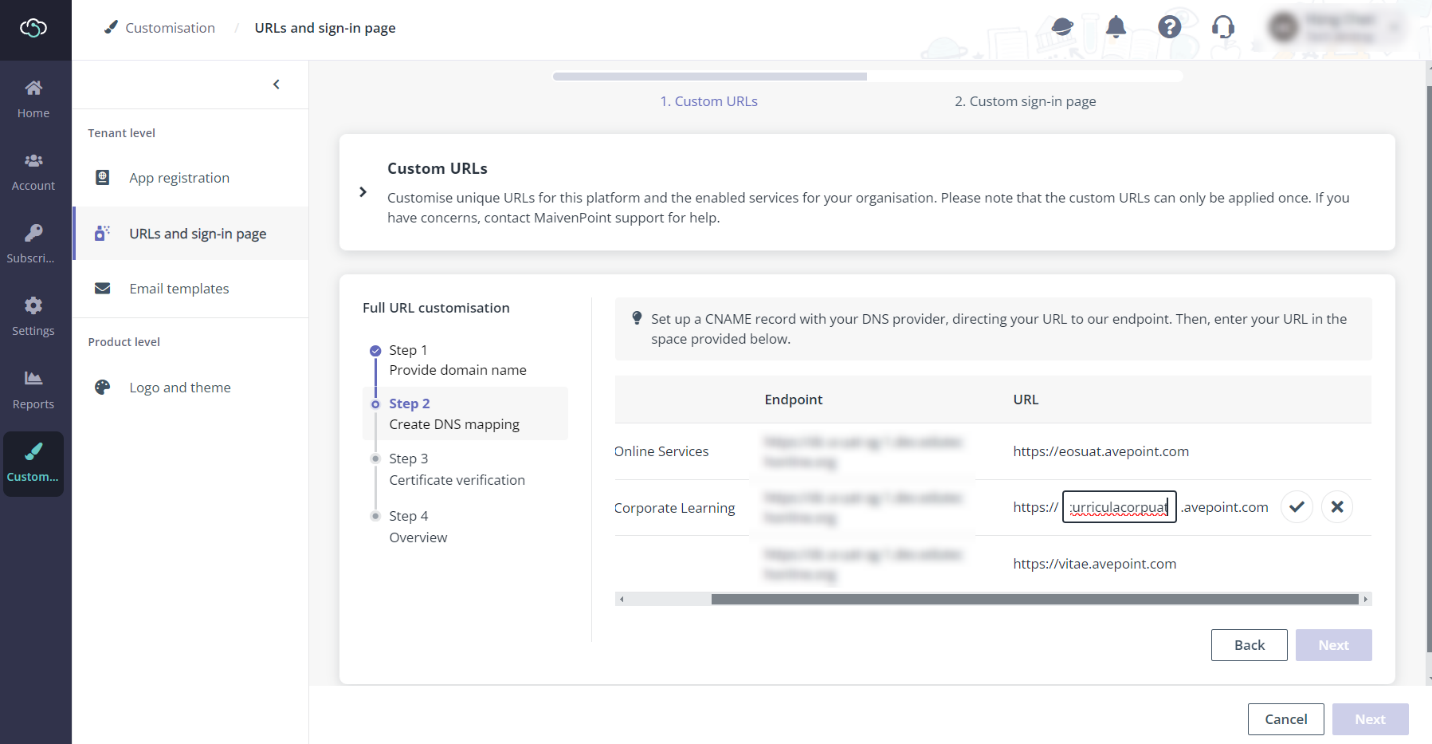
The DNS Mapping listed in the step 2.
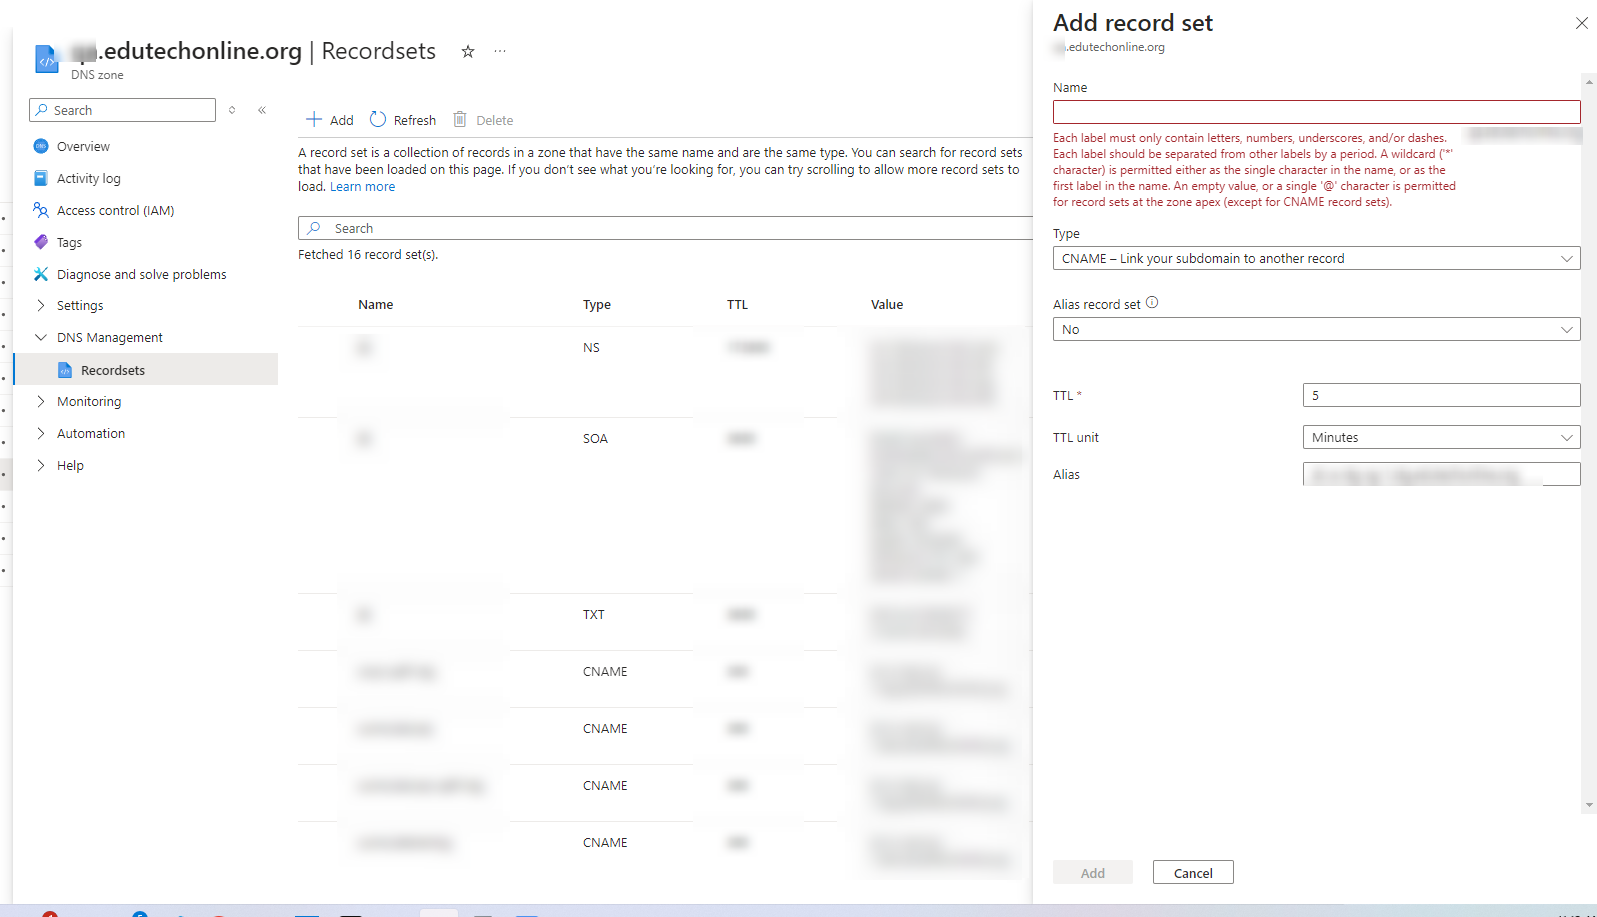
Microsoft Azure DNS Management.
e. Once you have completed the DNS configuration, return to this setting and click Next to proceed.
f. In Step 3, upload the certificate and provide the passphrase. Ensure that your certificate is valid and matches the domain name you provided in Step 1. Additionally, remember to update the certificate here if it expires.
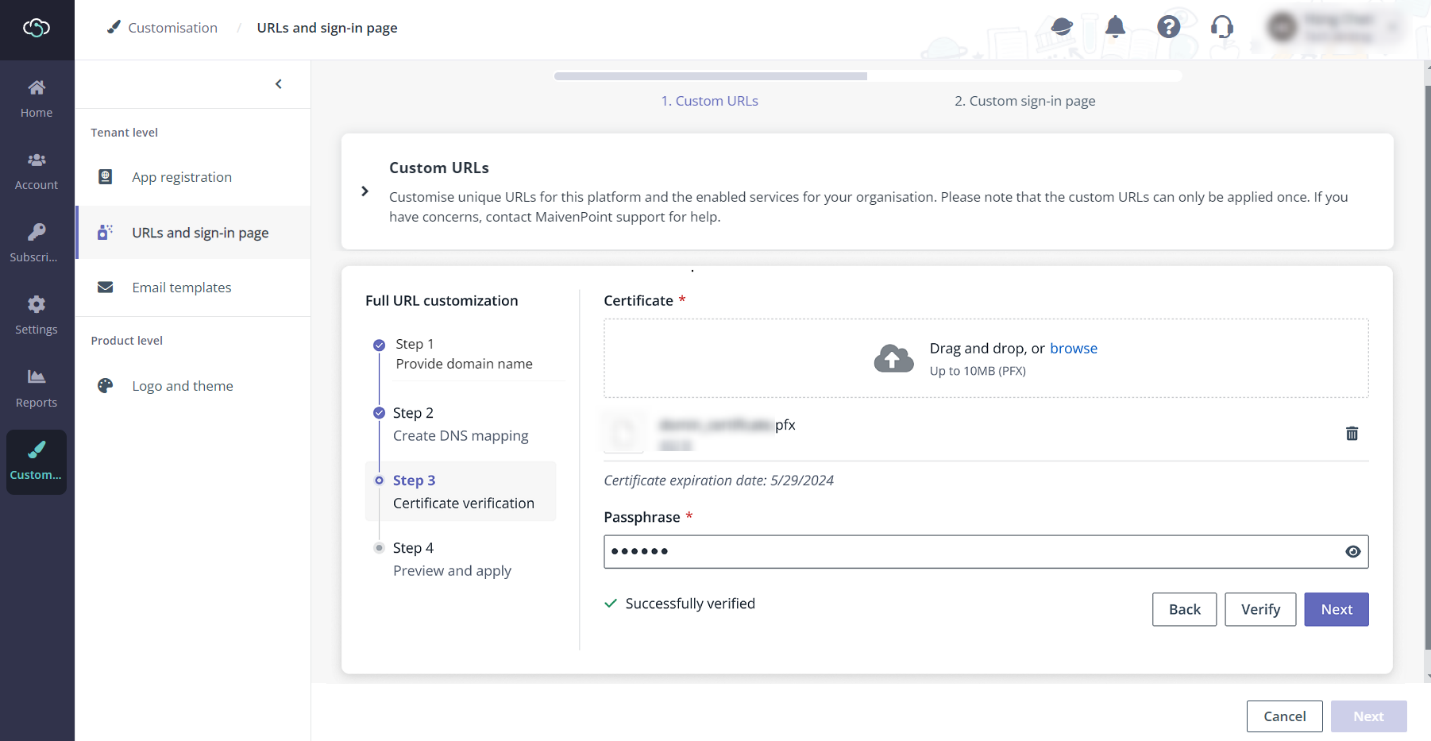
g. Click Next to review the configurations, and then click Apply. Note that it will take some time to implement your configurations and the configurations cannot be changed afterward. If you add new products to your subscription, you will need to configure their settings separately.
6. After the custom URLs are applied for the products in your tenant, click Next to go to the Custom sign-in page step.
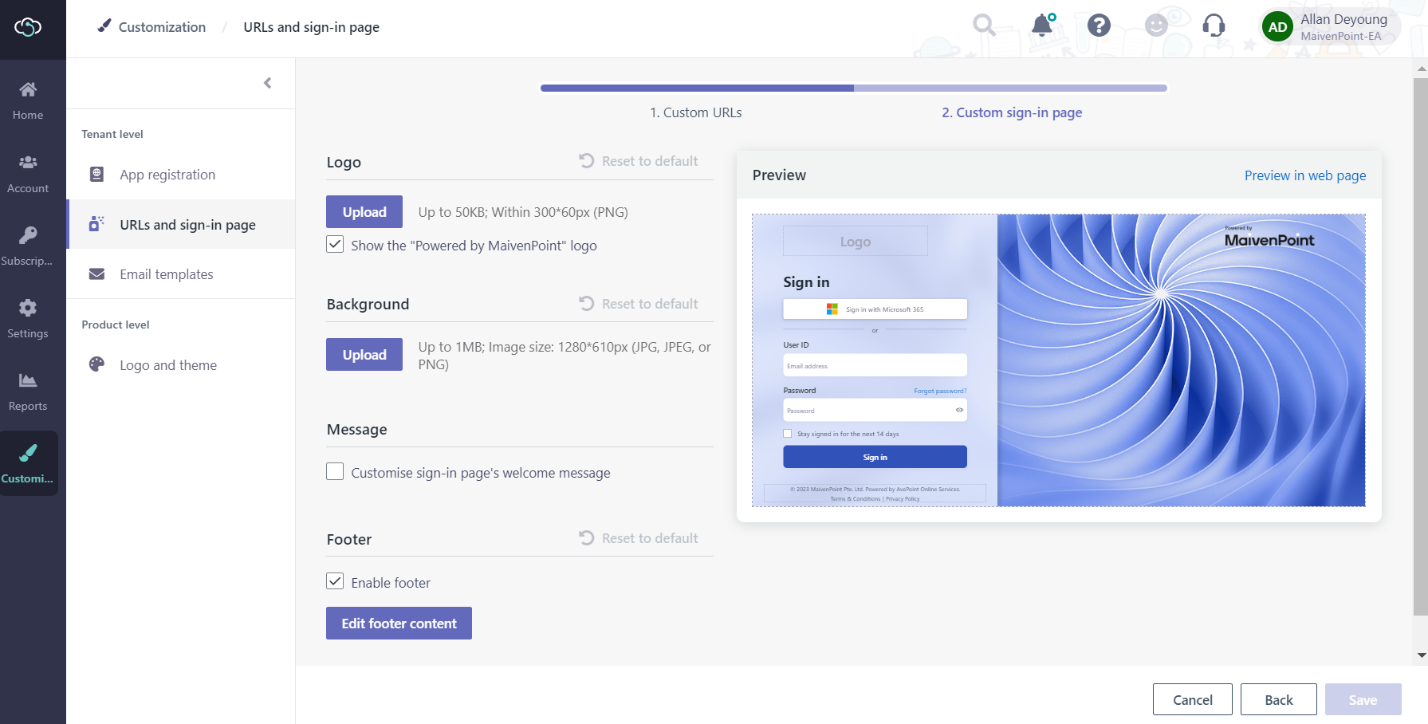
7. In the Custom sign-in page step, you can change the logo and the background image, choose to display a custom welcome message, or decide whether to display the footer or customise your footer content. For Vitae, you can also enable the role selection for the sign-in and configure the available sign-in methods for each portal.
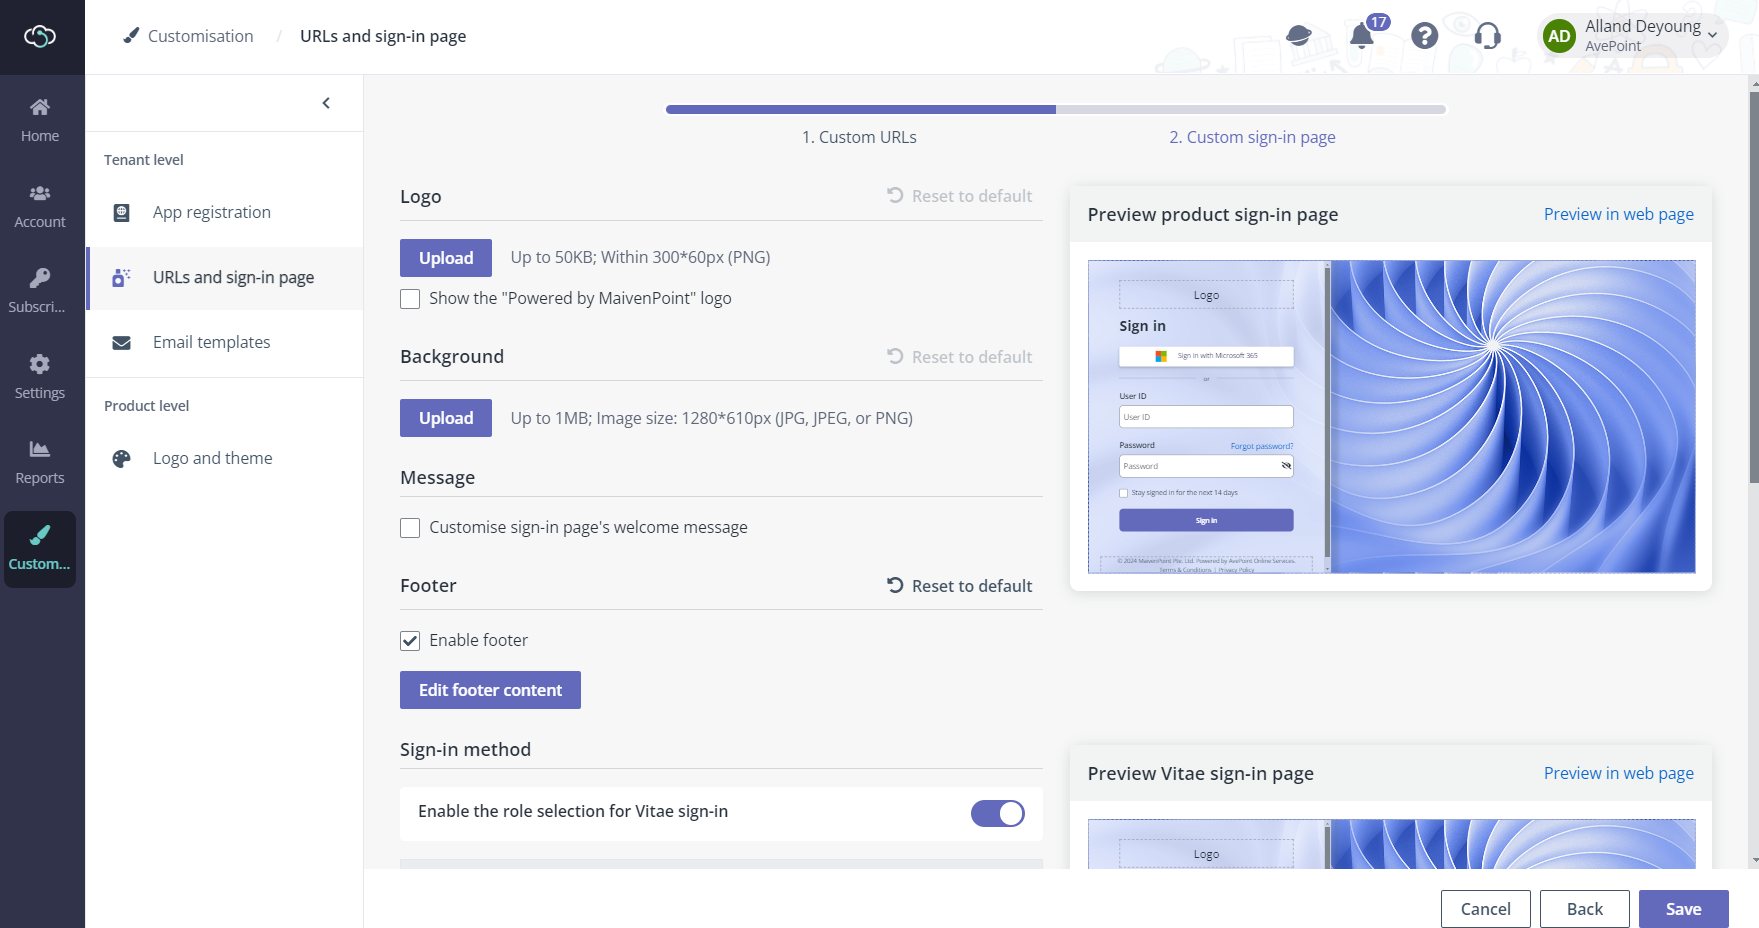
Customise the logo, background image, welcome message, or footer on the Sign-in page.
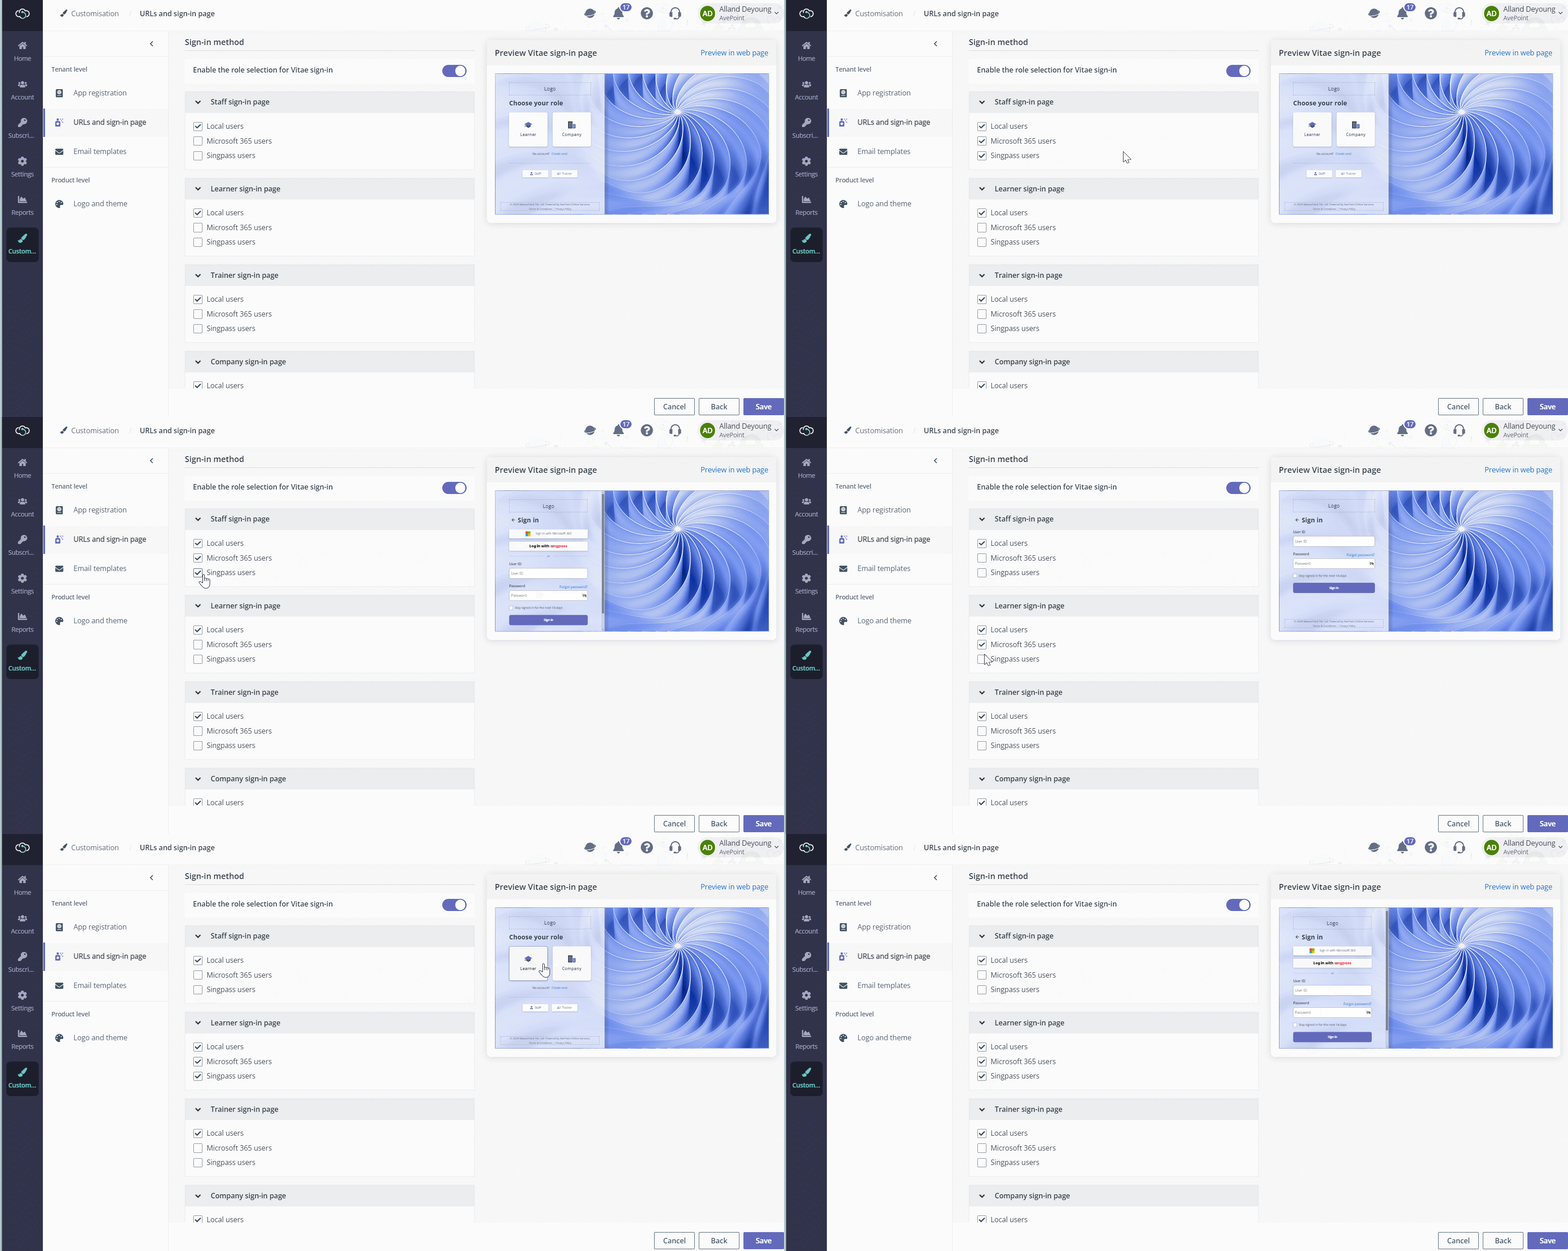
Enable the role selection for Vitae sign-in and customise their sign-in methods on each portal.
8. You can have a preview on the right for your changes or choose to preview in a web page.
9. Click Save to save your changes.