MaivenPoint provides a free storage to store your files uploaded or generated by the trial products. The storage will be deleted with your content when your trial expires.
If you have Enterprise or Enterprise pro subscription for MaivenPoint products, you can connect your own storage to store the generated or uploaded files. Currently, only the Microsoft Azure Blob storage type is supported. If you want to increase the space for your trial or update your subscription, contact MaivenPoint for assistance.
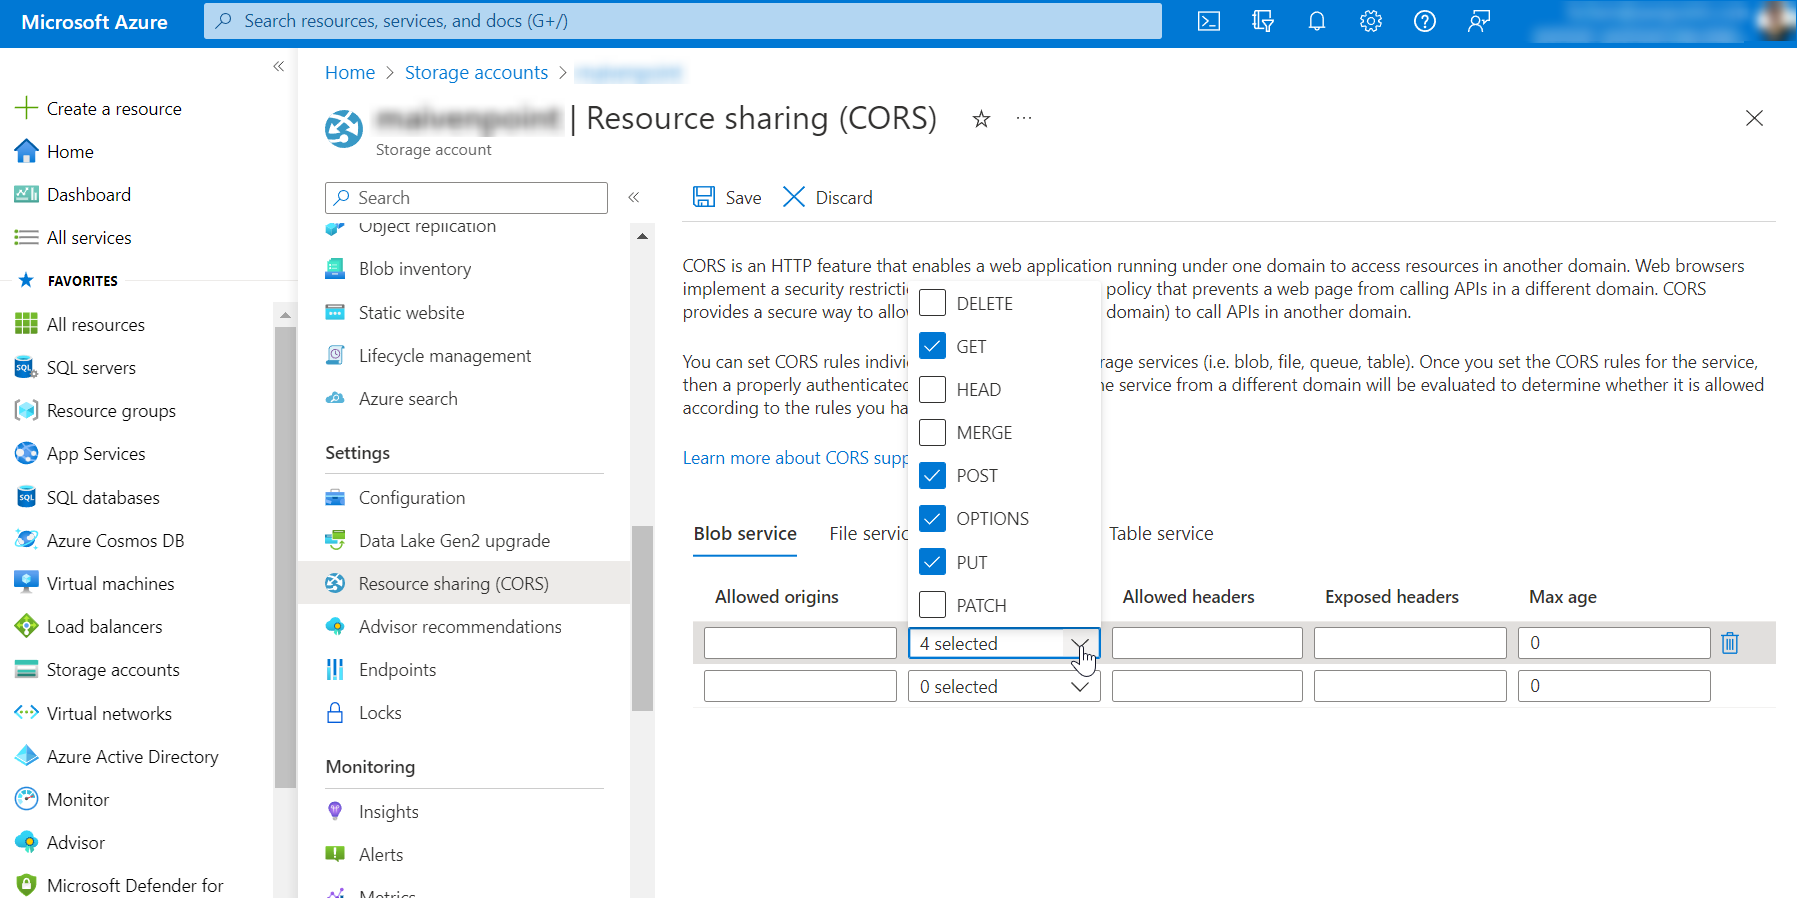
To store the MaivenPoint app data to your own storage, you must allow MaivenPoint to access your storage account. You can grant the required permissions to MaivenPoint apps through CORS as follows:
*Note: If you have completed full URL customization, you must also update the allowed origins for the CORS settings for your storage account.
1. Sign into your Azure portal and go to the storage account that you prepare to use.
2. In the storage account page, find the Settings section on the navigation panel and click Resource sharing (CORS).
3. Go to the Blob service tab.
4. In the Allowed origins box, enter the URL of the app whose data you want to store in the connected storage location.
5. Select GET, POST, OPTIONS, and PUT from the Allowed method list.

6. Enter * in the Allowed headers box.
7. Click Save on the task bar.
8. If you are using multiple MaivenPoint products and you plan to create storage connection for each of them, repeat the steps above to add a rule for each allowed origin.
Follow the steps below to add a storage connection:
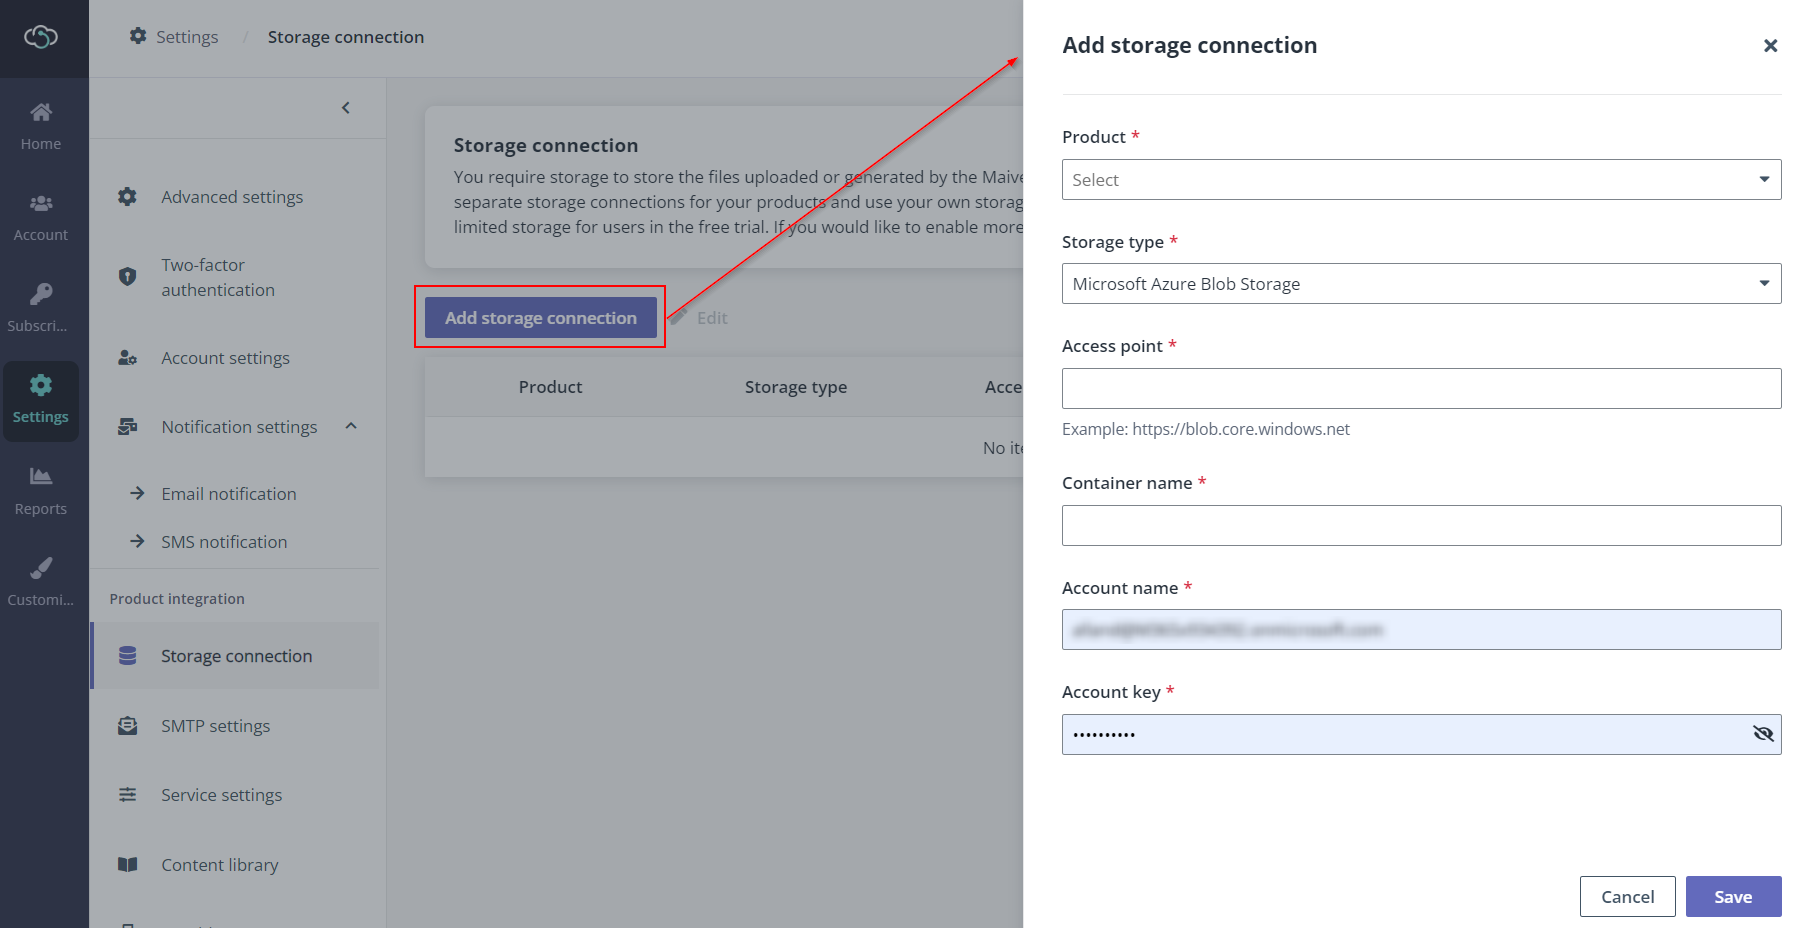
1. Navigate to Settings > Storage connection.
2. Click Add storage connection.

3. Select a product for this storage connection. The data of this product will be stored to your configured storage location.
4. Microsoft Azure Blob Storage as the only supported storage type is populated in the Storage type list.
5. Enter the access point to your storage account. For example, https://blob.core.windows.net.
6. Enter the storage container where you want to store the data.
7. Provide the account name and key to access the container.
8. Click Save to save this storage connection or click Cancel to exit the panel without saving.