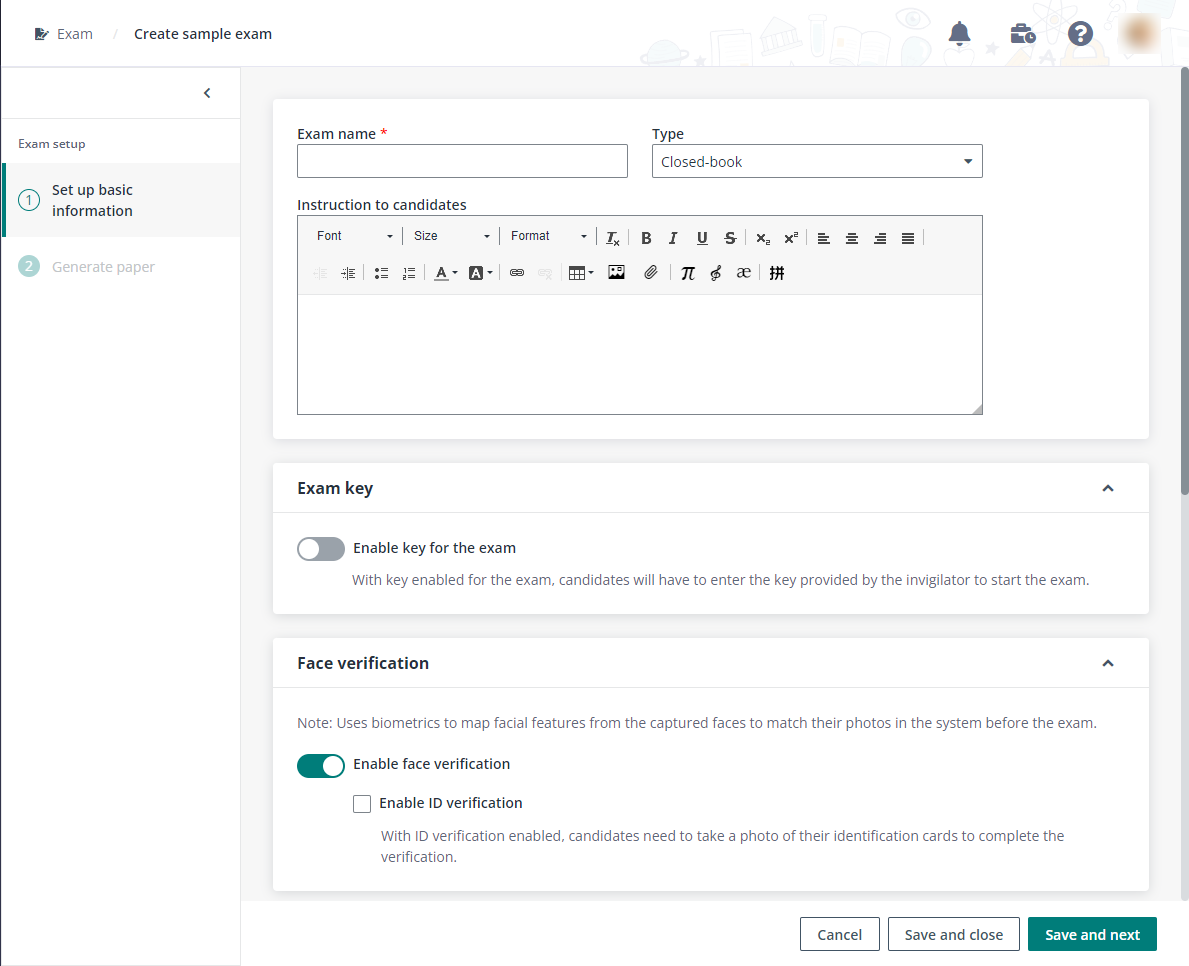
Derek, as a member of exam administrators, wants to set up a sample exam for candidates so that they can get familiar with the system in advance. He can follow the steps below:
1. Navigate to Exam > Sample exams in Examena.
2. He clicks Create sample exam to access the exam setup page.

3. Enter a name for the exam.
4. Select Open-book or Closed-book from the Type list.
5. Enter the instruction for candidates if needed.
6. Choose whether to enable a key for the exam.
7. Choose whether to enable face verification and/or ID verification to use biometrics to map facial features from the captured faces to match their photos in the system before the exam.
8. For the exam that is closed-book, Do not allow access to any applications is selected by default in the Authorised application section.
To allow candidates to access the authorised applications during the exam, select Allow access to specified applications. Click Add authorised applications under Windows and/or Mac separately, select the desired applications and click Add to add them as authorised applications.
To allow candidates to access all applications during the exam, select Allow access to all applications. Then, candidates are able to minimize the Examena app during the exam. Candidate can access all materials and applications on their computers, without a connection to the Internet.
9. For the exam that is closed-book, Do not allow access to the Internet is selected by default in the Authorised URL section. To allow candidates to access authorised URLs during the exam, select Allow access to specified URLs. Click Add authorised URL to add an authorised URL.
10. Configure the maximum upload size and file types that are allowed in file submission.
11. Click Save and next to access the Generate paper step. For detailed information, refer to Last thing, generate a paper for the exam.