Derek is the exam administrator of a higher education organisation. He is responsible for preparing courses for candidates. Let’s see how Derek will create courses and enrol candidates in Examena.
*Note: Before the course configuration, organisations and semesters can be set up based on requirements. Then, courses can be created for organisations and semesters accordingly. For details on the configuration, refer to Organisation configuration and Semester configuration.
1. Navigate to Admin > Course configuration in Examena.
2. Derek can create courses using one of the following methods in the Course configuration tab:
•Create a single course
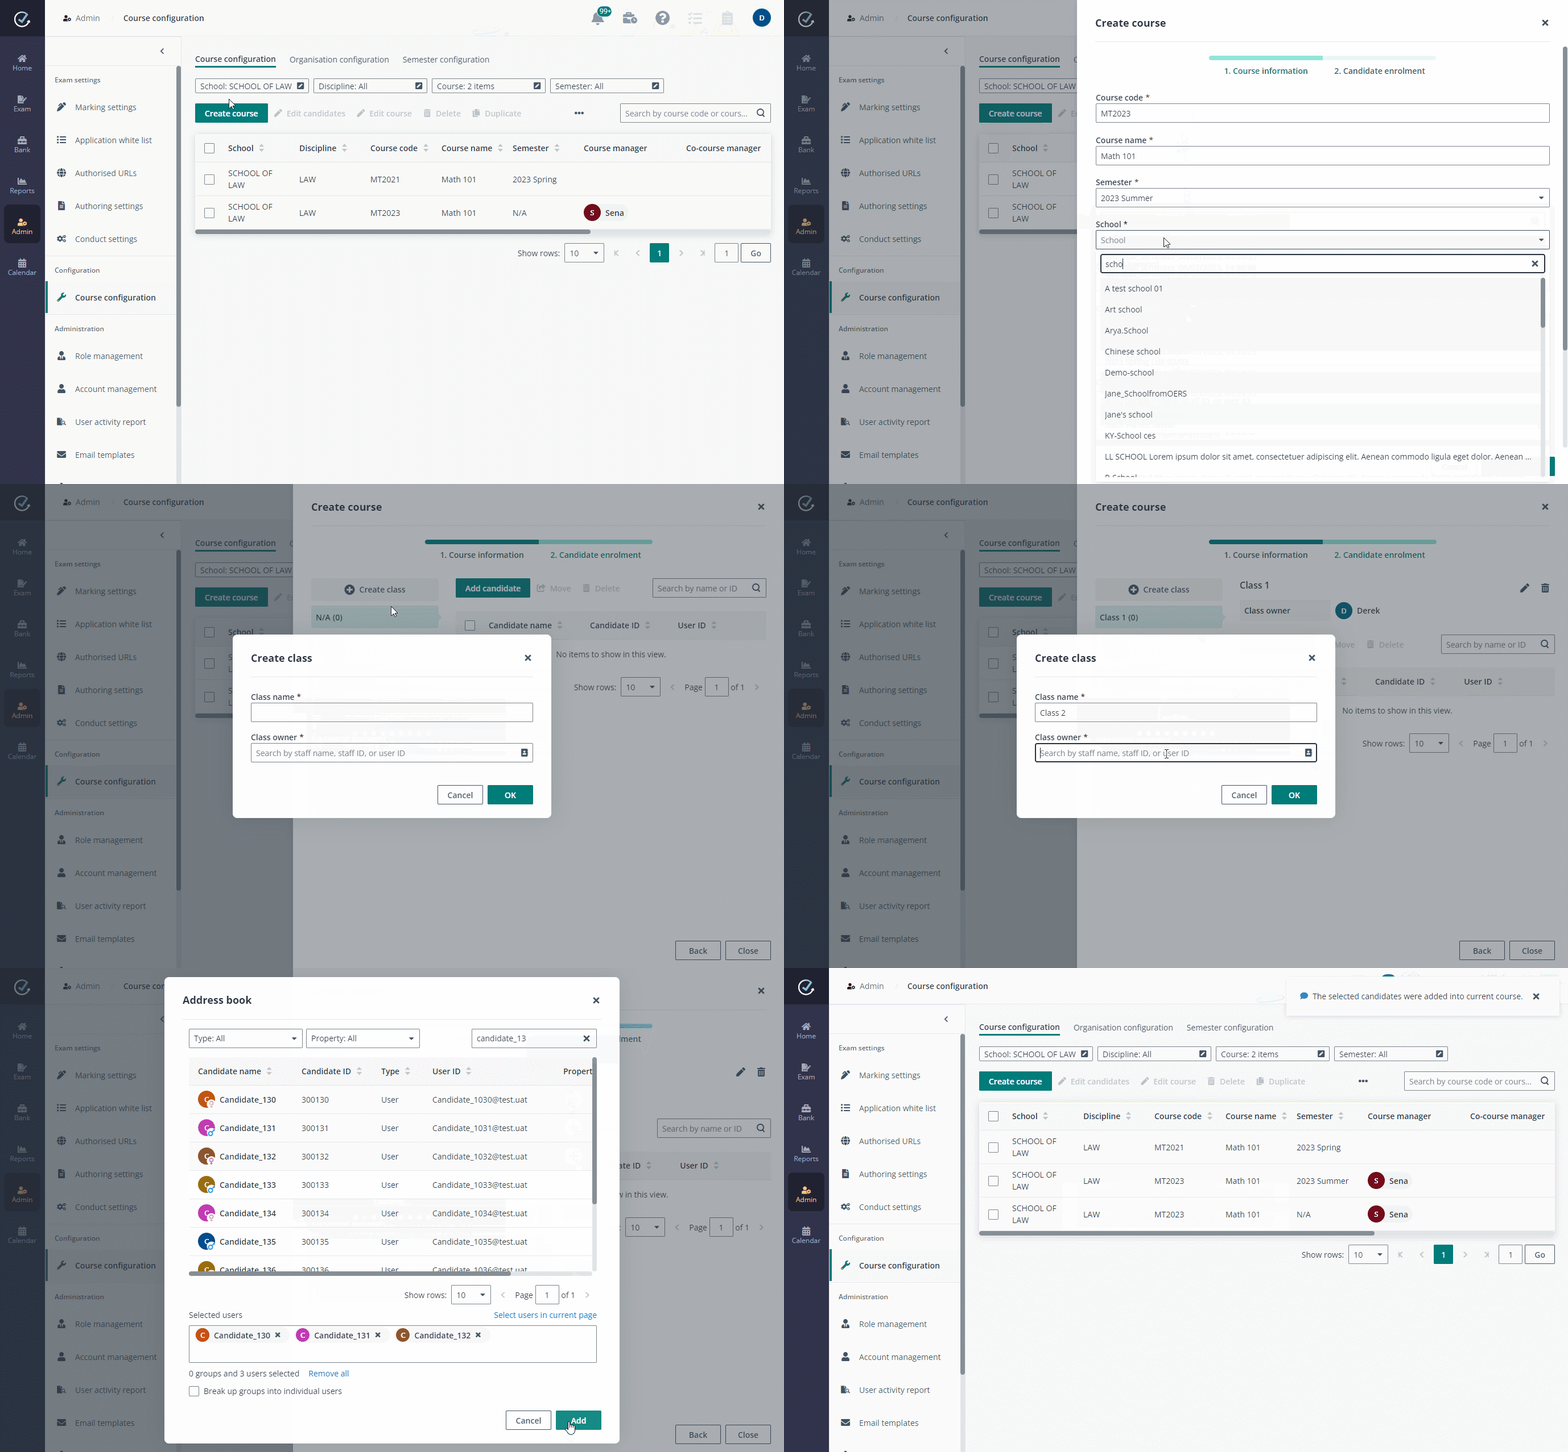
Click Create course above the course list. Complete the configurations for the course in the Course information step.

Click Save and next to create the course and enrol candidates for the course directly.
In the Candidate enrolment step, you can add users and groups from the system. You can also break up groups into individual users and enrol them as candidates to the course.
If the candidates come from multiple classes, you can create classes and assign candidates to their corresponding classes for management.
i. To create a class, click Create class, enter a class name and assign a class owner, and click OK.
ii. To add candidates to a class, click Add candidate. Select candidates from the address book or search for specific candidates, and click Add to add the selected users and/or groups to the class.
iii. To move candidates to another class, select the candidates and click Move. Select the class to move the selected candidates, and click Move.
•Create courses in bulk
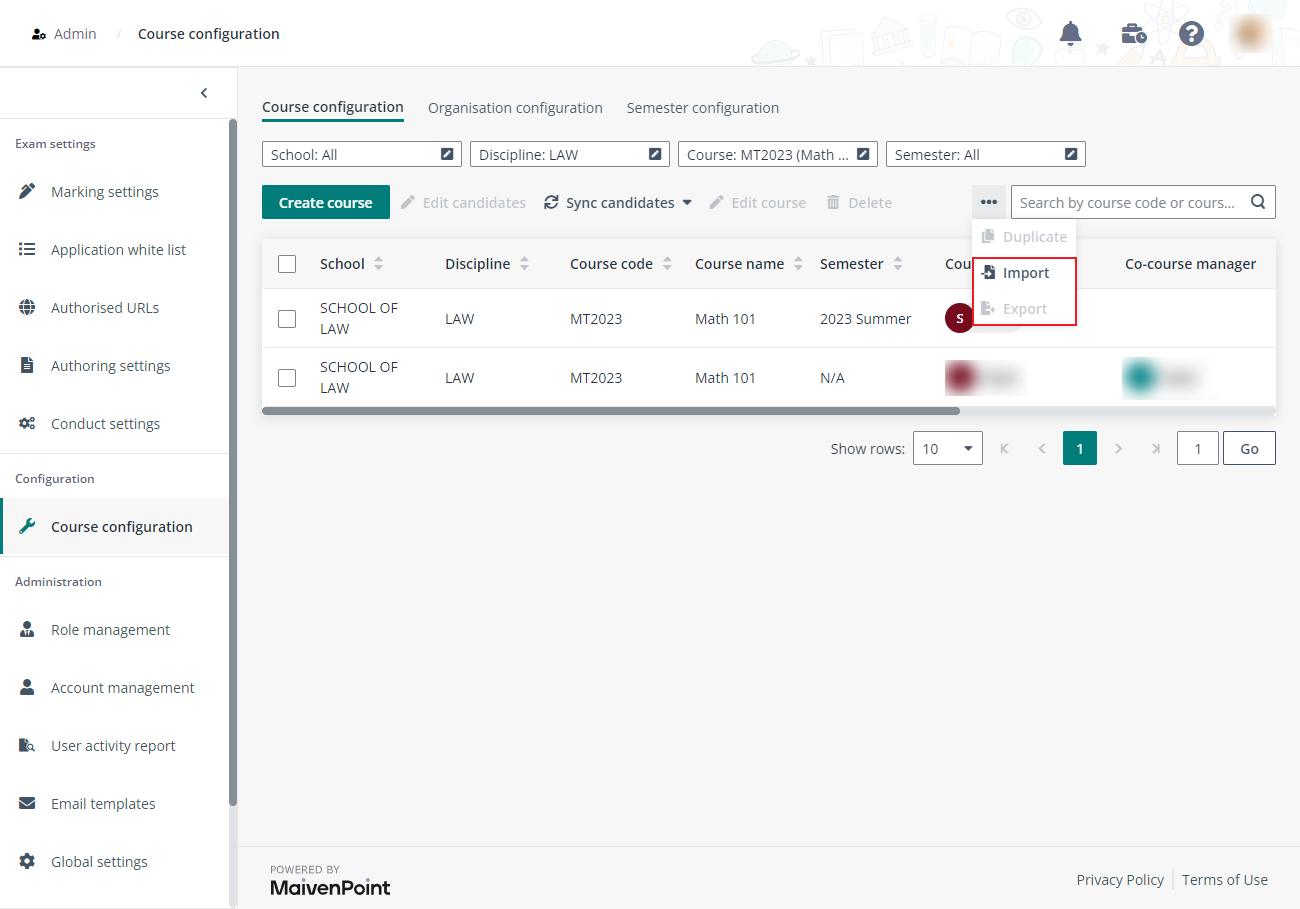
Select one or multiple courses, click Export to export the information of the selected courses to an Excel file. After courses have been configured in the file, click Import to create courses based on the configurations in the file.

3. Derek can synchronise all candidates of a course to the exams of the course anytime before the exam end time or deadline has reached by selecting the exam, clicking Sync candidates, and selecting Sync candidates of selected courses. Derek can also select Sync candidates of all courses to sync candidates of all courses to the exams.
To create courses for organisations with nested structure, Derek can switch to the Organisation configuration tab and follow the steps below:
1. Click Organisation structure, and the Organisation structure window appears.
2. Click Add level and enter a label for the first level organisation.
3. Repeat the step above to add multiple levels. At most 5 levels can be added to define the organisation structure.
4. Click Save as draft to save the organisation structure.
5. When the organisation structure is ready, click Publish to publish the organisation structure. Organisations can now be created based on the organisation structure.
*Note: Published organisation structure cannot be edited anymore.
6. Click Create top-level organisation, enter a name for the organisation and assign a user as the administrator, and click Save to create the top-level organisation.
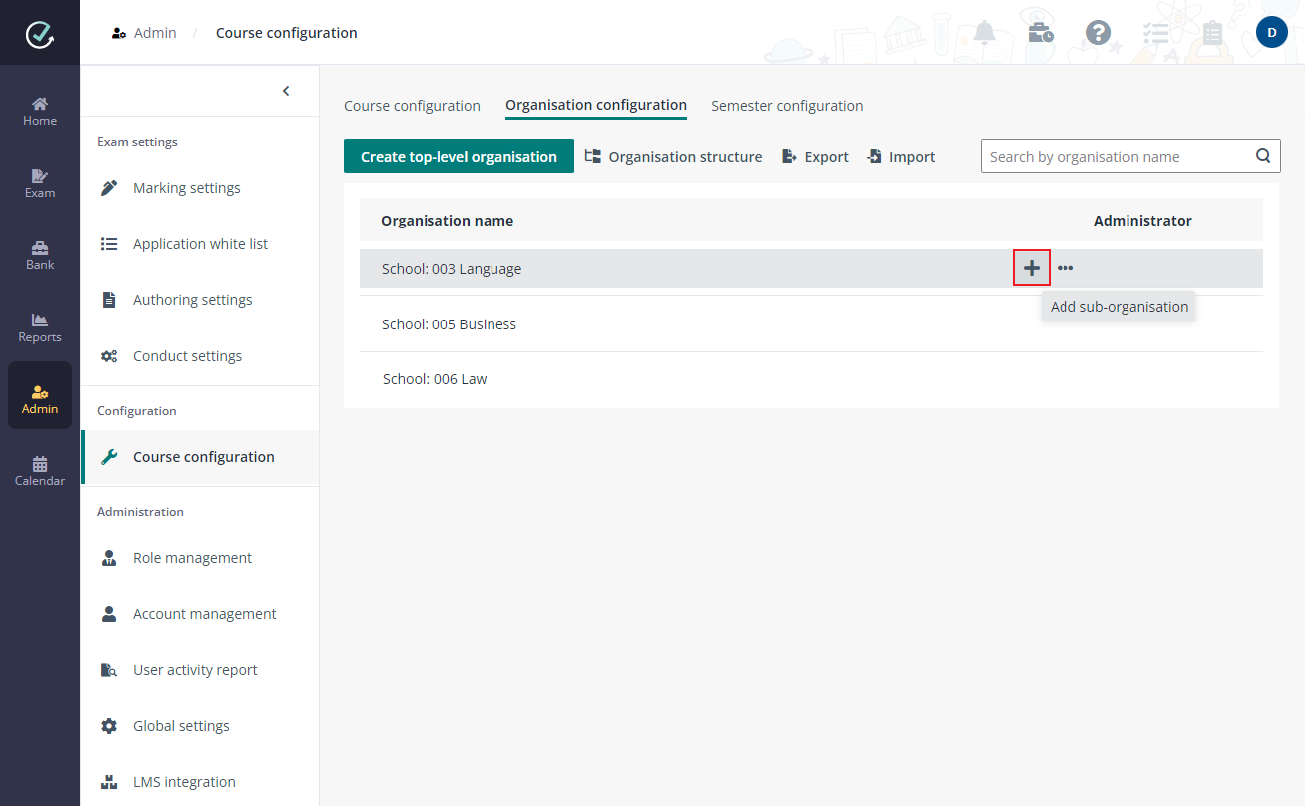
7. Hover your mouse over a top-level organisation, click the Add sub-organisation button to add a sub-organisation for the top-level organisation.

8. Derek can repeat the step above to add multiple organisations at different levels. With organisations configured, courses can be created for organisations. Derek can also edit existing courses to configure organisation settings.
If the academic year is divided into semesters, you can switch to the Semester configuration tab and follow the steps below to create semesters. Then, courses can be created for semesters and duplicated across semesters.
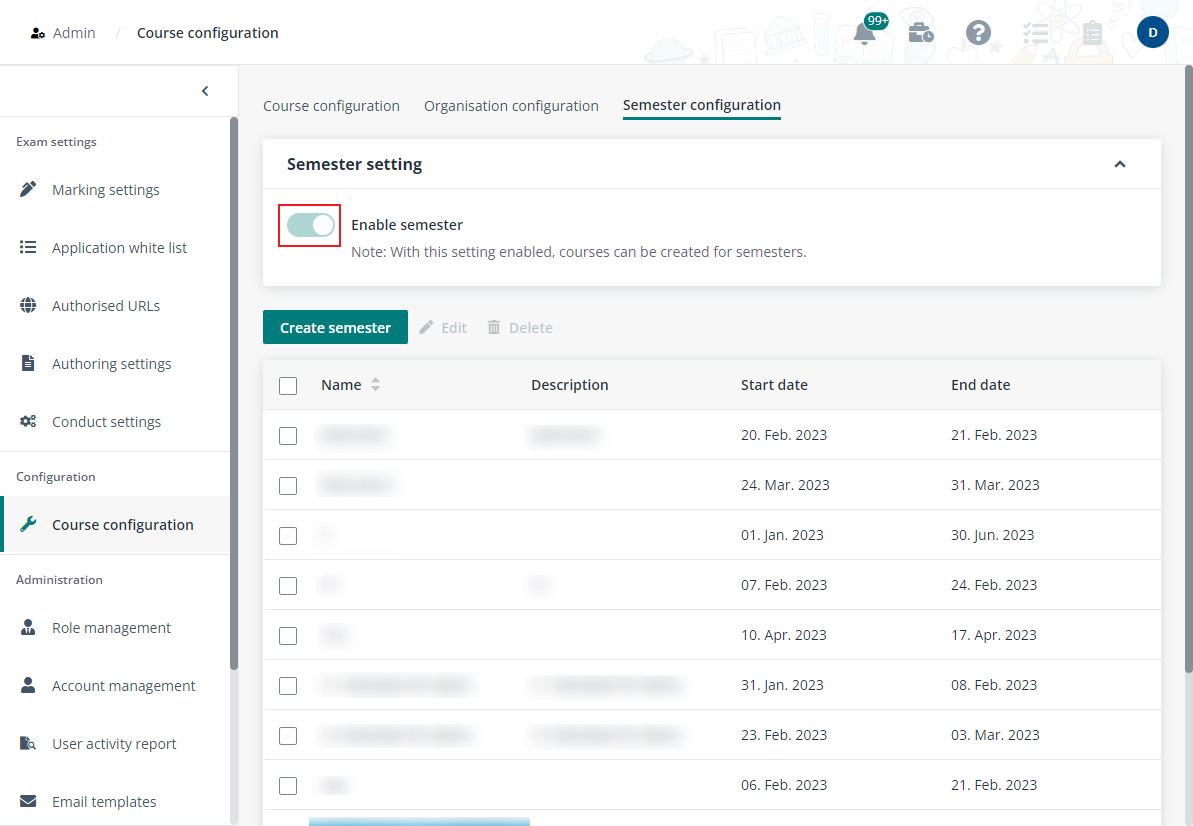
1. Click the toggle button to enable the semester setting.

2. Click Create semester, and the Create semester window appears.
3. Enter a name and an optional description for the semester.
4. Select a start date and end date for the semester.
5. Click Save to save the semester.