Create scheduled jobs
For jobs that sync information from and to the other
platforms, scheduled jobs can be created according to the requirements.
Refer to the following sections on the details of scheduled
job management.
Create a scheduled job
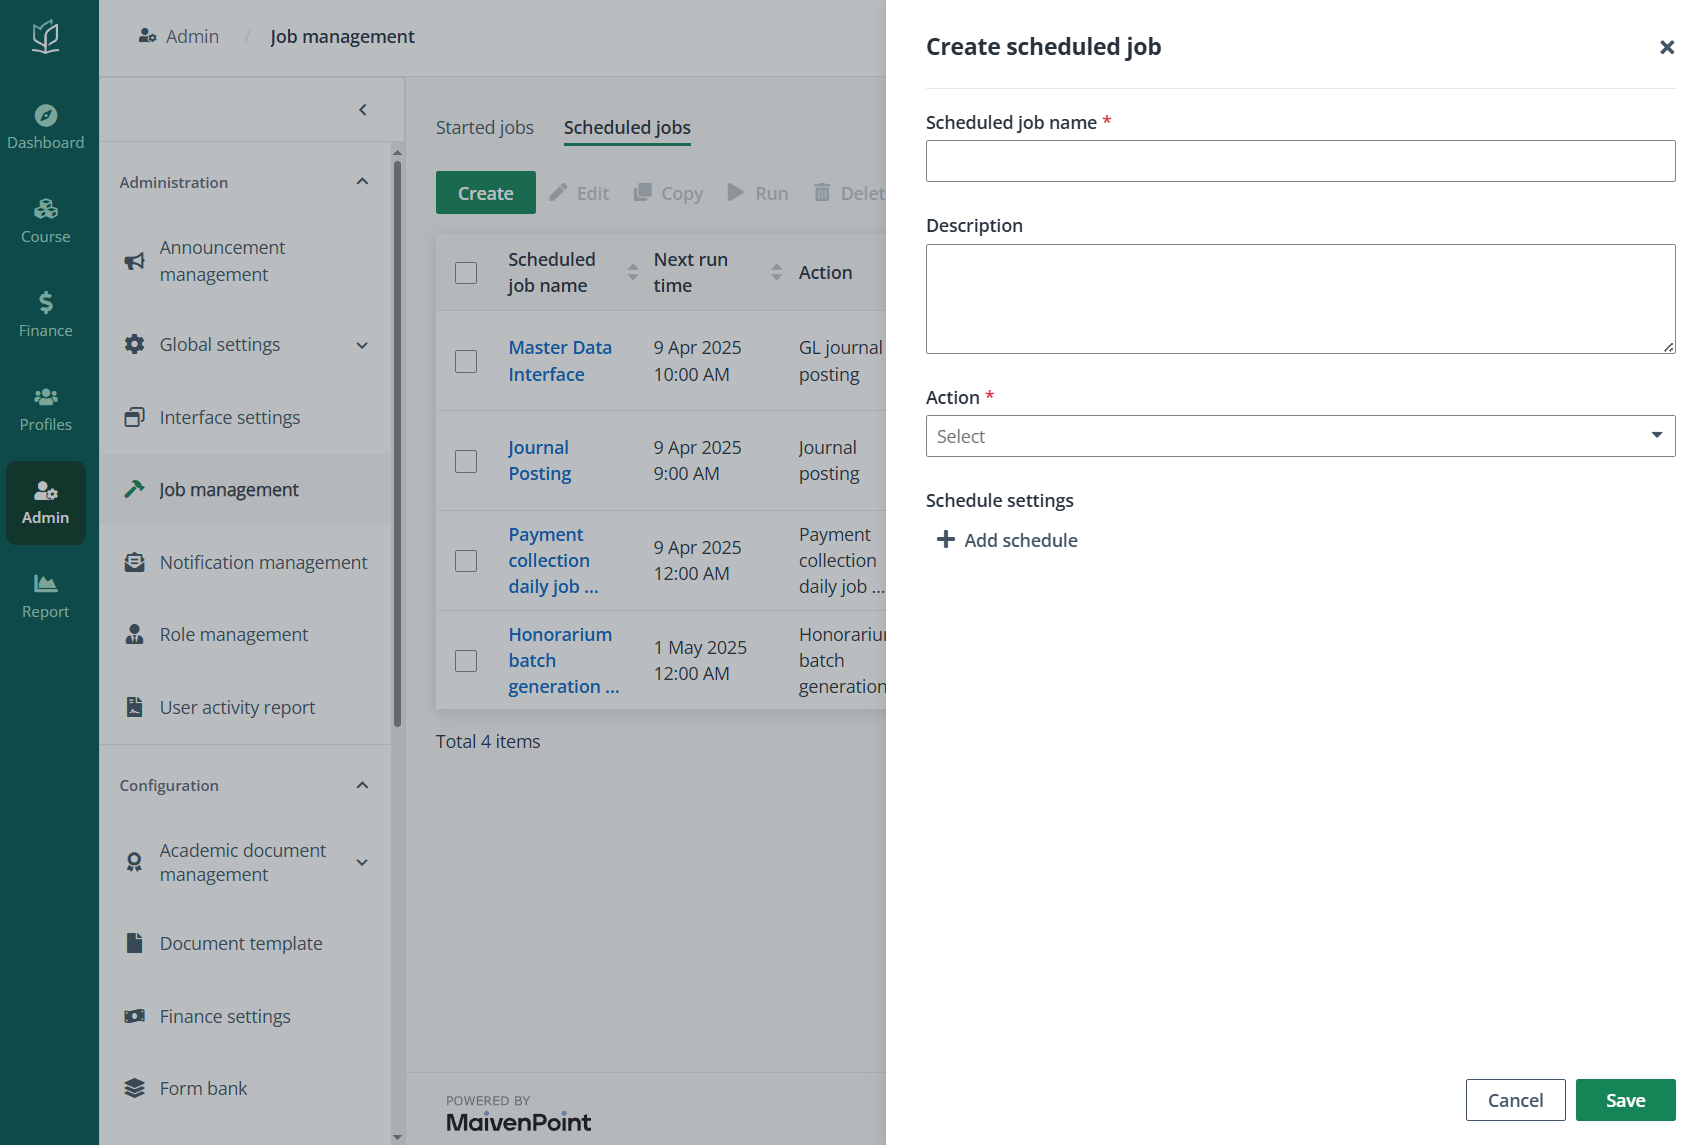
To create a scheduled job, complete the following steps:
1. In the
Scheduled jobs tab, click Create.
2. In the Create
scheduled job panel, enter the basic information of the job, select the
action in the job and click Add schedule to continue configuring the
time-related settings of the job.

3. Click
Save.
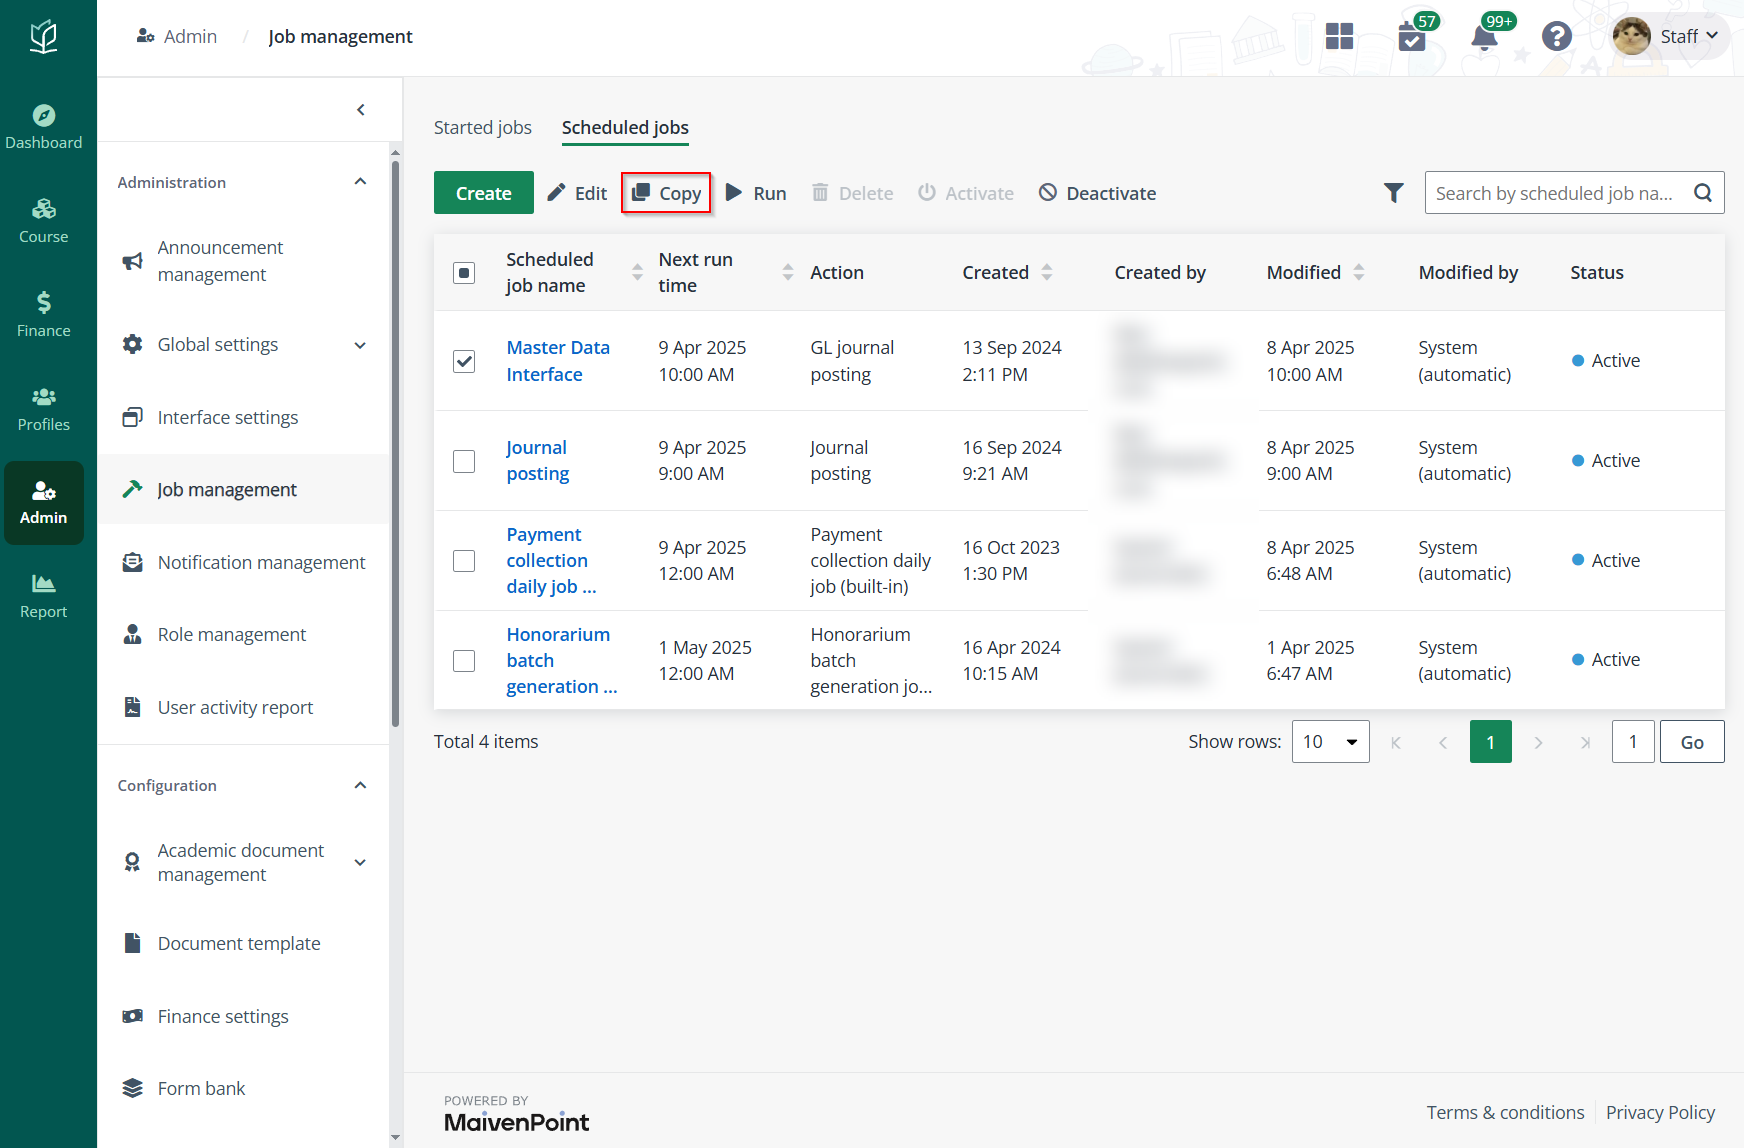
Copy an existing job
To create another job with the exact same settings, select
the job and click Copy.

After a scheduled job is created and to run the job in
advance, select the job and click Run.
*Note: The system Payment collection daily job
(built-in) is a daily job with only one schedule available. It cannot be run
by manually clicking the button. To manage the running schedule, select it and
click Edit to adjust its start time.

