As the course manager of the Language Studies course, let’s
see how to use Examena to set up
a proficiency oral exam for
the course.
You will need
to do the
following in order.
First,
set up the
exam basic information
1. In Examena, click
Create exam in the quick tutorial for Examena and select Create oral
exam.
2. Enter a name for
the exam and select the Language Studies course.
3. Select an exam
open time and exam deadline from the calendar. After the exam is opened,
candidates can start the exam at any time before the exam deadline.
4. Enter the
instruction for candidates if needed.
5. Click Save and
next to go to the next step.
Then,
assign invigilators
1. Choose whether to
allow invigilators to open the exam for candidates to retake the oral exam by
configuring the proctoring setting.
2. All candidates of
the course will be enrolled in the exam by default. You can remove candidates
from the exam by selecting the candidates and clicking Remove candidate.
3. The course
manager is the default invigilator. You can assign other invigilators to assist
you in the invigilation.
a. Select one or multiple candidates,
click Assign invigilator and select Assign invigilator for selected
candidates to assign invigilator for the selected candidates. To assign
invigilator for all candidates, click Assign invigilator and select
Assign invigilator for all.
b. Enter the staff name, staff ID, or
User ID in the text box and select the desired staff from the suggestion
list.
c. Click Save to add the
staff as invigilator.
4. If the candidates
of the course come from different classes, you can click Assign
invigilator and select Assign invigilator for classes.
Select the classes for which you want to change
invigilator, and click Change invigilator.
5. If teams are
needed to classify candidates, you can click Manage teams. After clicking
Create team, enter a team name and click Save to create a
team.
6. Select the
candidates that you want to assign to the team, and click Assign team.
Select the team and click OK to assign the candidates to the team.
7. Click Assign
invigilator and select Assign invigilators for teams to display teams
with assigned invigilators.
Select one or multiple teams and click Change
invigilator to change the invigilator assignment for the teams.
8. You can select
candidates and click Edit exam time to edit the exam time for all
candidates, only the selected candidates, classes, or teams based on the
requirements.
In the Edit exam time window, select an exam start
time and end time, enter your comment, and click Save.
9. Click Save and
next to go to the next step.
Last thing, generate a paper for the exam
You can generate a
paper for the
exam using one
of the following methods:
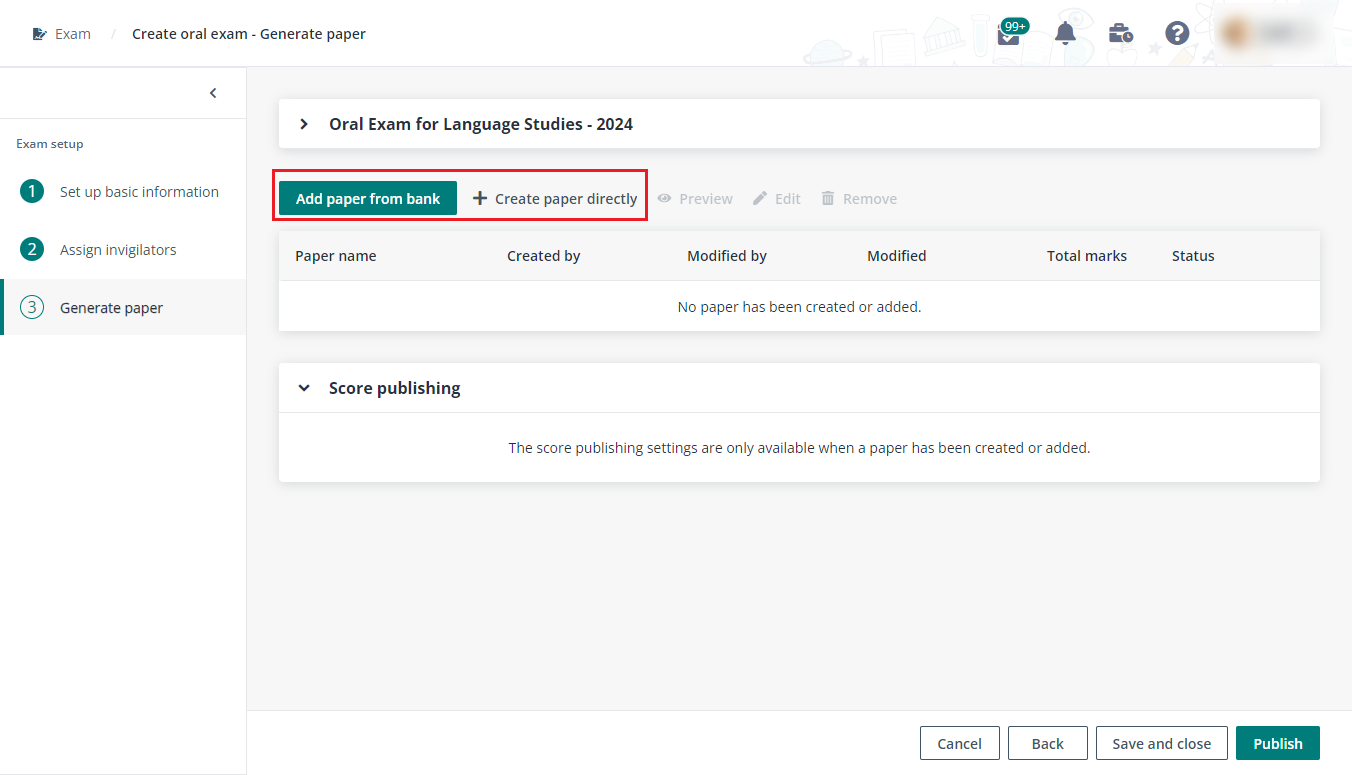
• Add
paper from bank
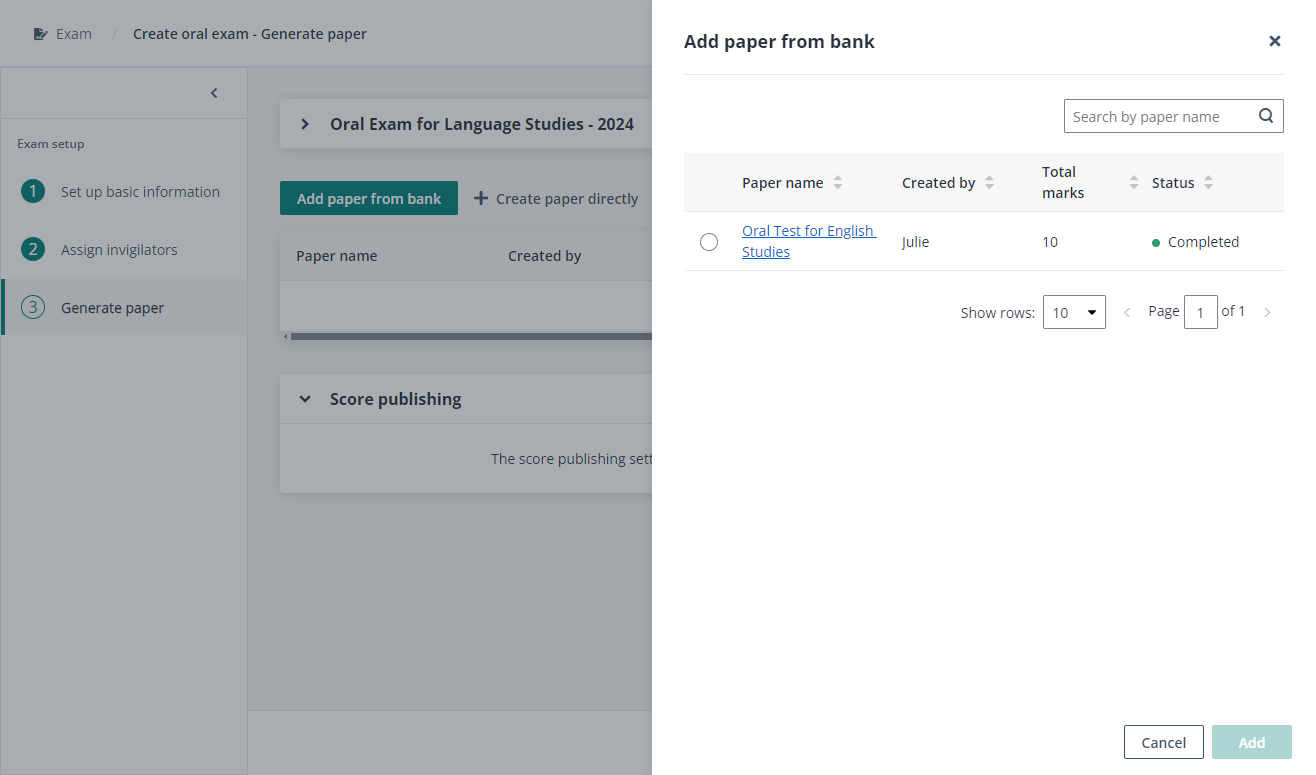
Click Add paper from
bank, select an existing paper from the paper bank, and click Add to
add the paper to the exam.
• Create
paper directly
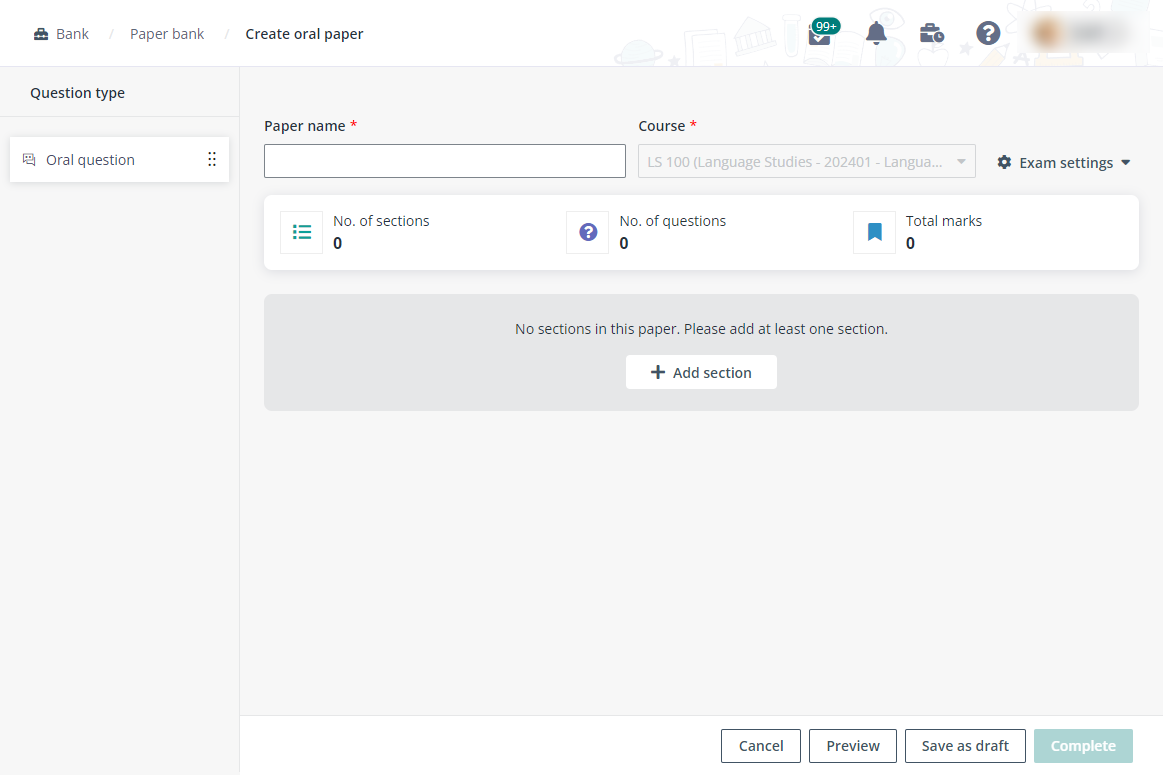
Click Create paper
directly to create a new paper for the exam. Enter a name for the paper and
configure oral questions. When you finish the paper configuration, click
Complete to make the paper Completed. For detailed information on
how to create questions, refer to How to create a question?.
After generating a paper for the exam, click Preview
to preview the paper in marker view.
You can configure publish settings after a paper has been
configured by clicking the Edit button in the Score publishing section.
In the Edit publish settings window, complete the following settings and
click Save to save the publish settings for the exam.
•
Click the toggle button under Score to grade mapping to
enable score to grade mapping for this exam.
If there is a default mapping template configured by the
administrator, the score to grade mapping will be enabled automatically for this
exam.
o Configure the score to grade
mapping directly. Enter a number in Score from and a grade to define a
mapping, and click Add mapping to add more mappings.
o When the default mapping
template is automatically applied for the exam, you can adjust the grade mapping
based on the default template, and click Save to save changes to the
grade mapping for the exam.
o You can also click Change
grade mapping template, select a template from the drop-down list, and click
Apply to apply the selected mapping template to the exam. You can further
edit the grade mapping to meet your requirement for the exam, and click
Save to save changes.
•
Select Scores, Percentage scores, or Grades
to be published to candidates.
•
Select Yes or No in the Display exam results to
candidates field to decide whether to display scores, percentage scores, or
grades based on the setting above to candidates.
•
Select Yes or No in the Display rubric details to
candidates field to decide whether to display rubric details to candidates
together with exam results.
Click Publish to publish the exam. Published
exams can be unpublished at any time before the exam starts. Candidates can view
the exam time and instructions of published exams in the Examena web portal.
To create a similar exam for the same course or reuse these
exam settings, you can duplicate this exam from the Exam page. You will
be brought to the Edit oral exam - Set up basic information page
with the same exam settings duplicated. Then, you can edit the exam as
required.


