Let’s see how to manage and public scores for Math 101 mid-term exam via Examena.
You can follow the steps below:
1. After you or the assigned markers complete the marking for all questions, you can sign into MaivenPoint Online Services and go to Examena to manage and publish scores for the exam candidates.
2. On the Exam page, you can search for the exam or use the Status filter to find the exams for marking. You can also select the Only show exams from my courses to quickly view exams from the courses in which you are the course manager or co-course manager.
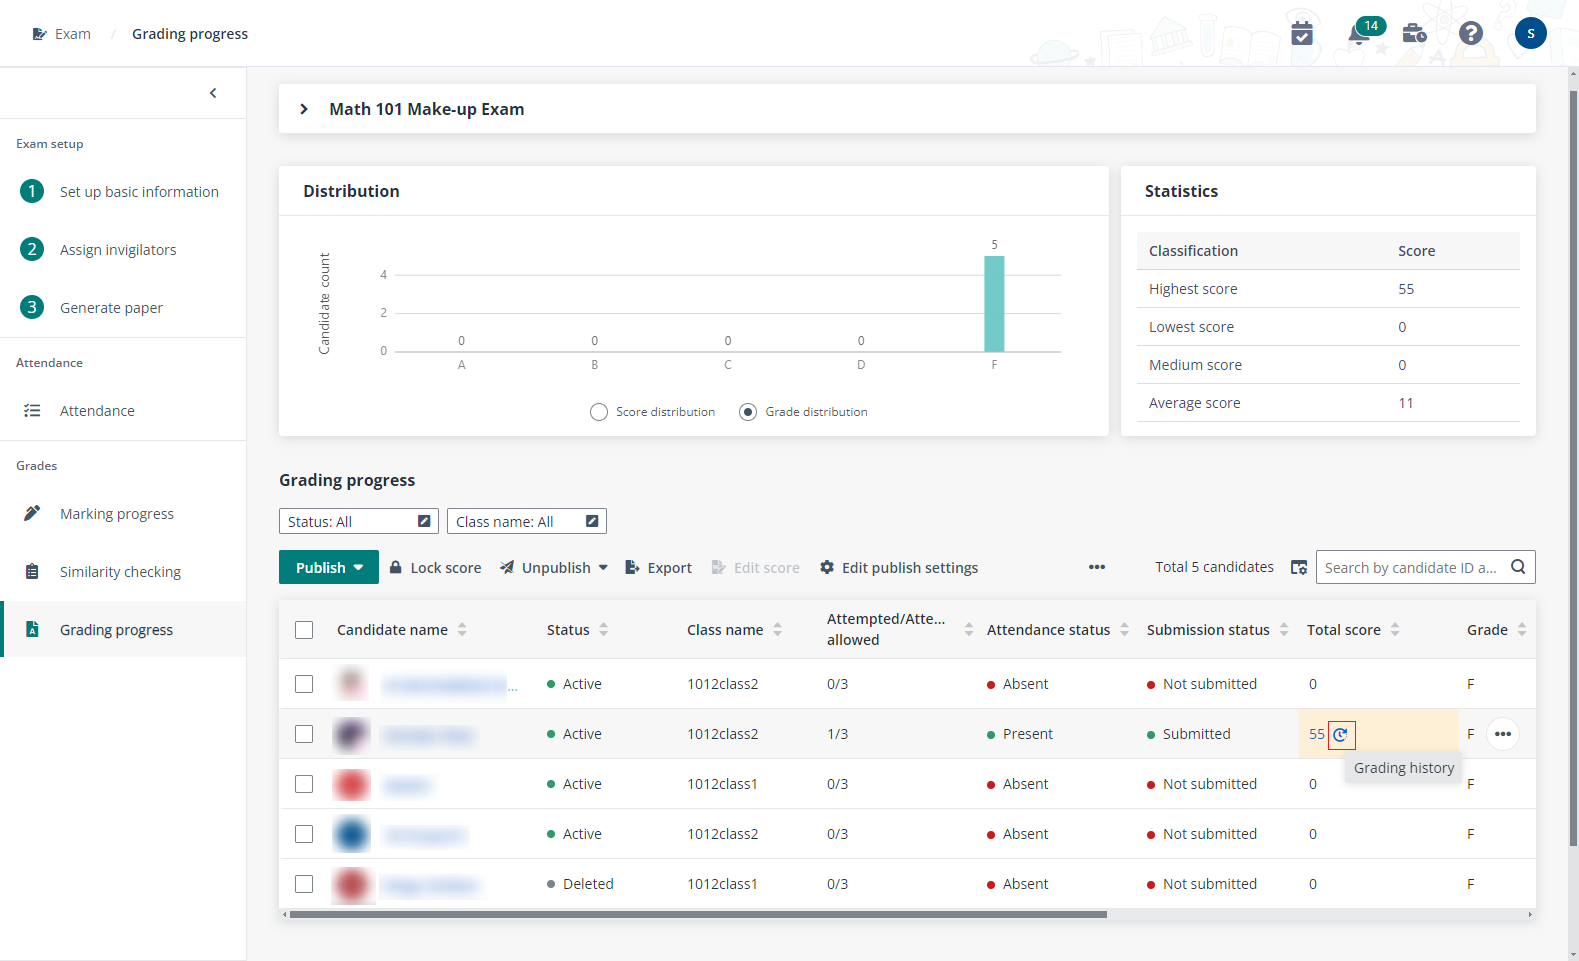
3. Click Grading progress to enter the page to get an overview on score distribution and view the total score of each candidate, along with their attendance status and submission status.

4. By default, the All columns view is selected with all columns displayed in the table. To only show specific columns in desired order, you can create your customised views by clicking the view name and clicking Manage views in the drop-down list.
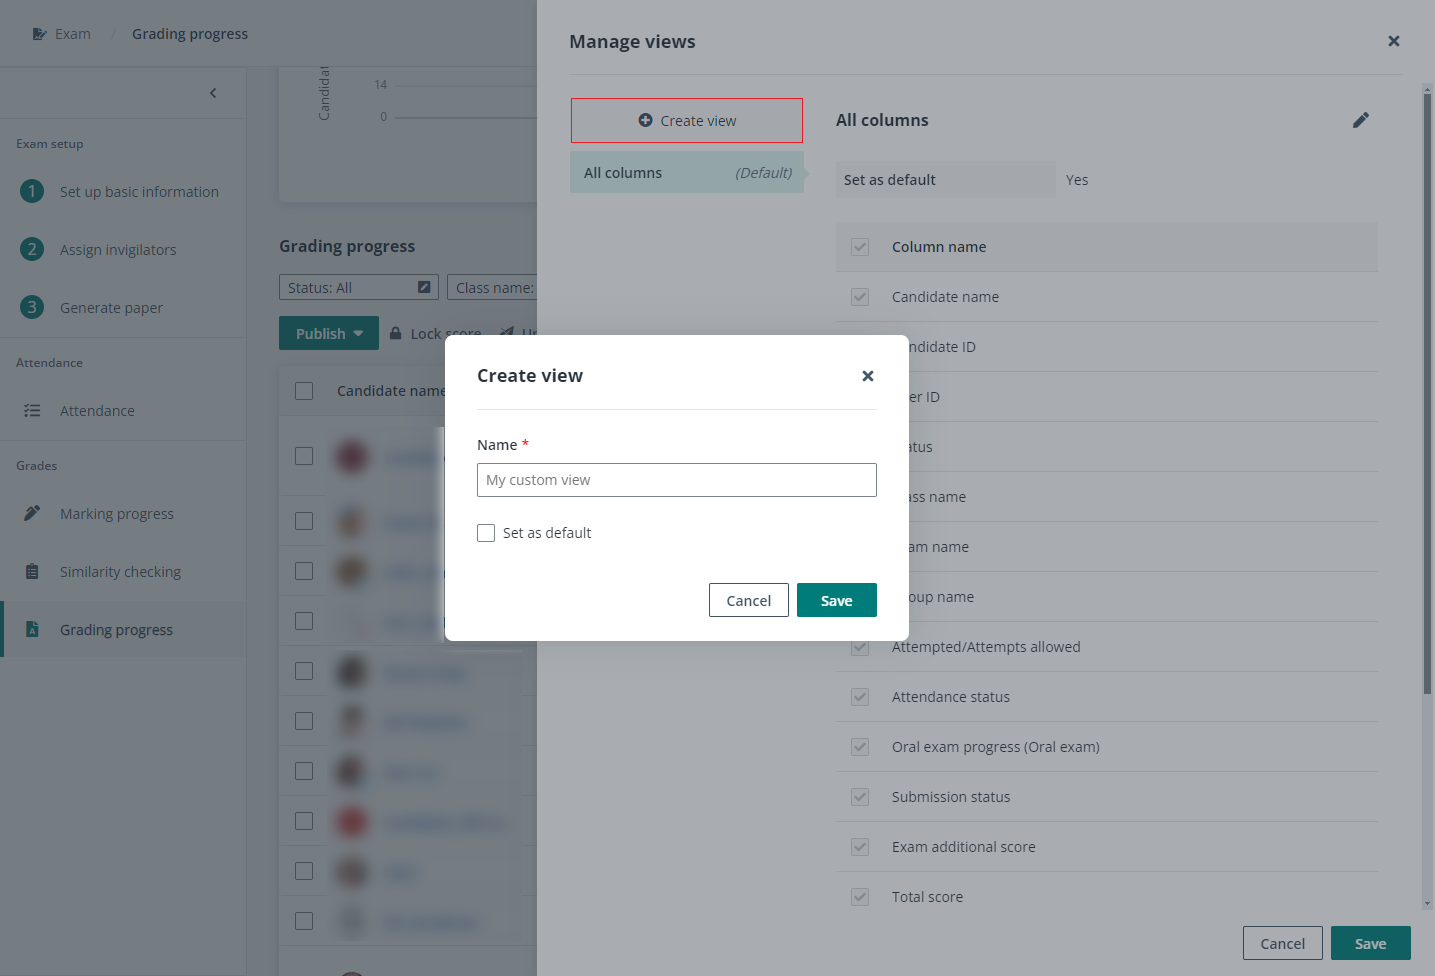
Complete the following steps to create a new view in the Manage views panel.
a. Click Create view on the left pane.
b. Enter a name for the custom view, choose whether to set it as the default view, and click Save. The default view will be automatically selected when you enter the Grading progress page.
c. On the right pane, select the columns that you want to display in the table and arrange them in desired order.
d. Click Save to save the view settings.
5. After the marking completes, you or the assigned checker can edit score manually for specific candidates by selecting the candidates and clicking Edit score. Enter the new score as the Submitted score, add your comment and select for whom the comment is added, click Save to save the new score.
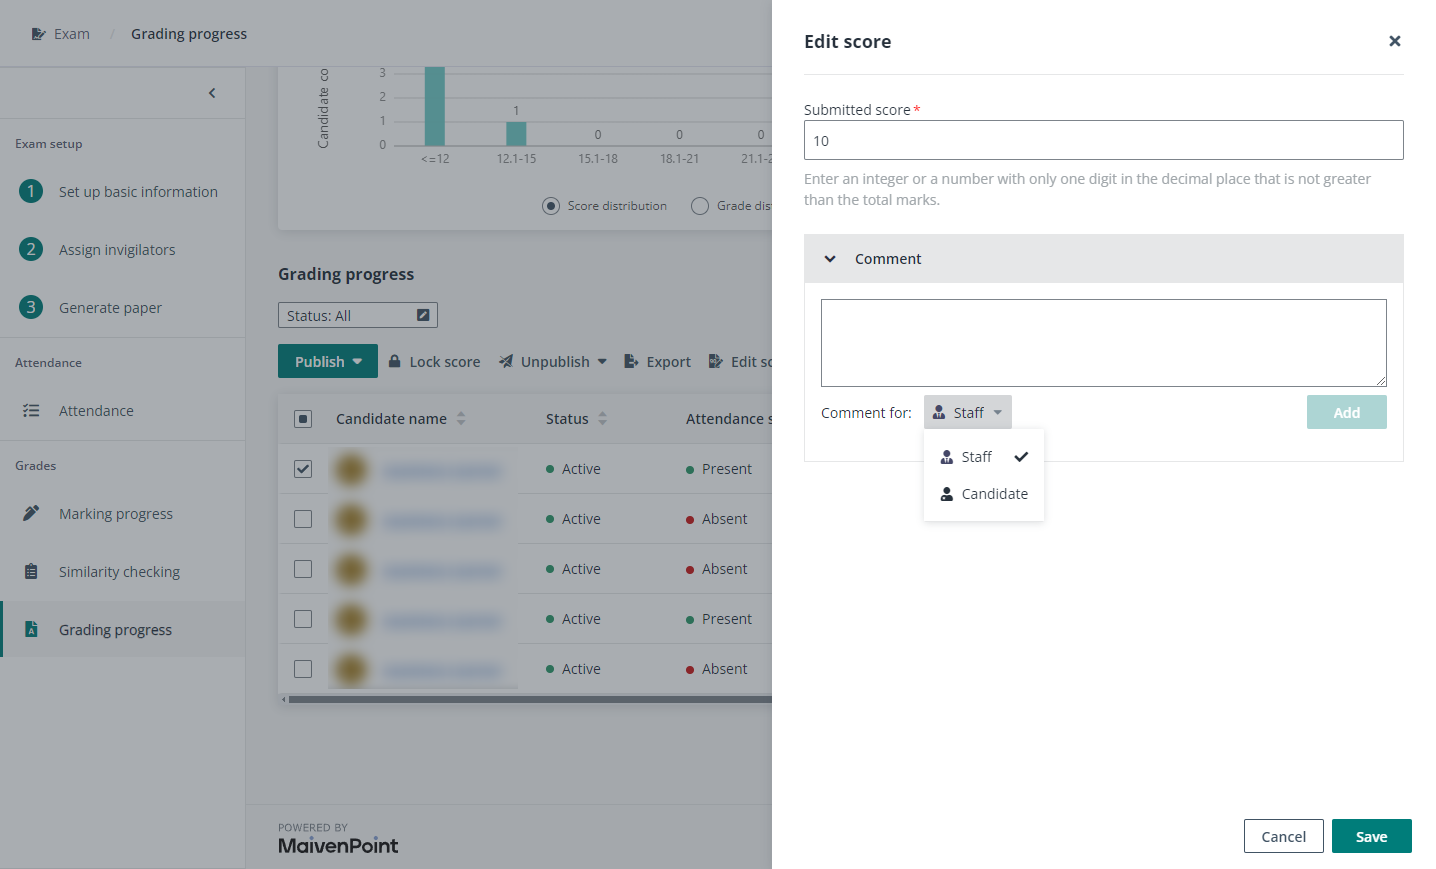
The score edits and added comments can be viewed by clicking the Grading history button to the right of the submitted score.
For the comments added for the candidate, you can click View details in the Exam results column to access the Candidate response page and have a preview of the comment to be displayed for the candidate.
6. You can click Sync score to reports to sync the total scores of the submitted candidates to reports without having to lock the scores. When the synchronisation completes, the statistics reports of the candidate responses can be viewed in Reports separately.
7. To prevent candidate scores from being edited, you or the assigned checker can click Lock score. The candidate scores cannot be edited and will be available in both the candidate statistics report and question statistics report. If candidate scores need to be edited later, you or the assigned checker can click Unlock score.
8. You can edit the publish settings by clicking Edit publish settings.
•The automatically publish results to candidates setting is displayed for your information.
•Click the toggle button under Score to grade mapping to enable or disable the score to grade mapping for this exam. With score to grade mapping enabled, you can edit the grade mapping for the exam as follows:
o Configure the score to grade mapping directly. Enter a number in Score from and a grade to define a mapping, and click Add mapping to add more mappings.
o When the default mapping template is automatically applied for the exam, you can adjust the grade mapping based on the default template, and click Save to save changes to the grade mapping for the exam.
o You can also click Change grade mapping template, select a template from the drop-down list, and click Apply to apply the selected mapping template to the exam. Then, you can edit the grade mapping to meet your requirement for the exam, and click Save to save changes.
•Select Scores, Percentage scores, or Grades to be published to candidates.
•Select Yes or No in the Display response details to candidates field to decide whether to display response details to candidates together with the exam results.
•Select Yes or No in the Display correct answers to candidates field to decide whether to display correct answers to candidates together with the response details.
•Select Yes or No in the Display rubric details to candidates field to decide whether to display rubric details, which includes the rubric matrix, marking range and description of each criterion, to candidates together with the response details.
9. You can generate PDF for candidates to view candidate responses in PDF files.

10. You can publish the exam results to candidates and export the exam results to an Excel file.

11. For the exam that is created in the LMS platform, you can push the scores to the LMS.
