Examena leverages authorised URLs configuration to allow candidates to access authorised URLs during closed-book exams.
Derek, an exam administrator, prepares some commonly used websites and wants to configure them as authorised URLs in Examena, so that these authorised URLs can be added directly during exam setup. He can follow the steps below:
1. Navigate to Admin > Authorised URLs in Examena.
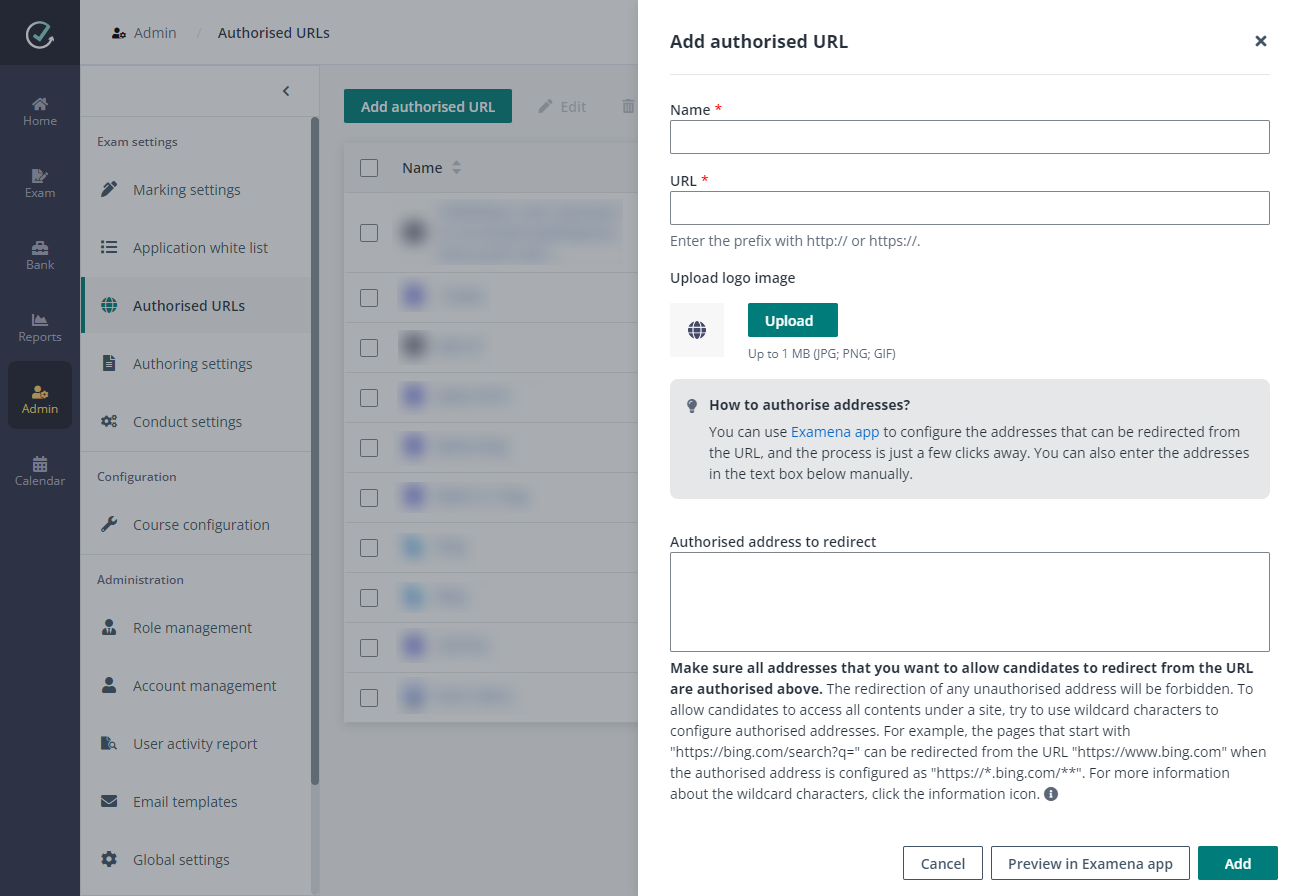
2. Derek clicks Add authorised URL and the Add authorised URL window appears.

a. Enter the name for the authorised URL, which will be visible for candidates during the exam.
b. Enter the URL that will be accessible for candidates during the exam.
c. The logo image of the authorised URL will be automatically retrieved. To upload a custom image for the URL, click Upload.
d. Use one of the following methods to configure the addresses that can be redirected from the URL:
o Click the Examena app link in the How to authorise addresses? message to access Examena app. Authorise the addresses that you want to allow candidates to be redirected from the URL via Examena app.
o Enter the URLs of the addresses that can be redirected from the URL in the text box. Wildcard characters are supported here.
*Note: If the website needs login or authorisation and will redirect to another address, make sure the address to be redirected is added here. For example, enter https://login.microsoftonline.com/** for Microsoft Office Home.
3. To have a preview of the authorised URL and addresses to redirect, Derek clicks Preview in Examena app.
4. When the authorised URL and authorised address to redirect are ready, Derek clicks Add to add the authorised URL.