Curricula allows programme admins to create the following
types of courses in Curricula:
•
Blended course
•
Self-paced course
To create and manage courses in Curricula, refer to the
following sections.
Create blended courses
To create a blended course, compete the following steps:
1. In Curricula,
click Admin on the left navigation pane, and then clicks Course
configuration.
2. In the Blended
courses tab, click Create course and then select Create
course.
3. Upload the course
image and fill in the course information.

Note the following:
•
Depending on the requirement of classes, you can decide whether to open
classes within this course.
• Each
course belongs to a programme. You can select a previously configured programme.
To add a new programme, navigate to Programme configurations to create a
new one.
•
Depending on the course type, the course may require a venue. If a venue
is required, you can navigate to Venue management to create a venue.
•
Depending on the requirement of your organisation, the course may require
compulsory or optional course tags. You can select course tags from the
drop-down list in the Course tags field. The course tags will be
displayed on the Course details page after course upon course creation.
4. Click Save and
release to save the course and release the course to the course manager.
Click Save to release the course later.
Create self-paced courses
1. In Curricula,
click Admin on the left navigation pane, and then click Course
configuration.
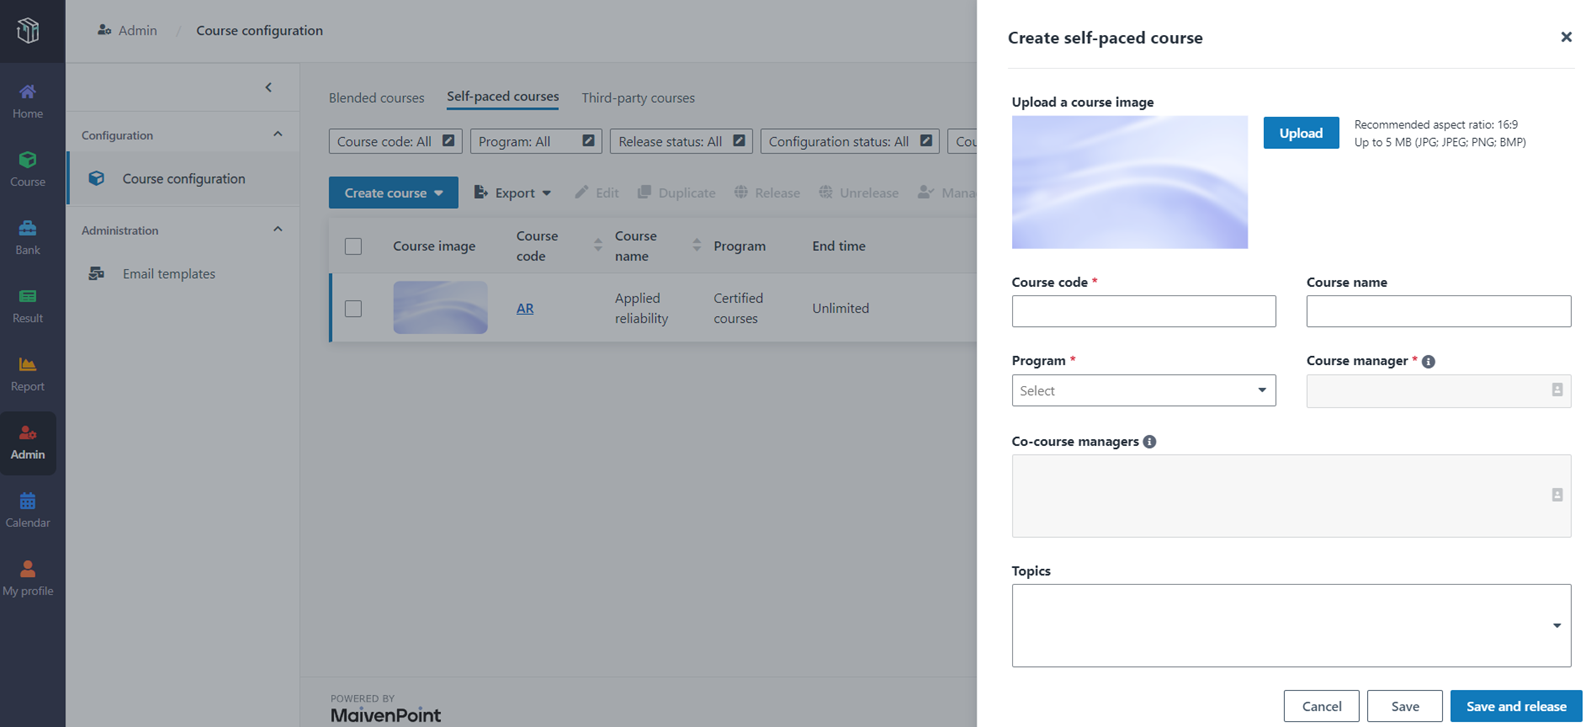
2. Click the
Self-paced courses tab, click Create course, and then select
Create course.
3. Upload the course
image and fill in the course information.

Note the following:
• Each
course belongs to a programme. You can select a previously configured programme.
To add a new programme, navigate to Programme configurations to create a
new one.
•
Depending on the requirement of your organisation, the course may require
compulsory or optional course tags. You can select course tags from the
drop-down list in the Course tags field. The course tags will be
displayed on the Course details page after course upon course creation.
4. Clicks Save
and release to save the course and release the course to the course manager.
Click Save to release the course later.
Create self-paced courses using AI
Curricula supports using AI to
streamline the course creation process by drafting course outline and course
content from an entered description or an uploaded file within
minutes. Let’s see how to generate courses using
AI.
1. In
Curricula, click Admin on the left navigation pane, and then click
Course configuration.
2. Navigate to the
Self-paced courses tab, click Create course, and then select
Generate AI course.
3. Upload a file as the content reference and
give the estimated course duration. After clicking Next, the course basic
information is generated promptly.
4. Preview the generated course basic information,
including the course code & course name, description, and aims and objects.
Click the Edit button to update the course name.
5. Then, click Next to generate the
course outline and content groups. By default, each content group contains one
quiz with five questions and one piece of reference material. Click the Advanced
settings button to adjust the number of questions in some
quizzes.
6. Finally, click Generate AI course to generate
the course.
7. After reviewing the course content and
finding it satisfactory, click Save to save and release the course. Note
that at this time, learning objects in the course have not been published
yet.
8. Navigate
back to the Course configuration tab, select this course, and then click
Configure to configure the course certificate and other
settings.
Enrol learners to courses
Let’s see how to enrol learners to a blended course with
classes in it:
1. Select the course
and click the Configure button.
2. In the step of
class management, select a class and then click Enrol learners.
3. Click Enrol
learners and then click Add learner.
4. In the Address
book window, select users or Microsoft Entra groups.
5. When finishing
the learner enrolment, click Add to add learners to the course.
6. Selects the
learners that you want to add to the class, and then click Save.
Let’s see how to enrol learners to a blended course without
classes or to a self-paced course:
1. Select the course
and click the Configure button.
2. In the step of
learner enrolment, click Enrol learners.
3. In the Address
book window, select users or Microsoft Entra groups.
4. When finishing
the learner enrolment, click Add.
*Note: When a Microsoft Entra group is enrolled to a
course, all existing group members and newly added group members will be
enrolled to the course. Once the course is overdue, Curricula for Corporate
Learning will stop syncing Microsoft Entra group members to that course, so that
users newly added to the Microsoft Entra group will not be enrolled to the
overdue course. If the end time of the course is extended later, Curricula for
Corporate Learning will sync the user updates during the time period.
What if the programme admin wants to reuse an
existing course?
The organisation provides recurrence courses for different
batch of learners. They want to reuse the content of an existing course, so they
don’t need to repeat the configurations of classes, sessions, learning paths,
etc.
Now let’s see how to duplicate a course in Curricula.
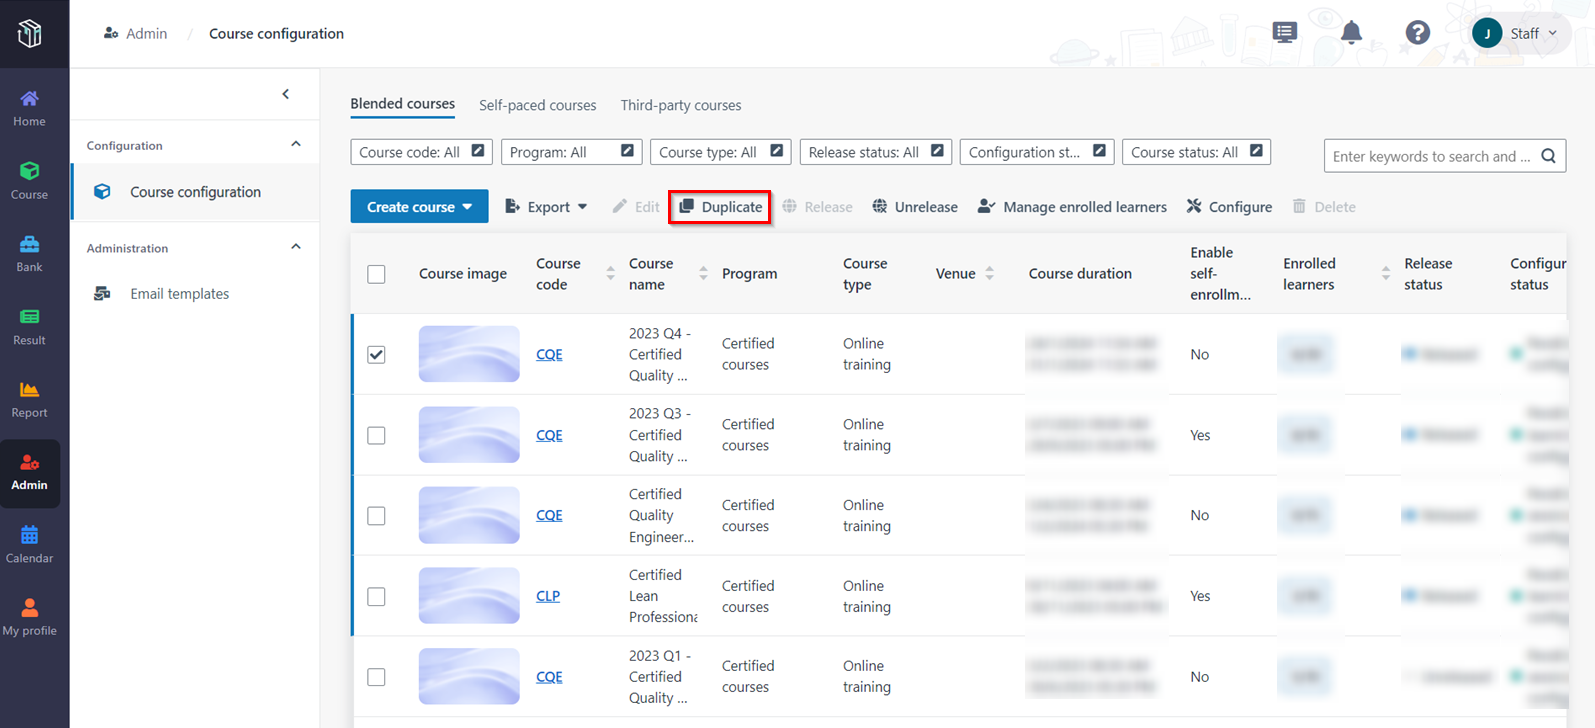
1. Selects a course
and click Duplicate.

2. In the
Duplicate course panel, you can see that the new course will use the same
course code and the suffix - Copy is added to the course name. The course
name can be modified.
3. For a blended
course, you need to select the start time and end time for the course. For a
self-paced course, you can select the end time.
4. Click Save and
edit it now to procced to edit the course information.


